


16
Installing the Mini-Touch Panel
Black/White LCD Mini-Touch Panels
GND - (BLK)
2
1
PWR + (RED)
AXM (GRN)
AXP (WHT)
3
4
PWR + (RED)
Control system
1
2
3
4
1 - GND - (BLK)
3 - AXP (WHT)
2 - AXM (GRN)
4 - PWR + (RED)
GND - (BLK)
12 VDC power supply
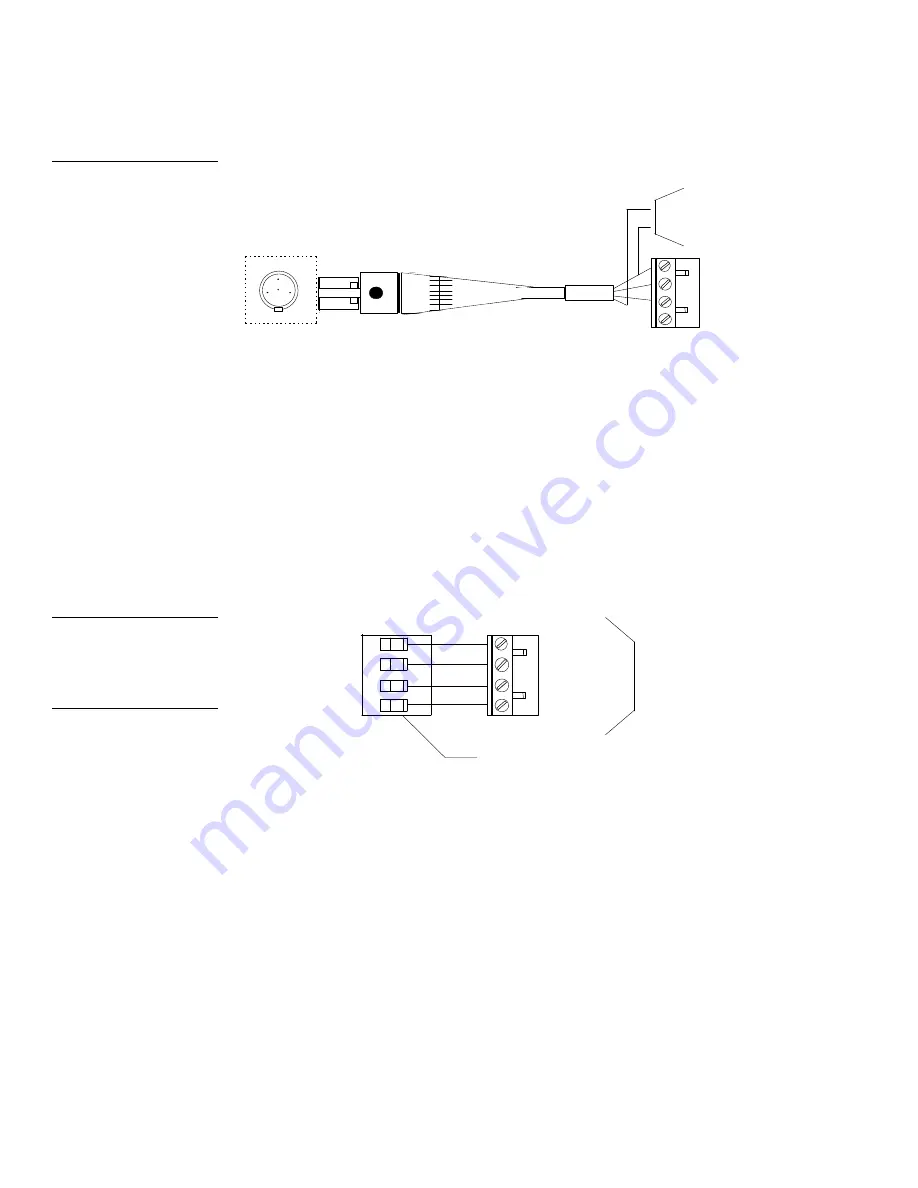
Using the AXlink 4-pin connector (UniMount and rack-mount)
Connect the control system’s AXlink connector to the AXlink connector (male) on
the rear panel of the mini-touch panel for data and 12 VDC power as shown in
Figure 18.
UniMount or rack-mount AXlink
connector
Control system
1
3
2
4
GND - (BLK)
AXP (WHT)
AXM (GRN)
PWR + (RED)
GND - (BLK)
AXP (WHT)
AXM (GRN)
PWR + (RED)
1
3
2
4
Using the AXlink 4-pin connector and external 12 VDC power supply
Connect the control system’s AXlink connector to the AXlink connector on the rear
panel of the mini-touch panel as shown in Figure 19.
Figure 17
Mini-XLR connector to external
12 VDC power supply, and
control system wiring diagram
Caution
If you are using power from
AXlink, disconnect the wiring
from the AXCESS or
AXCENT2 Control System
before wiring the mini-touch
panel.
Figure 18
AXlink wiring diagram
Содержание AXM-MLC
Страница 8: ...vi Table of Contents Black White LCD Mini Touch Panels ...
Страница 36: ...28 Mini Touch Panel Basics Black White LCD Mini Touch Panels ...
Страница 114: ...106 Mini Touch Panel Program Reference Black White LCD Mini Touch Panels ...
Страница 130: ...122 Replacing the Lithium Batteries Black White LCD Mini Touch Panels ...
Страница 140: ...132 Technical Support Black White LCD Mini Touch Panels ...


