L0190D
36
This is helpful if you are replacing the Control Board in a certain
machine and is especially useful if you are setting up a number
of machines that have the same number of motors, prices and
options settings.
Saving a Configuration File
1. Open the Front Door and leave the machine
turned ON.
2. Locate the socket for the micro SD Card (See
Figure 8.1
on page 35).
3. Insert the micro SD Card into the socket (it will
only fit one way). Push in until it latches in place.
4. Press the yellow Mode button. After a few
seconds, four software options will be shown on
the display.
5. Press
“
2
”,
to ‘SAVE CONFIG’ . You will be
prompted to ENTER FILE NAME.
6. Use the Keypad to enter a unique filename that
you can remember in the future. The keypad
buttons work like a telephone keypad – for
example the ‘2’ button will cycle through
A,B,C,2,A,B… If you pause after a key entry, the
display will shift one character to the left and
prompt you for the next entry. Press the “
*
” button
to erase a mistake.
7. Keep the filenames brief (maximum is 8
characters) for convenience, and press “
#
” to Save
the file.
8. When the file writing process is complete, there
will be a file on your microSD Card with the name
you entered with a “.cfg” extension.
The saved file will contain the list of motors as connected in this
machine, along with all prices, temperature settings and options
settings.
Loading a Configuration File
1. Open the Front Door and leave the machine
turned ON.
2. Locate the socket for the micro SD Card (See
Figure 8.1
on page 35).
3. Insert the micro SD Card into the socket (it will
only fit one way). Push in until it latches in place or
is fully seated.
4. Press the yellow Mode button. After a few
seconds, four software options will scroll on the
display.
5. Press
“
1
”,
to ‘LOAD CONFIG’. If the microSD Card
has any .cfg files, the first (alphabetically) filename
will be displayed.
6. Press the “
*
” button to scroll through the filenames
until your choice is displayed.
7. Press the “#” button to load the contents of the
displayed file into the Control Board’s memory.
8. You will be prompted “OVERWRITE S/N ?”. If you
are loading the same configuration to several
different machines, you will want to retain those
unique Serial Numbers and you should choose
NO. If you are replacing a Control Board, and want
to retain the Serial Number of the board that
supplied the configuration file, choose YES. This is
very important for operations that utilize DEX
reporting.
RECORDING DEX DATA ON SD CARD
DEX data can be saved to a file on the microSD card for
analysis late via PC or other computing device.
1. Open the Front Door and leave the machine
turned ON.
2. Locate the socket for the micro SD Card (See
Figure 8.1
on page 35).
3. Insert the micro SD Card into the socket (it will
only fit one way). Push in until it latches in place.
4. Press the yellow Mode button. After a few
seconds, four software options will be shown on
the display.
5. Press “
4
”,
to ‘SAVE AUDIT’
6. ‘PLEASE WAIT’ will be displayed as the data is
transferred to the SD Card. ‘SAVED’ will display
briefly when the process is complete.
7. Text files will be saved on the card with filenames
generated as follows:
a. The first character will always be ‘A’
b. The next 4 characters will be the last four
digits of the machine’s Serial Number (see
OPTIONS—Serial Number on Page 26.
c. The 6th character will be an underscore (‘_’).
d. The 7th and 8th characters will be an ever-
incrementing 2 digit number represent the
number of DEX reads performed in this
manner. (In this way you can keep multiple
readings from each machine on a card
without ever over-writing the previous file—
until you reach 100 reads of the same
machine!)
e. The file extension will be “txt” and these files
can be read and analyzed with many different
computer apps.
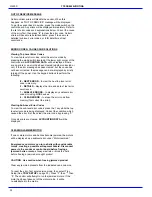
CLEANING THE VENDOR EXTERIOR
Clean the vendor exterior as necessary using mild household
cleaners and water. Dampen a cloth or sponge with the cleaning
solution and gently wipe clean the exterior.
a. Do not use chemicals or solvents. These can
damage paint, plastic trim and decals.
b. Do not use abrasive cleaners.
c. Do not use a water jet.
d. Do not let water or cleaning solutions contact
electrical or electronic components.
e. Clean the glass front inside and out with a good
window cleaner.
CLEANING THE VENDOR INTERIOR
Clean the interior using mild household cleaners and water.
Dampen a cloth or sponge with the cleaning solution and gently
wipe the interior surfaces clean.
1. Unplug the vendor from the power socket.
2. Open the vendor door.
8
MAINTENANCE
Содержание EPIC SENSIT 3
Страница 12: ...L0190D 6 THIS PAGE INTENTIONALY LEFT BLANK ...
Страница 18: ...L0190D 12 THIS PAGE INTENTIONALLY LEFT BLANK ...
Страница 26: ...L0190D 20 THIS PAGE INTENTIONALLY LEFT BLANK ...
Страница 44: ...L0190D 38 THIS PAGE INTENTIONALLY LEFT BLANK ...
Страница 45: ...L0190D 39 Epic Model 9 WIRING DIAGRAM Note Transformer part numbers are forma ed as 120 V 220V ...
Страница 46: ...L0190D 40 THIS PAGE INTENTIONALLY LEFT BLANK ...
Страница 50: ...L0190D 44 THIS PAGE INTENTIONALLY LEFT BLANK ...
Страница 52: ...L0190D 46 THIS PAGE INTENTIONALLY LEFT BLANK ...

