


Temposonics
®
R-Series
V
POWERLINK
Operation Manual
I 49 I
Adding R-Series
V
POWERLINK to a network
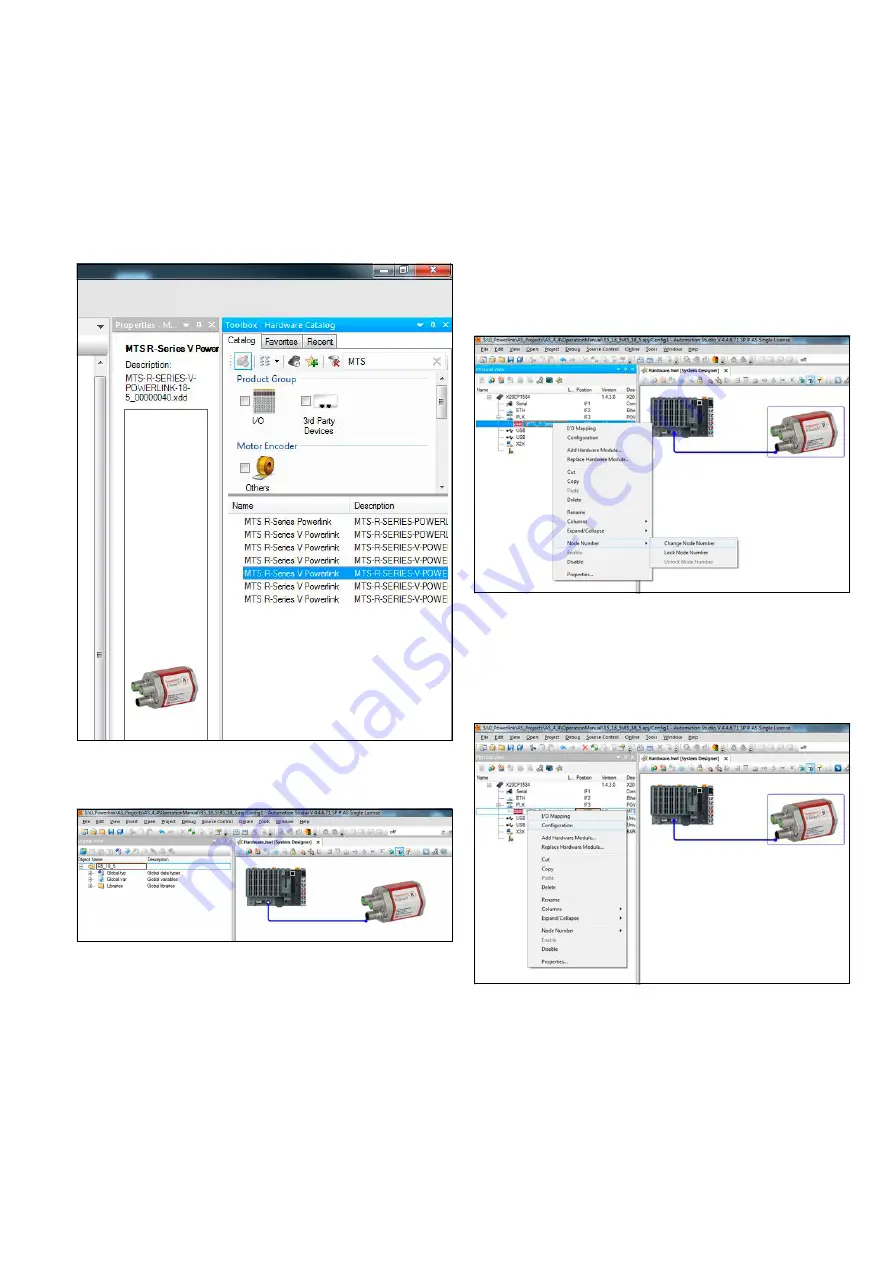
In the right of the main view is the “Toolbox - Hardware Catalog”.
Choose the R-Series
V
POWERLINK in the “Toolbox - Hardware
Catalog” and move it via drag and drop in the system designer where
the sensor should be integrated in the network (Fig. 74).
Fig. 74: Selecting R-Series
V
POWERLINK in the “Toolbox - Hardware Catalog”
Connect the sensor with the control (Fig. 75).
As in the system designer also in the physical view on the left
the sensor is connected to the control. To enable the control to
communicate with the sensor, the node ID previously set on the
sensor must be set on the control. Click on the sensor in the physical
view with the right mouse button and select the entry “Node Number
Change Node Number” (Fig. 76). The node number on the control
must be identical to the node ID of the device. The default node ID of
R-Series
V
POWERLINK is 1. See the sections 6.1 and 6.2
to change the node ID of R-Series
V
POWERLINK.
Fig. 75: Connect R-Series V POWERLINK sensor with control
Fig. 76: Setting the node number of the connected device on the control
To configure the sensor, select the R-Series
V
POWERLINK sensor on
the left side (physical view) again. The right mouse button takes you to
the menu entry “Configuration” (Fig. 77.) The configuration tab in the
main window will open.
Fig. 77: Setting the node number of the connected device on the controller