


Chapter 2
User interface
22
OsmoTECH XT Single-Sample Micro-Osmometer User Guide
2.3 Home screen
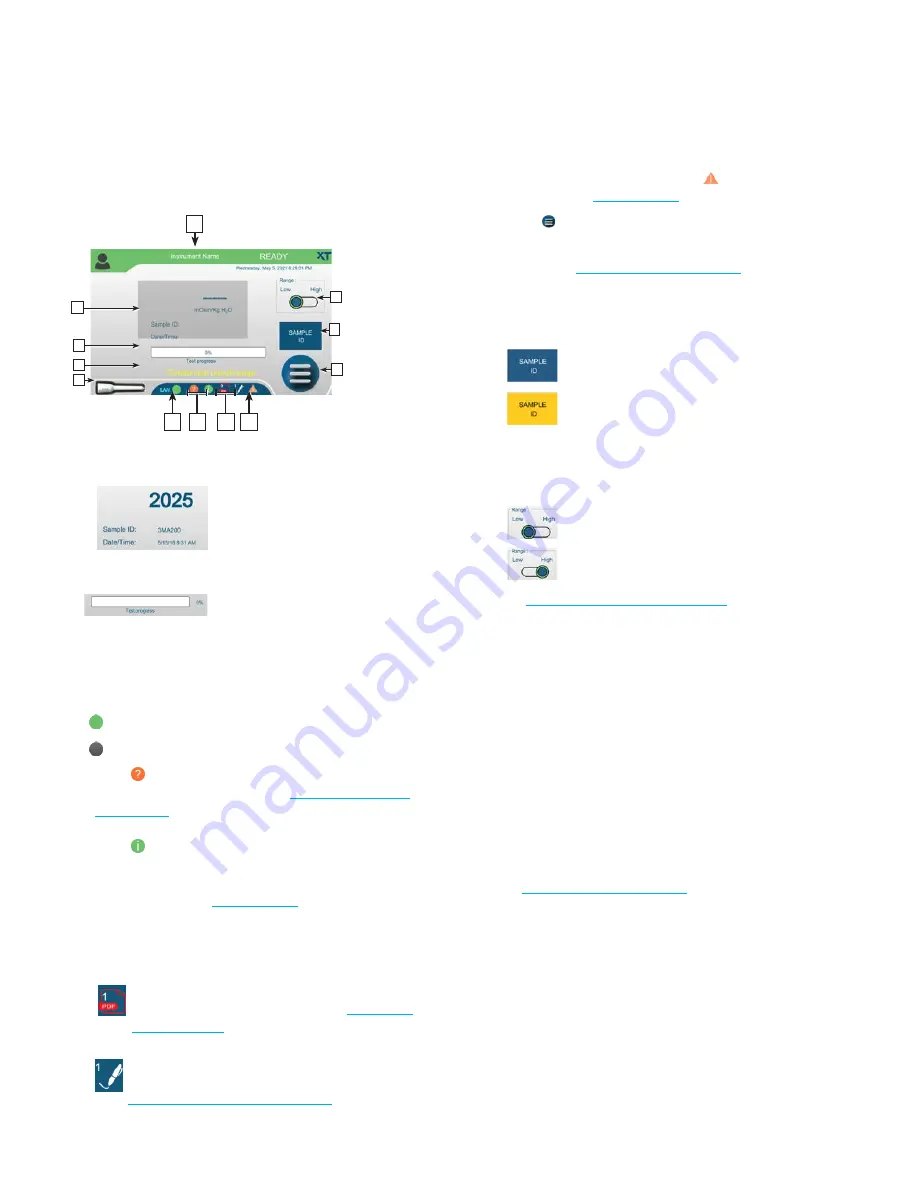
Use the Home screen to perform sample testing.
A
K
B
C
E
D
F
G
H
I
J
L
A.
Shows the latest test sample osmolality reading,
sample ID, and date and time of the test
B.
Test progress bar
C.
Warning messages display here
D.
Shows the number of tests remaining in the system
E.
Local area network (LAN) status
- LAN connected
- LAN disconnected
F.
Press to open the LEGEND screen which
describes each status icon (see
Press to display system information, including
distributor and manufacturing information, software
revisions, LAN and MAC address, system history, and
serial number (see
).
The system information and system status icons are
hidden after five seconds if you do not press one of
them.
G.
Appears when the
Single
Result PDF Export
Enabled
checkbox is selected (see
.
Appears when the
Review of Results
and/or
Approval of Results
checkbox is selected (see
Configuring audits of test results
).
H.
Indicates a message alert. Press
to display
message (see
).
I.
Press to open the main menu.
J.
The color of the button indicates the Sample ID
status (see
Press the button to display a keyboard and activate
the barcode scanner; then use the keyboard or
barcode scanner to enter the sample ID.
–
Blue:
Sample ID is optional.
–
Orange:
Sample ID is required.
K.
Indicates the current operating range – the sample
being tested must be in the selected range.
Authorized users can change the operating range
from the Home screen.
–
Low:
Samples between 0 and
1500 mOsm/kg H
2
O.
–
High
: Samples greater than 1500 and up to
4200 mOsm/kg H
2
O.
See
Configuring the operating range
for instructions.
L.
Displays the instrument name. Administrators can
change the instrument name (up to 16 characters)
from the Home screen:
1.
Press and hold on the
Instrument Name
text until
the login screen opens and then log in.
2.
Change the instrument name using the keyboard
and press
Enter
.
The instrument name appears on instrument
printouts and data exports, and also is used as
part of auto indexing of test results. The
instrument name must be changed before auto
indexing of sample IDs can be enabled (see


