ptg
139
#54:
Adding Watermarks and Backgrounds
Pick a Page, Any Page
You don’t have to apply your headers and footers on every page. Click the Page
Range Options link in the Preview area of the dialog (hidden under the Page
Number and Date Format dialog in Figure 53) to open the Page Range Options
dialog.
Select the pages to which the headers and footers are applied. The default is All
Pages, or choose another option:
•
Click the Pages from button and type the page numbers in the Pages from
and to fields.
•
Choose “Odd pages only, Even pages only” from the Subset pop-up menu,
or leave the default as “All pages in range.”
Click OK to return to the main Add Header and Footer dialog.
Picking Watermark and
Background Features
To specify how the water-
marks and backgrounds are
shown on the page, click the
Appearance Options link at
the bottom of the Appear-
ance section.
In the resulting dialog,
choose from these options:
•
“Show when printing”—
Use this option when
you want to circulate a
document that has a spe-
cific status, such as Draft
to prevent readers from
assuming it’s the final ver-
sion, or Confidential to
maintain the integrity of
the document.
•
“Show when displaying
on screen”—If you intend
to circulate a document
for review or collaboration
online only, make sure the
recipients can see a water-
mark when reviewing the
file. It’s important for par-
ticipants to understand a
special status, view dates
and other document data,
or see a background that
you’ve inserted.
A good way to create a cohesive-appearing document you have con-
structed from multiple source documents is to use a watermark or back-
ground. Watermarks overlay the page content; backgrounds are behind
the content. In this technique, you’ll see how to apply and configure
graphic backgrounds. Watermarks and backgrounds have separate
commands and open separate dialogs. The content in both dialogs is
identical, with the exception of the text insertion options, available only
for watermarks. Read how to use text at the end of this technique.
Note
As with headers and footers, you can save and reuse custom settings for
watermarks and backgrounds. Refer to the sidebar “Saving Settings” in
#53, “Inserting Headers and Footers,” for further details.
Our sample document has four pages, each containing one large image.
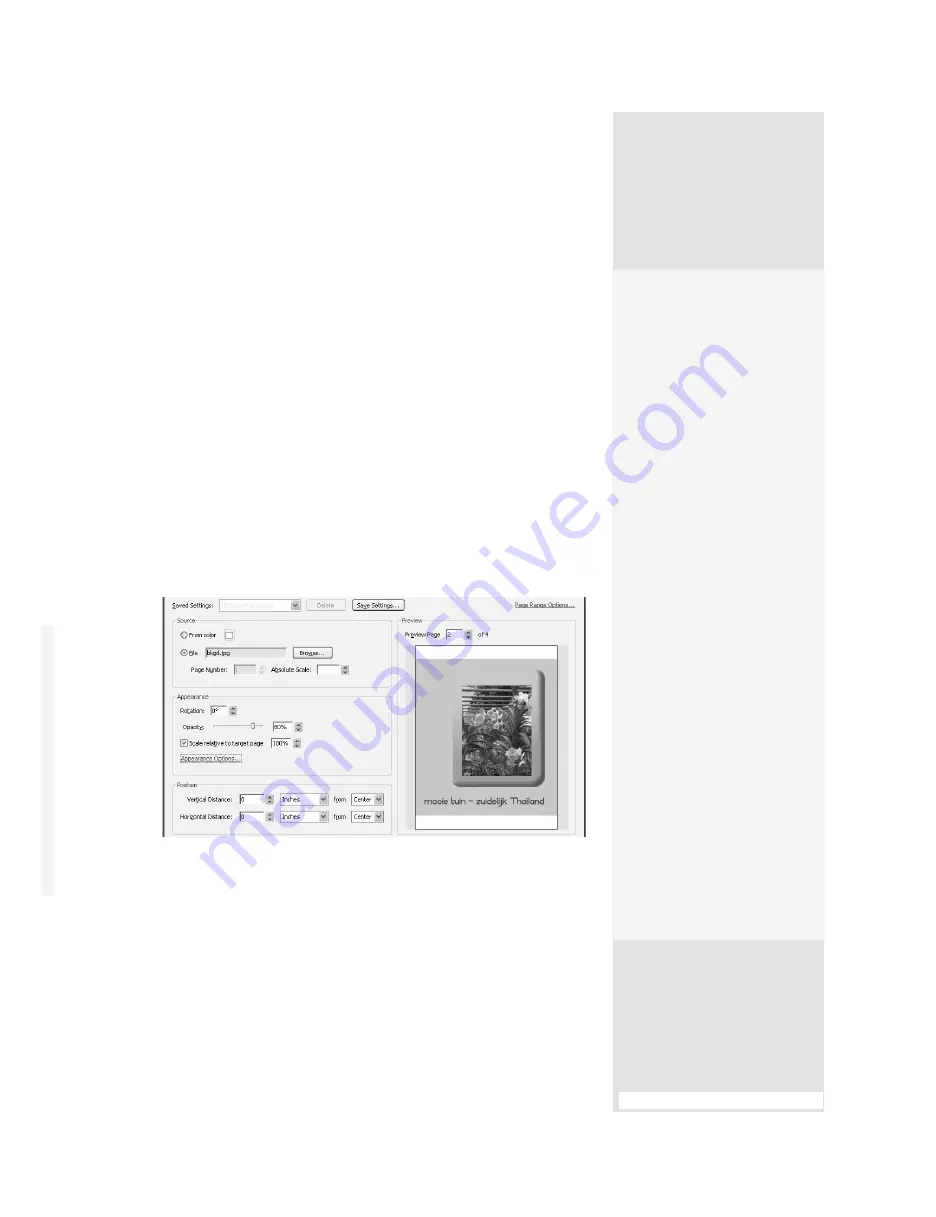
1. Choose Document > Background > Add/Replace to open the dialog
shown in Figure 54.
Figure 54
Configure the settings for the background in the dialog.
2. Click File in the Source area of the dialog, and click Browse (Choose)
to select a source document to use for the background. If the source
document has more than one page, select the page you want to use
as an example.
(continued on next page)
(continued on next page)
From the Library of Daniel Dadian
Содержание ACROBAT 9 Extended
Страница 1: ...From the Library of Daniel Dadian...
Страница 2: ...Donna L Baker Adobe Acrobat 9 HOW TOs 125 Essential Techniques From the Library of Daniel Dadian...
Страница 4: ...Dedication For Pippi From the Library of Daniel Dadian...
Страница 31: ...This page intentionally left blank From the Library of Daniel Dadian...
Страница 75: ...This page intentionally left blank From the Library of Daniel Dadian...
Страница 111: ...This page intentionally left blank From the Library of Daniel Dadian...
Страница 137: ...This page intentionally left blank From the Library of Daniel Dadian...
Страница 217: ...This page intentionally left blank From the Library of Daniel Dadian...
Страница 241: ...This page intentionally left blank From the Library of Daniel Dadian...
Страница 269: ...This page intentionally left blank From the Library of Daniel Dadian...
Страница 309: ...This page intentionally left blank From the Library of Daniel Dadian...


