


27
Trimming Tips
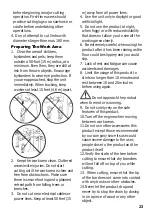
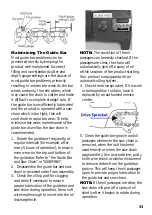
1. When operating the hedge trimmer,
keep the extension cord behind the
user and the trimmer. Never drape it
over the hedge being trimmed.
2. This tool must not be used as a lever
to lift, move or split objects.
3. Keep handles dry, clean, and free
from oil and grease. Greasy, oily
handles are slippery causing loss of
control.
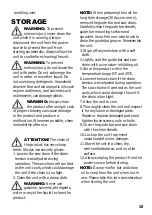
4. Always disconnect the unit from the
power source when it is not in use.
5. Do not force the hedge trimmer
through heavy shrubbery. This can
cause the blades to bind and slow
down. If the blades slow down, reduce
the pace.
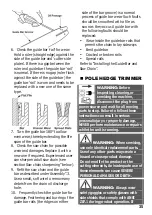
6. D
O
not attempt to cut stems or twigs
that are thicker than 3/4” (19 mm), or
those obviously too large to feed into
the cutting blade. Use a non-powered
hand saw or pruning saw to trim large
stems.
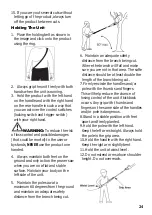
7. If desired, you can use a string to
help cut your hedge level. Decide how
high you want the hedge. Stretch a
piece of string along the hedge at the
desired height. Trim the hedge just
above the guide line of string. Trim the
side of a hedge so that it will be
slightly narrower at the top. More of
the hedge will be exposed when
shaped this way, and it will be more
uniform.
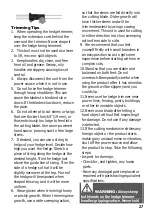
8. Wear gloves when trimming thorny
or prickly growth. When trimming new
growth, use a wide sweeping action,
so that the stems are fed directly into
the cutting blade. Older growth will
have thicker stems and will be
trimmed easiest by using a sawing
movement. The unit is used for cutting
in either direction in a slow, sweeping
action from side to side.
9. We recommend that you test
yourself firstly with small branches in
an easy position so as to get some
experience before starting with more
complex cuts.
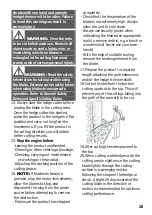
10. Stand so that you are stable and
balanced on both feet. Do not
overreach.Be especially careful when
using the product after it has rained as
the ground will be slippery and you
could slip.
11. Never use the hedge trimmer near
power lines, fencing, posts, buildings,
or other immovable objects.
12. Never use a blade after hitting a
hard object without first inspecting it
for damage. Do not use if any damage
is detected.
13. If the cutting mechanism strikes any
foreign object or the product starts
making any unusual noise or vibration,
shut off the power source and allow
the product to stop. Take the following
steps:
- Inspect for damage.
- Check for, and tighten, any loose
parts.
- Have any damaged parts replaced or
repaired with parts having equivalent
specifications.
WARNING:
Always keep
both hands on the hedge trimmer
handles gripping surface. Never hold