


Chapter 19 Certificates
P-873HNU(P)-51B User’s Guide
213
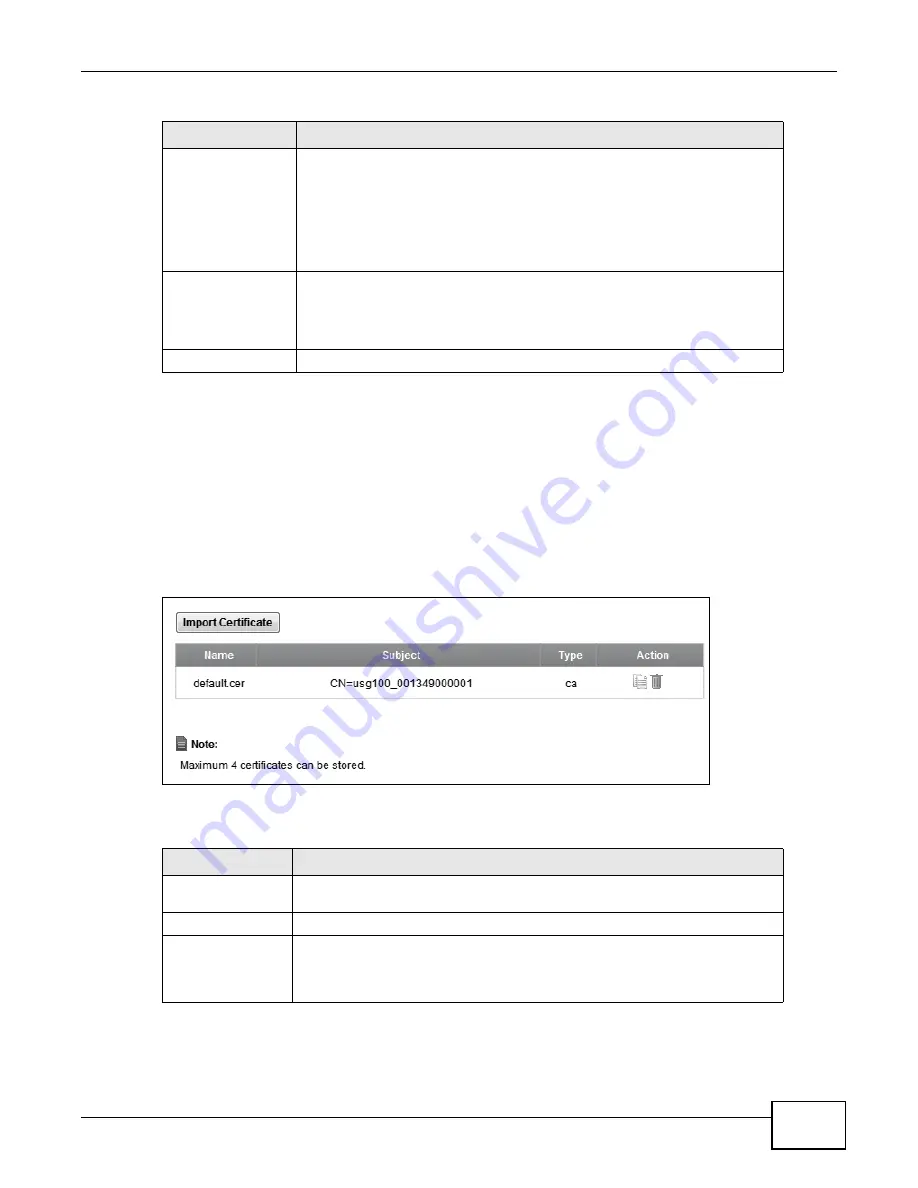
19.4 The Trusted CA Screen
Click Security Settings > Certificates > Trusted CA to open the following screen. This screen
displays a summary list of certificates of the certification authorities that you have set the VDSL
Router to accept as trusted. The VDSL Router accepts any valid certificate signed by a certification
authority on this list as being trustworthy; thus you do not need to import any certificate that is
signed by one of these certification authorities.
Figure 107
Security Settings > Certificates > Trusted CA
The following table describes the fields in this screen.
Private Key
This read-only text box displays the private key in Privacy Enhanced Mail
(PEM) format. PEM uses base 64 to convert the binary certificate into a
printable form.
You can copy and paste the private key into an e-mail to send to friends or
colleagues or you can copy and paste the certificate into a text editor and save
the file on a management computer for later distribution (via floppy disk for
example).
Signing Request
This read-only text box displays the request information in Privacy Enhanced
Mail (PEM) format. PEM uses base 64 to convert the binary certificate into a
printable form.
This displays null in a signed certificate.
Back
Click Back to return to the previous screen.
Table 82
Certificate Details (continued)
LABEL
DESCRIPTION
Table 83
Security Settings > Certificates > Trusted CA
LABEL
DESCRIPTION
Import Certificate
Click this button to open a screen where you can save the certificate of a
certification authority that you trust to the VDSL Router.
Name
This field displays the name used to identify this certificate.
Subject
This field displays information that identifies the owner of the certificate, such
as Common Name (CN), OU (Organizational Unit or department), Organization
(O), State (ST) and Country (C). It is recommended that each certificate have
unique subject information.
Summary of Contents for P-873HNU-51B
Page 4: ...Contents Overview P 873HNU P 51B User s Guide 4...
Page 13: ...Table of Contents P 873HNU P 51B User s Guide 13 Appendix F Legal Information 329 Index 333...
Page 14: ...Table of Contents P 873HNU P 51B User s Guide 14...
Page 15: ...15 PART I User s Guide...
Page 16: ...16...
Page 32: ...Chapter 2 The Web Configurator P 873HNU P 51B User s Guide 32...
Page 57: ...57 PART II Technical Reference...
Page 58: ...58...
Page 64: ...Chapter 5 Network Map and Status Screens P 873HNU P 51B User s Guide 64...
Page 108: ...Chapter 7 Wireless P 873HNU P 51B User s Guide 108...
Page 132: ...Chapter 9 Static Routing P 873HNU P 51B User s Guide 132...
Page 152: ...Chapter 10 Quality of Service QoS P 873HNU P 51B User s Guide 152...
Page 168: ...Chapter 11 Network Address Translation NAT P 873HNU P 51B User s Guide 168...
Page 182: ...Chapter 13 IGMP P 873HNU P 51B User s Guide 182...
Page 188: ...Chapter 14 Interface Group P 873HNU P 51B User s Guide 188...
Page 202: ...Chapter 17 Parental Control P 873HNU P 51B User s Guide 202...
Page 224: ...Chapter 22 Logs P 873HNU P 51B User s Guide 224...
Page 234: ...Chapter 25 xDSL Statistics P 873HNU P 51B User s Guide 234...
Page 238: ...Chapter 26 Users Configuration P 873HNU P 51B User s Guide 238...
Page 244: ...Chapter 27 Remote Management P 873HNU P 51B User s Guide 244...
Page 250: ...Chapter 29 Logs Setting P 873HNU P 51B User s Guide 250...
Page 256: ...Chapter 31 Configuration P 873HNU P 51B User s Guide 256...
Page 262: ...Chapter 32 Diagnostic P 873HNU P 51B User s Guide 262...
Page 274: ...Chapter 34 Product Specifications P 873HNU P 51B User s Guide 274...
Page 310: ...Appendix C Pop up Windows JavaScript and Java Permissions P 873HNU P 51B User s Guide 310...
Page 324: ...Appendix D Wireless LANs P 873HNU P 51B User s Guide 324...


