6-40
HANDLEBAR
CHAS
CAUTION:
*****************************************************
*****************************************************
NOTE:
NOTE:
23 Nm (2.3 m
S
kg)
NOTE:
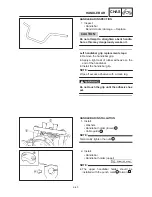
HANDLEBAR INSPECTION
1. Inspect:
S
Handlebar
Bends / cracks / damage
Replace.
Do not attempt to straighten a bent handle-
bar as this may dangerously weaken it.
Left handlebar grip replacement steps:
D
Remove the handlebar grip.
D
Apply a light coat of rubber adhesive on the
end of the handlebar.
D
Install the handlebar grip.
Wipe off excess adhesive with a clean rag.
Do not touch the grip until the adhesive has
set.
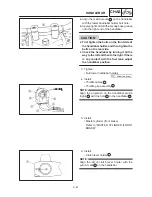
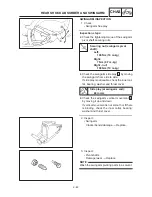
HANDLEBAR INSTALLATION
1. Install:
S
Washers
S
Handlebar holder (lower)
1
S
Cable guide
2
Temporarily tighten the nuts
3
.
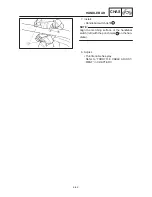
2. Install:
S
Handlebar
S
Handlebar holder (upper)
D
The upper handlebar holder should be
installed with the punch mark
a
forward
A
.
Summary of Contents for XVS6501997
Page 1: ......
Page 2: ......
Page 8: ......
Page 10: ...GEN INFO ...
Page 18: ...GEN INFO ...
Page 20: ...SPEC ...
Page 44: ...2 24 LUBRICATION DIAGRAMS SPEC 1 Crankshaft 2 Oil filter 3 Oil pump ...
Page 102: ...INSP ADJ ...
Page 188: ...CARB ...
Page 198: ...CARB ...
Page 266: ...CHAS ...
Page 268: ...ELEC SELF DIAGNOSIS 7 49 TROUBLESHOOTING 7 50 ...
Page 298: ...E 7 30 SIGNAL SYSTEM ELEC EB806000 SIGNAL SYSTEM CIRCUIT DIAGRAM ...
Page 320: ...TRBL SHTG ...
Page 326: ...TRBL SHTG ...


