How to name and store your new voice
If you have followed along with the last five “Simple editing” sections, the voice is now probably quite
different than when you first selected it. Even if the voice sounds rather strange, give it a new name and
store it as explained in this section.
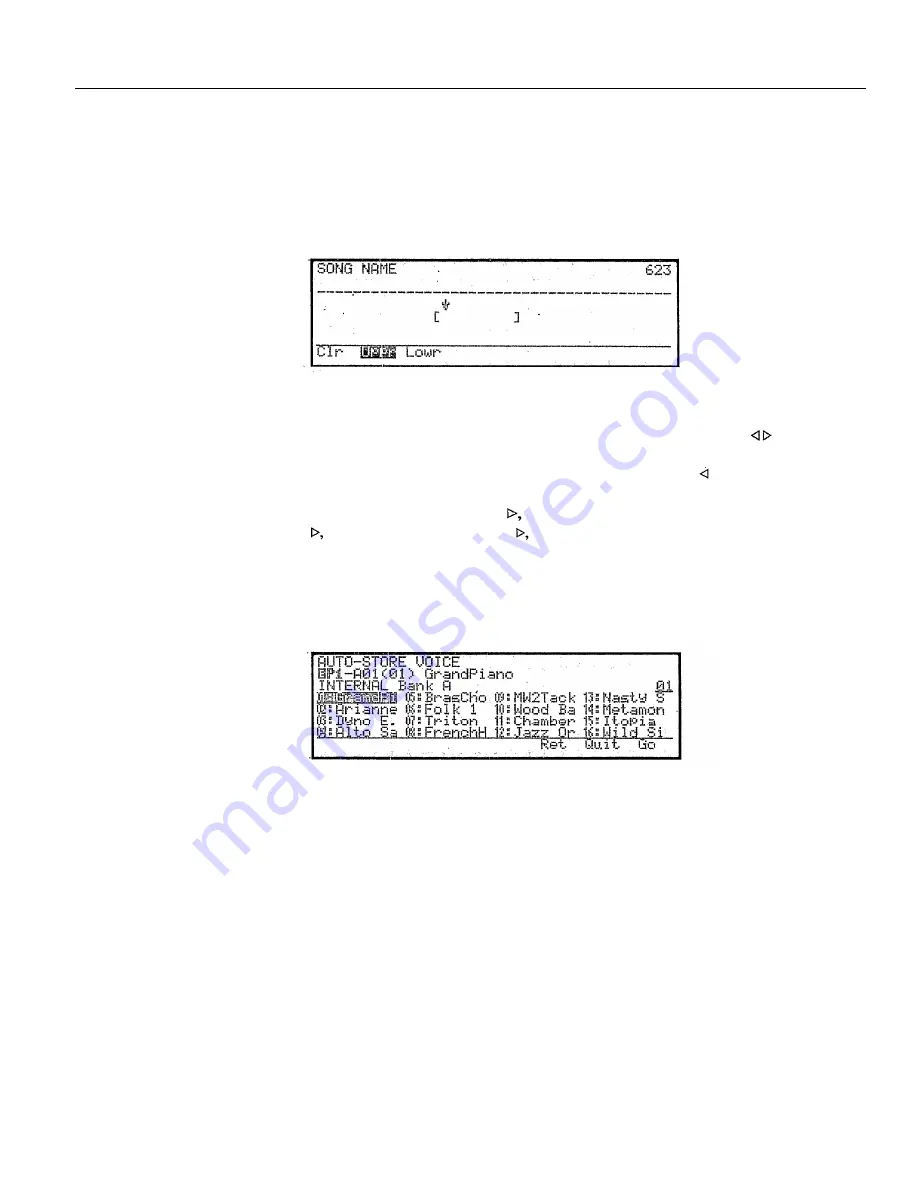
Enter a 10-character
voice name
From the voice edit Common data job directory, select 13:Name.
Press
F1
(Clr) to clear the currently set voice name, and use the numeric keypad
to enter the characters printed below each key. Press
F2
to select uppercase
characters and press
F3
to select lowercase characters. Use
to move the
cursor.
For example to enter the voice name “New1”, use
to move the cursor to
the beginning of the line, and press the following buttons; F2 to select uppercase,
4 three times to enter “N”, D,
F3
to select lowercase, 1 three times to enter “e”,
7
three times to enter
“W”
,
and
1
once to enter “1”.
Store the edited voice
When you have finished entering the voice name, press the mode select key
VOICE
to exit to the voice edit Common job directory, and press
EXIT
once again
to exit voice edit mode. Since the voice data has been edited, the top line of the
display will blink “AUTO-STORE VOICE”
Note:
Voices which use voice mode 3 (4AFM mono), 8 (4AWM poly), and 10
(2AFM&2AWM) occupy extra memory, and can be stored only in bank D. The
AUTO-STORE display for such voices will automatically show bank D, and
blink “Use bank D” in the bottom line as a reminder..
Voices which use other voice modes can be stored in bank D as well.
The LCD will show the first seven characters of the voicenames in the currently
selected bank of voices. The voice name displayed in inverse indicates the voice
memory into which the edited data will be stored.
Storing data will overwrite the data that previously occupied that memory,
so if you do not want to overwrite the original data, use
INTERNAL
or
CARD
to
specify the voice memory, select a bank A-D, and select the voice memory 1-16
in which you want to store your newly edited voice.
76
Summary of Contents for SY-77
Page 1: ...YAMAHA MUSIC SYNTHESIZER ...
Page 12: ...iv ...
Page 13: ...1 ...
Page 14: ...2 ...
Page 32: ...Front panel right side This page explains the front panel features to the right of the LCD 20 ...
Page 44: ...32 ...
Page 51: ...39 ...
Page 53: ...41 ...
Page 57: ...45 ...
Page 61: ...49 ...
Page 64: ...52 ...
Page 92: ...80 ...
Page 93: ...VOICE PLAY MODE 81 ...
Page 94: ...82 ...
Page 134: ...VOICE EDIT MODE 122 ...
Page 166: ...154 ...
Page 180: ...168 ...
Page 212: ...200 ...
Page 246: ...234 ...
Page 247: ...APPENDIX 235 ...
Page 248: ...236 ...
Page 265: ...253 ...
Page 268: ......


