14
RM1x SEQUENCE REMIXER
❏
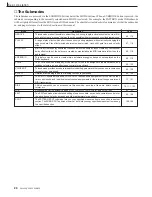
Rear Panel
4
3
7
5
6
2
1
1. STANDBY/ON Switch
Press in to turn the RM1x on, and press again to turn it off. When the power is on one of the mode button indicators will
light and the PATTERN mode display will appear on the LCD (Liquid Crystal Display).
2. DC IN Jack
The DC output cable from the Yamaha PA-5C AC Power Adaptor supplied with the RM1x is plugged in here.
3. CONTRAST Control
Use the CONTRAST control to achieve the best LCD display visibility (LCD visibility varies greatly with viewing angle).
4. MIDI IN & OUT Connectors
The RM1x has MIDI IN and MIDI OUT connectors for maximum system flexibility. If you plan to use a MIDI keyboard or
other instrument to play and program the RM1x, it should be connected to the RM1x MIDI IN connector (see “Connecting
external MIDI devices,” page 18). Input “filters” defining what data will and will not be received by the MIDI IN connector
can be set as required via the UTILITY mode (page 137).
The MIDI OUT connector can be connected to an external tone generator or synthesizer if you want to drive external voices
from the RM1x sequencer. Like the MIDI IN connector, MIDI filters can be set for the MIDI OUT connector via the
UTILITY mode.
5. L/MONO & R OUTPUT Jacks
These are the main stereo outputs from the RM1x tone generator system (see “Audio equipment connections,” page 17).
Both are standard 1/4” mono phone plugs. When a plug is inserted into only the L/MONO output, the left- and right-
channels signals are mixed and delivered via that output to allow direct connection to mono sound systems. The output level
is adjusted via the VOLUME control (page 12).
6. PHONES Jack
Any pair of stereo headphones with a 1/4” stereo phone plug can be plugged in here for convenient monitoring. The
PHONES output level is adjusted via the VOLUME control.
7. FOOT SW Jack
An optional Yamaha FC4 or FC5 footswitch connected to this jack can be used for start/stop, section selection, sustain, or
tap BPM entry, as determined by the setting of the UTILITY mode FOOT SWITCH parameter (page 132).
SETUP


