


6D45F11
4-8
9
8
7
6
5
4
3
2
1
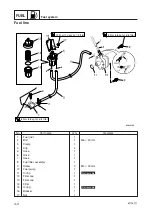
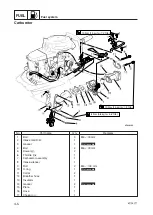
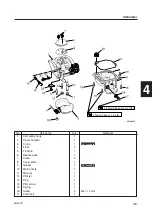
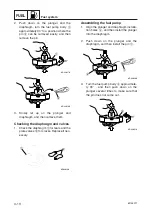
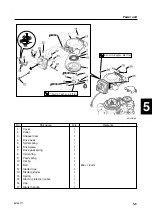
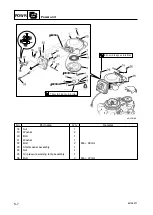
Carburetor
Disassembling the carburetor
NOTE:
9
Write down how many turns you have actu-
ally turned out the pilot screw.
9
Disassembled jets and other components
should be sorted out and kept in order, so
that they can be re-assembled in their orig-
inal positions.
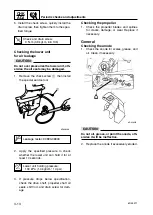
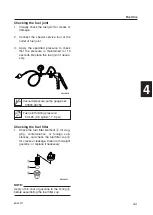
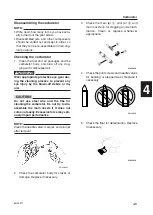
Checking the carburetor
1.
Clean the fuel and air passages and the
carburetor body, and blow off any clog-
ging with compressed air.
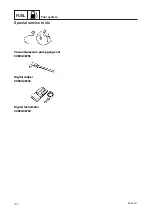
w
Wear appropriate protective eye gear dur-
ing the cleaning process to prevent any
eye injury by the blown-off debris or liq-
uid.
c
C
Do not use steel wire and the like for
cleaning the carburetor. Do not try to dis-
assemble the main nozzle if it does not
come out easily. Excessive force may seri-
ously impair performance.
NOTE:
Clean the needle valve, main jet, and pilot jet
after removal.
2.
Check the carburetor body for cracks or
damage. Replace if necessary.
3.
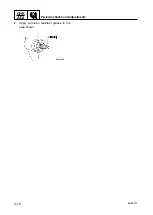
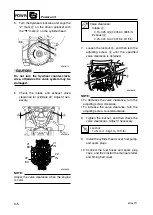
Check the main jet
1
, pilot jet
2
, and
main nozzle
3
for clogging and contam-
ination. Clean or replace whenever
appropriate.
4.
Check the pilot screws and needle valves
for bending or stepped wear. Replace if
necessary.
5.
Check the float for deterioration. Replace
if necessary.
6D440025
1
2
3
6D440030
6B440040
6D440050
6D45F11-04_1 03.10.16 20:06 Page 9


