9
TOOLS for 01X/Plug-in Effect Installation Guide
25
When installation is finished, a “Complete” message appears. Click
[Finish].
26
Repeat steps
24
and
25
above as often as necessary, until the Wait-
ing display disappears.
• The Waiting display may sometimes be hidden behind the “New Hardware Wiz-
ard” display. If this happens, click on the “New Hardware Wizard” display to
bring it to the front.
Setting of mLAN AUTO W.CLK(01X)
27
When the mLAN Driver is installed, the mLAN Auto Connector starts.
To ensure that settings of the mLAN Auto Connector are properly
received, set the mLAN AUTO W.CLK (wordclock) parameter to
ENABLE, as described in the following instructions. These settings
can also be made after the mLAN Auto Connector has run.
Setting on the 01X
27-1
Enter the UTILITY mode by pressing the [UTILITY] button on
the 01X.
27-2
Call up the mLAN AUTO W.CLK display by pressing W.CLK
(channel knob 3).
27-3
Press ENABLE (channel knob 1).
27-4
The “ENABLE SURE?” prompt is shown. Change the set-
ting by pressing channel knob 8.
• If this parameter is already set to ENABLE, the prompt will not appear,
so proceed to the next step.
• The 01X Utility settings are lost when the power is turned off, unless System
Backup is performed. (Refer to the 01X Owner’s Manual.) In order to ensure the
settings here are effective the next time you turn the 01X on, perform System
Backup by holding [SHIFT] and pressing [UTILITY].
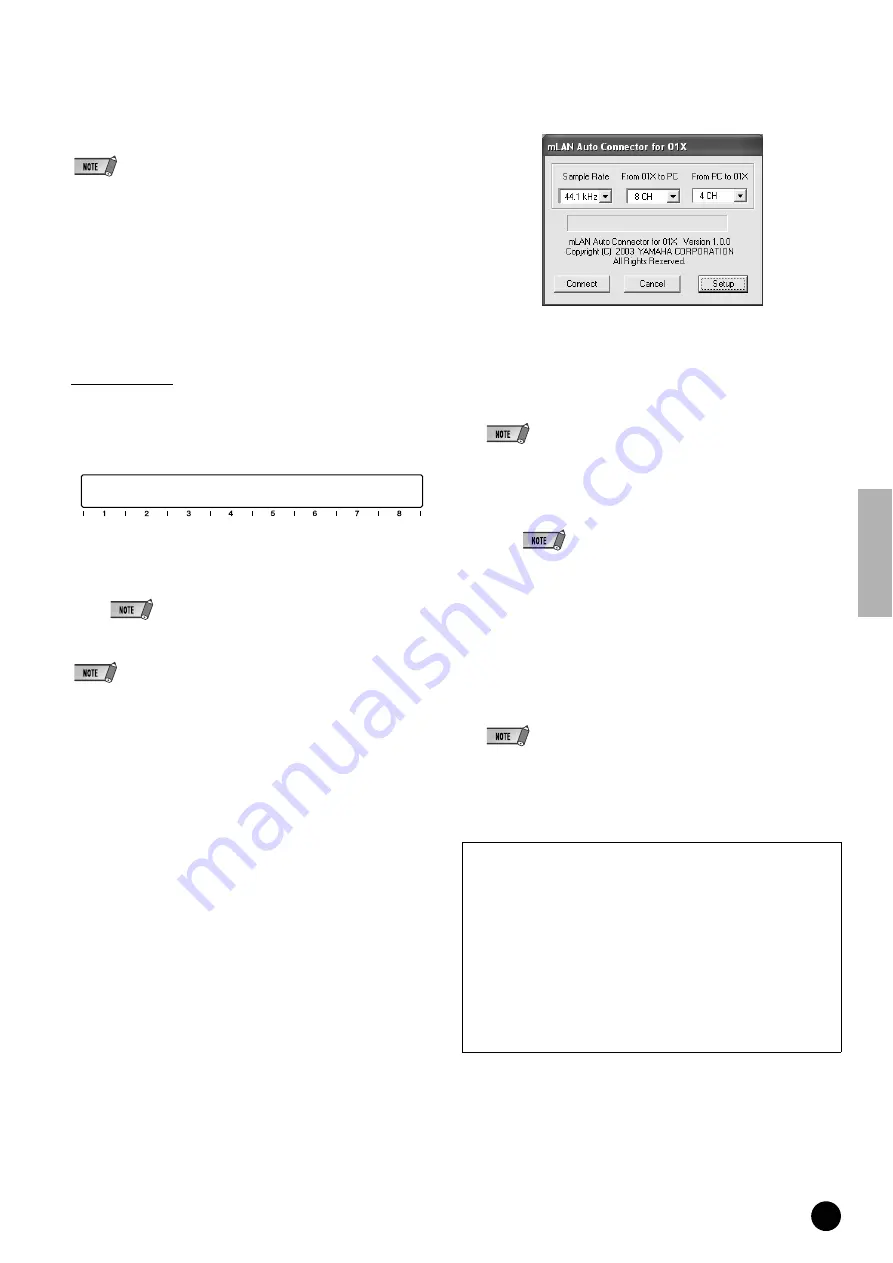
Settings in the mLAN Auto Connector
28
Change the mLAN Auto Connector settings as necessary for your par-
ticular mLAN usage.
Sample Rate
.......... Determines the sampling frequency (frequency of
the wordclock)
From 01X to PC
..... Determines the number of mLAN audio transmis-
sion channels from the 01X to the computer.
From PC to 01X
..... Determines the number of mLAN audio transmis-
sion channels from the computer to the 01X.
• Connecting the 01X by using the mLAN Auto Connector may produce noise in
some of the devices. For this reason, make sure to turn down the level of your
amp/speaker system or the MONITOR/PHONES knob/Stereo fader during the
“Connect” operation.
• When selecting “ASIO + WDM” (see the "Mode" of mLAN Driver setup
on page 10), the indication shows “4CH + 2CH.” The first number (4CH)
refers to the amount of channels to be handled by ASIO and the latter
two channels of the four are connected to the monitor input channels 17/
18 of the 01X (or 9/10, when set to 96 kHz/88.2 kHz). The second num-
ber in the indication refers to the amount of channels to be handled by
WDM, and they are input to channels 15/16 of the 01X (or 7/8, when set
to 96 kHz/88.2 kHz). When “2CH + 2CH” is selected, the audio is not
sent to the monitor input of the 01X.
• The display indication shows “6CH” when only ASIO or WDM is
selected, and the latter two channels are connected to the monitor input.
• If you change the Sample Rate to 96 kHz when LAYER of the 01X is set to 17 –
24 (mLAN), LAYER 1 – 8 will be called up and channel 1 will automatically be
selected.
• If you want to change the settings here after installing, right-click on the mLAN
icon in the task bar to start the mLAN Auto Connector.
Proceed to the next step.
UTILITY
mLAN AUTO W.CLK
[INT : 48 kHz] 1/2
ENABLE/DISABLE
Setting the 01X mLAN Control Panel
Clicking [Setup] from the mLAN Auto Connector display opens the
01X mLAN Control Panel.
When the wordclock of the 01X is set to slave to an external mLAN
and the incoming wordclock changes, this determines whether the
wordclock will adjust quickly or slowly to match the master word-
clock.
Slow
.... The wordclock changes slowly. (This is the usual setting
for most applications.)
Fast
..... The wordclock changes quickly. (This may result in
increased jitter noise.)


