background image

How to customize the MAX 200

255

How to change the storage/disk manager features
(continued)

E-sorter (program) settings (continued)

Delete

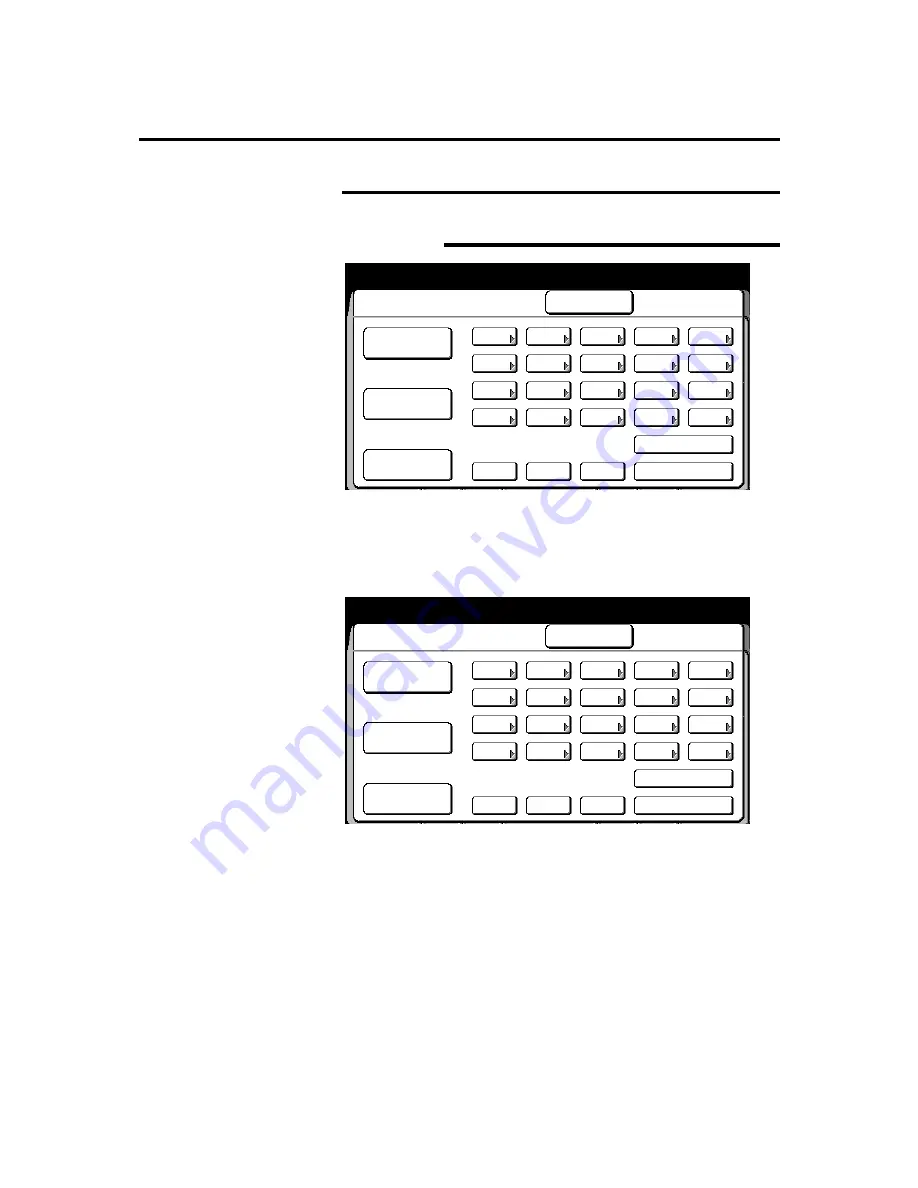
8. Select 

yes

 or 

no

.

If 

yes

 is selected, the selected pattern is deleted.

If 

no

 is selected, the selected pattern is not deleted.

The 

E-sorter (program) settings screen

 is displayed.

9. Select 

close

, to exit from this screen.

10.  To exit, press the 

custom presets

 button.

E-sorter (Programme)
Settings

Close

Store

Change

Delete

20

15

10

5

19

14

9

4

18

13

8

3

17

12

7

2

16

11

6

1

1–

101–

201–

Previous

Next

Program change
Select a number to change program pattern

E-sorter (Programme)
Settings

Close

Store

Change

Delete

20

15

10

5

19

14

9

4

18

13

8

3

17

12

7

2

16

11

6

1

1–

101–

201–

Previous

Next

Program store
Select a number to store program pattern

Summary of Contents for MAX 200

Page 1: ...User Guide 701P36011 October 2000...

Page 2: ...inted in the United States of America XEROX XES AccXES The Document Company and the identifying product names and numbers herein are trademarks of XEROX CORPORATION All terms mentioned in this documen...

Page 3: ...Large media supply Six media supply sources 4 x 500 feet or 600 feet rolls 1000 cut sheet tray for 8 5 x11 inch to 12 x 18 inch sizes and the manual feed tray Image quality Has an excellent 400 dpi im...

Page 4: ...chine configurations may have optional features Any one or more features may or may not be installed on your system The MAX 200 has the following optional features available Editing kit Stamper kit wi...

Page 5: ...terms a feature an option or message Example 1 Select print Example 2 The ready to copy message is displayed Example 3 The normal R E screen is displayed Italic None Identifies a chapter or section t...

Page 6: ...This section of the introduction provides you with all safety information warnings and instructions marked on the product Failure to follow the recommendations in this section may result in personal i...

Page 7: ...nd procedures for the optional stamper feature How to customize the MAX 200 This chapter provides information about the custom presets feature and how to enter custom presets It also identifies and pr...

Page 8: ...how to obtain the serial number refer to page 24 Fill in each item below When you call for service they will request this information Customer account name Customer account number Machine type Machine...

Page 9: ...rated in a commercial environment Operation of this equipment in a residential area is likely to cause interference in which case the user at his own expense will be required to take whatever measures...

Page 10: ...rt of law 5 Proclamations orders regulations or appointments or notices thereof with intent to falsely cause same to purport to have been printed by the Queen s Printer for Canada or the equivalent pr...

Page 11: ...d materials out of the reach of children 5 Do not use the units near water wet locations or outdoors 6 The components of this product are equipped with a three wire grounding type plug i e a plug havi...

Page 12: ...graphic system from the wall outlet and call for service under the following conditions When the power cord is damaged or frayed If the gas piston springs in the upper cover of the printer lose their...

Page 13: ...d tray 18 Touch screen 19 Components 19 How do I know if a feature or option is available 20 Scanner control panel 21 Upper components 21 Lower components 22 Information button 23 Stored jobs button 2...

Page 14: ...el 48 From the cut sheet panel 48 How to load roll media 49 How to load cut sheet media 51 How to cut roll media 52 Auto cut 52 Manual cut 53 Heater 54 Humidifier optional 55 How to make copies 56 Bef...

Page 15: ...presets 194 Media type and width for auto mode 196 Stamp location and orientation 198 Date stamp format 201 Folder setup 203 Auto manual mode 212 Media cut mode and document orientation 214 Lead trail...

Page 16: ...How to enter copy mode from plot mode 277 Technical data 278 Printer specifications 278 Physical characteristics 278 Floor space requirements 278 Scanner specifications 279 Physical characteristics 2...

Page 17: ...available features and options messages and job information For detailed information about the touch screens refer to page 19 4 Scanner control panel Contains the numeric keypad control buttons and th...

Page 18: ...guides If documents are longer than 36 inches pull out the document support guides The guide keeps long documents from falling off the document output tray 11 Document output tray The document output...

Page 19: ...roll feed cutter RFC drawer 2 supplies up to 2 rolls of media The media type and series panel is included in the drawer for detailed information about the panel refer to page 38 6 Cut sheet tray Supp...

Page 20: ...l information The trim button controls the auto cut function For detailed information about the panel refer to page 36 13 Lower door Open to access the printer circuit breaker heater switch and the hu...

Page 21: ...een The text above the selection buttons displays the current copy feature selections Message bar Displays the machine conditions operator instructions and copy quantity In this example the message ba...

Page 22: ...t is not available In this example the following tabs are not available image quality additional and finishing Note Any feature group tab or selection button that is not available may have a conflict...

Page 23: ...eck repair button is for the service representative Meter check button The meter check button provides access to the billing meter The meter reads the printer usage For detailed information on how to...

Page 24: ...counter displays the total number of scanned documents To reset press the button beside the counter Clear button Press the clear C button to clear numeric data For detailed information refer to page...

Page 25: ...s lit and the information main menu screen is displayed 2 Select the desired topic Information about the topic is displayed or a sub topic menu is displayed Select close to return to the previous scre...

Page 26: ...lamp is lit and the meter check screen is displayed The billing field displays the media usage 3 To exit press the meter check button The basic feature group screen is displayed Custom presets button...

Page 27: ...Perform one of the following a If you do not have any more changes select done on the copy feature screen Continue to the next step b If you need to make more feature changes press the review button a...

Page 28: ...ypad Clear all button Introduction When the clear all button is pressed the machine resets the copy features to the custom presets defaults This occurs automatically after some preset amount of time I...

Page 29: ...py job at the point where it was stopped or select no to cancel the current job Interrupt button Introduction Press the interrupt button when you need to run a job other than the current job that is p...

Page 30: ...entering No minutes The factory default is set to No minutes The interval timer clock is reset whenever the power save button is pressed and the machine is currently in the power save mode If the mac...

Page 31: ...splay the correct media supply information ensure the media type and series panel and the media series panel tray 5 are set correctly If needed refer to page 38 T T T T Media size matrix The media siz...

Page 32: ...dicates one of the printer doors is open Call for service When the machine detects an unrecoverable error that cannot be recovered by a power on reset Turn printer off then on When the machine detects...

Page 33: ...low is displayed when the machine detects the selected media supply is empty The following media information is also displayed Media series window displays the media series Roll or paper The type of m...

Page 34: ...r lamp is lit red 11 When a jam has occurred at the printer media exit area for the folder or stacker the indicator lamp is lit red 12 When a jam has occurred at the printer media exit area for the co...

Page 35: ...r is offline Red When the machine detects an a problem Note The three indicator lamps flash at power up Buttons There are three buttons on the left side of the printer control panel not shown The tabl...

Page 36: ...a type When there is no media inserted at the start of the manual feed copying Press start When the machine detects media inserted in the manual feed tray Manual mode When making copies from the manua...

Page 37: ...media needs to be loaded in the portrait direction The landscape icon is lit when media needs to be loaded in the landscape direction Window Function The window displays the number of copies made Inc...

Page 38: ...age 49 Icon Function Indicates the roll number in the RFC drawer The media supply indicator lamp displays the amount of media on the roll When the roll is empty there are no horizontal lines lit Messa...

Page 39: ...to page 51 Icon Function The 5 icon indicates the cut sheet tray tray 5 The portrait indicator lamp is lit when the feed direction from the cut sheet tray is portrait The landscape indicator lamp is...

Page 40: ...he media series Media type Set the dial to the correct media type When the drawer is closed the RFC panel displays the media type Window Function When the drawer detects media the indicator lights Not...

Page 41: ...g the power on Caution Never switch off the printer or scanner when the printer is in operation Note This procedure is for the printer and scanner only If your system contains the folder or stacker re...

Page 42: ...er 6 Switch the scanner power on Switching the power off WARNING The machine power switch does not break power to the low voltage power supply to remove power from the machine disconnect the power cor...

Page 43: ...Position the ground fault up If the test indicator remains lit call your Xerox Engineering Systems service representative Scanner ground fault In case of a scanner power loss perform the procedure be...

Page 44: ...warm up cycle and the ready to copy message is displayed you may begin copying again The auto power off timer can be set from 1 to 5 hours or the feature can be disabled entirely by entering No minute...

Page 45: ...the lead edge is frayed mend it with tape Document with curl 1 Roll the document in reverse to straighten the curl 2 If the curl cannot be straightened fold the original document once along the line a...

Page 46: ...he cut sheet media flat not on edge Store open media in original wrap and seal Do not expose to moisture or sunlight How to store roll media Store roll media on end Store open media in original wrap a...

Page 47: ...ellum 20 lb Improved erasable vellum Film 4mil Zero solvent accu image film 3mil Aqueous film RFC media size parameters Minimum width 11 inch Maximum width 36 inch 3 in core diameter with 500 ft or 65...

Page 48: ...SO A series Size 36 in 30 in 24 in 18 in 12 in 34 in 30 in 22 in 17 in 11 in 841 mm 594 mm 420 mm 297 mm 210 mm Supports A M A A A A M A A A A A A A A Tray 5 A Supports auto and manual mode M Supports...

Page 49: ...maximum scan length is 49 3 feet 15 m Xerox Engineer Systems guarantees copy quality up to 32 8 feet 10 m Maximum print length The MAX 200 print length can be set up to 62 4 feet 19 m Xerox Engineer S...

Page 50: ...om the R E media cut touch screen When the MAX 200 is in manual mode the media supply levels are displayed on the R E media cut touch screen The media supply icons are located next to the R E media cu...

Page 51: ...essages add media and load media indicated below Perform the following procedure when you need to load roll media into the machine Procedure 1 Pull out the RFC drawer 2 Remove the mandrel and empty ro...

Page 52: ...a clockwise again The media indicator lamp is lit 9 Use the dial on the media type and series panel and set to the correct media series and type 10 Push in the RFC drawer gently back into the machine...

Page 53: ...ocedure 1 Pull out the cut sheet tray 2 Load the media short edge or long edge feed Refer to the media size label in the tray 3 Adjust the guides to the media size Do not force the guides against the...

Page 54: ...the media Use this method when a media jam occurs and the media jam length is very long When the cutter knob is used media is cut at a slight angle Auto cut Procedure 1 Press the offline button on th...

Page 55: ...ed Manual cut Procedure 1 Open the desired RFC drawer 2 Press and release the cutter knob 3 Rotate the cutter knob counterclockwise to cut the media 4 Remove the cut media from the drawer 5 Push the R...

Page 56: ...ter to on Note When the printer is switched off the heater remains on In order to switch the heater off the printer breaker switch must be off Procedure 1 Turn the key and open the printer circuit bre...

Page 57: ...order to switch the humidifier off the printer breaker switch must be off Note The humidifier and the heater can not be activated at the same time Procedure 1 Turn the key and open the printer circuit...

Page 58: ...ries or 9 inch series The Custom Presets feature Document Width sets up the default series the machine recognizes If your machine is set up to recognize the 8 5 inch series all output lengths are base...

Page 59: ...automatically reduced or enlarged per your selection Auto 100 Copy at 100 Cut roll media Standard or synchronize Add remove margins you can add up to 999 mm or remove up to 90 mm margins in 1 mm incr...

Page 60: ...to enable the auto mode synchronized media cut default to enable in Custom Presets For detailed refer to page 192 Procedure 1 Ensure the auto mode indicator lamp is lit If not press the mode select b...

Page 61: ...ositioned correctly If needed refer to page 16 11 When the ready to copy message is displayed insert the document face down along the guide Basic Image Quality Additional Finishing Ready to copy Load...

Page 62: ...25 to 400 0 1 increments are available Cut roll media Standard synchronized long copy or variable length Add remove margins you can add up to 999 mm or remove up to 90 mm margins in 1 mm increments t...

Page 63: ...and one width 100 0 Same as document 4 Select the desired media source roll 1 roll 4 or tray 5 When roll media is selected the paper length adjustment feature is enabled If needed select this button...

Page 64: ...age 95 Selected 01 Ready to copy Load documents face down R E Media Cut Image Density Document Image Type Print Color Bond 100 0 Line Fixed Black Only Black Red Basic Image Quality Additional Finishin...

Page 65: ...the copy quantity 10 Ensure the document exit guide is positioned correctly If needed refer to page 16 11 When the ready to copy message is displayed insert the document face down along the guide Basi...

Page 66: ...eature can be used with manual feed Not available when the E sorter is being used Copies made with the manual feed tray can not be folded Procedure 1 Ensure MAX 200 is in manual mode If needed press t...

Page 67: ...ct the change setup button and go to step 14 b When all your documents have been scanned and there are no required copy feature changes select the done button Continue to the next step 6 Open the manu...

Page 68: ...ton to make copies of your next scanned document Else continue to the next step To make multiple copies of the same document repeat step 9 11 Repeat step 10 until all scanned documents have been copie...

Page 69: ...are complete for the scanned document select the close button and go to step 5 Ready to Copy E Sort Collated Load document face down Change Setup Close Media Standard R E Image B Normal Density R Nor...

Page 70: ...ic feature group screen is displayed 2 Go to the desired selection Media cut mode when in auto mode and synchronized cut mode is enabled go to page 69 R E media cut page 69 Image density page 87 Docum...

Page 71: ...in Custom Presets page 192 Synchronize cuts roll media to the length of the original up to 19 8 feet 6 m long 1 Select media cut mode 2 Select Synchronized 3 If needed you can add up to 999 mm or remo...

Page 72: ...d one for the length and one for the width Refer to page 73 R E calculator The percentage is automatically calculated based on the document and copy size There are two calculators available one for no...

Page 73: ...ation on how to change the default presets refer to page 194 Procedure 1 Select the basic feature group tab If needed refer to page 68 2 Select the R E media cut button on the basic screen The R E med...

Page 74: ...ttons To clear wrong data select the C button on the touch screen Select 0 1 to increase or decrease the percentage in 0 1 increments To cancel the changes and exit from this screen select cancel 5 In...

Page 75: ...increments from 25 to 400 Procedure 1 Select the basic feature group tab If needed refer to page 68 2 Select the R E media cut button on the basic screen The R E media cut screen is displayed 3 Selec...

Page 76: ...r the desired width percent 5 Select Y and enter the desired length percent To cancel the changes and exit from this screen select cancel 6 Insert the document to make copies or select done as require...

Page 77: ...c screen The R E media cut screen is displayed 3 Select normal R E The normal R E screen is displayed 4 Select R E auto calc The R E auto calculate screen is displayed Ready to copy Load documents fac...

Page 78: ...th field 7 Enter the required copy length 8 Select scroll The reduce enlarge field displays the new percentage To cancel the changes and exit from this screen select cancel 9 Insert the document to ma...

Page 79: ...button on the basic screen The R E media cut screen is displayed 3 Select R E by L W The R E by L W screen is displayed 4 Select R E auto calc The R E auto calculate L W screen is displayed 1 2 3 4 5...

Page 80: ...nt 8 Enter the required copy length width 9 Select scroll The calculated percentages are displayed in the document length fields To cancel the changes and exit from this screen select cancel 10 Insert...

Page 81: ...tandard size is 30 x 42 inch Synchronized Cuts roll media to the length of the original up to 19 8 feet 6 m Refer to page 81 For detailed information on how to set the custom presets default for the l...

Page 82: ...t paper length adjustment The paper length adjustment screen is displayed 4 Select standard Ready to copy Load documents face down Selected 01 Paper Length Adjustment Cancel Done Standard Synchronized...

Page 83: ...document to make copies or select done as required to select additional features Synchronized Note The synchronized option can be selected with magnification The width of document does not have to be...

Page 84: ...d paper length adjustment screen is displayed Ready to copy Load documents face down Selected 01 Paper Length Adjustment Cancel Done Standard Synchronized Long Copy Variable Length Landscape Portrait...

Page 85: ...itional features Long copy Procedure 1 Select the basic feature group tab If needed refer to page 68 2 Select the R E media cut button on the basic screen The R E media cut screen is displayed 3 Selec...

Page 86: ...90 mm from the lead or trail edge margin To cancel the changes and exit from this screen select cancel 6 Insert the document to make copies or select done as required to select additional features Rea...

Page 87: ...he paper length adjustment screen is displayed 4 Select variable length The second paper length adjustment screen is displayed Ready to copy Load documents face down Selected 01 Paper Length Adjustmen...

Page 88: ...n keypad and select the C button to clear wrong data To cancel the changes and exit from this screen select cancel 6 Insert the document to make copies or select done as required to select additional...

Page 89: ...Select the image density button on the basic screen The image density screen is displayed 3 Adjust the black and red density levels to meet your specific needs To increase density select the down arro...

Page 90: ...ne picture photo low contrast and dark The machines image quality components are automatically calibrated to ensure proper copy quality Background suppression The background suppression feature allows...

Page 91: ...negatives blueprints sepias diazo 4 Select the desired background suppression If needed select the arrow buttons to further adjust the background suppression level Fixed Select fixed when the backgrou...

Page 92: ...cognizes to be printed in red Refer to the two color procedure on page 91 One color black or red Procedure 1 Select the basic feature group tab If needed refer to page 68 2 Select the print color butt...

Page 93: ...ed To cancel a color selection press the same color button again Multiply colors can be selected Others specify colors other than red blue green yellow and black To cancel the changes and exit from th...

Page 94: ...ocedure to access the image quality feature group screen 1 Select the image quality feature group tab The image quality feature group screen is displayed 2 Go to the desired selection Sharpness page 9...

Page 95: ...eve minimum sharpness Procedure 1 Select the image quality feature group tab If needed refer to page 92 2 Select the sharpness button on the image quality screen The sharpness screen is displayed 3 Se...

Page 96: ...Select the image quality feature group tab If needed refer to page 92 2 Select the scanner sensitivity button on the basic screen The scanner sensitivity screen is displayed 3 Select an arrow button t...

Page 97: ...election button provides the status of each feature Procedure to access the additional feature group screen 1 Select the additional feature group tab The additional feature group screen is displayed 2...

Page 98: ...lect the image location button on the basic screen The image location screen is displayed 3 Select the top or bottom arrow buttons to shift the image up or down If needed select the 100 buttons to shi...

Page 99: ...all edit features The screen below is the editing screen It is displayed when you select the editing button on the additional feature group tab Feature Function Overall editing Allows you to edit the...

Page 100: ...ument to be printed white and white areas to be printed in black or red It is useful when converting old blueprints or negatives Mirror image Prints as the reflection of the original document Color dr...

Page 101: ...ontinued 4 Go to the desired selection Fill page 100 Color drop page 105 Contrast reversal page 104 Mirror image page 105 Ready to copy Load documents face down Selected 01 Overall Cancel Done Color D...

Page 102: ...Select fill type The fill type screen is displayed Ready to copy Load documents face down Selected 01 Fill Cancel Done Off On Fill Type Fill Area Fill Density Texture Normal Color Black Background Nor...

Page 103: ...7 To cancel the changes and exit from this screen select cancel 7 Select done to save the selection The fill screen is displayed 8 Select fill area The fill area screen is displayed Ready to copy Loa...

Page 104: ...ntrast reversal Prints the image areas in white and background areas are printed in the selected fill Solid painting The entire copy is printed in the selected fill To cancel the changes and exit from...

Page 105: ...the normal setting To cancel the changes and exit from this screen select cancel 13 Insert the document to make copies or select done as required to select additional features Ready to copy Load docu...

Page 106: ...white and the background is red Note When red is selected the machine automatically changes the print color to red black To cancel the changes and exit from this screen select cancel 3 Insert the doc...

Page 107: ...t done as required to select additional features Color drop basic Procedure 1 Select color drop 2 The color drop screen is displayed Ready to copy Load documents face down Selected 01 Overall Cancel D...

Page 108: ...selected When others is selected all colors except red blue green yellow and black are deleted To cancel the changes and exit from this screen select cancel 4 Insert the document to make copies or sel...

Page 109: ...when changing colors or brands Xerox Engineering Systems recommends Bic Briteliner pink BC11 PK yellow BC11 YL or blue BC11 BE or equivalent 4 Dots Closed area Inside Outside Inside Outside Trimming m...

Page 110: ...rker editing screen is displayed 4 Select 4 dots area or closed area 5 Select the desired maker color red blue or yellow Ready to copy Load documents face down Selected 01 Editing Cancel Done Off Over...

Page 111: ...Only the area outside the marked area is edited The editing screen is displayed 7 Go to the desired option Trimming masking page 110 Fill page 111 Contrast reversal page 114 Mirror image page 116 Col...

Page 112: ...specify the edit area Note If closed area is selected the marked area on your document must be completely closed The scanner can not recognize an open loop To cancel the changes and exit from this sc...

Page 113: ...reen is displayed 2 Select on 3 Select fill type The fill type screen is displayed Ready to copy Load documents face down Selected 01 Closed Area Cancel Done Color Drop Mirror Image Fill Color Exchang...

Page 114: ...7 To cancel the changes and exit from this screen select cancel 7 Select done to save the selection The fill screen is displayed 8 Select fill area The fill area screen is displayed Ready to copy Load...

Page 115: ...lid painting The entire copy will be the selected fill To cancel the changes and exit from this screen select cancel 10 Select done to save the selection The fill screen is displayed 11 Select fill de...

Page 116: ...make copies or select done as required to select additional features Contrast reversal Procedure The closed area or 4 dots area outside or inside screen is displayed 1 Select contrast reversal The con...

Page 117: ...If red is selected the image is white and the background is red Note When red is selected the machine automatically changes the print color to red black To cancel the changes and exit from this screen...

Page 118: ...required to select additional features Color drop Procedure The closed area inside or outside screen is displayed 1 Select color drop The color drop screen is displayed Ready to copy Load documents f...

Page 119: ...re deleted To cancel the changes and exit from this screen select cancel 3 Mark your document to specify the edit area Note If closed area is selected the marked area on your document must be complete...

Page 120: ...cel the changes and exit from this screen select cancel 3 Mark your document to specify the edit area Note If closed area is selected the marked area on your document must be completely closed The sca...

Page 121: ...masking fill contrast reversal and mirror image Depending on your selection of inside or outside determines the options that are available to you Inside Outside Trimming masking Allows you to trim or...

Page 122: ...the screen shows you how to measure each coordinate 5 Select outside or inside area Inside When selected the printer edits the area outside the marked coordinates Outside When selected the printer edi...

Page 123: ...tside area screen is displayed 6 Go to the desired option Trimming masking page 122 Fill page 123 Contrast reversal page 127 Mirror image page 128 Ready to copy Load documents face down Selected 01 In...

Page 124: ...ask The edit area is deleted and everything else saved To cancel the changes and exit from this screen select cancel 3 Insert the document to make copies or select done as required to select additiona...

Page 125: ...Select fill type The fill type screen is displayed Ready to copy Load documents face down Selected 01 Closed Area Cancel Done Color Drop Mirror Image Fill Color Exchange Trimming Masking Contrast Reve...

Page 126: ...pe 7 To cancel the changes and exit from this screen select cancel 7 Select done to save the selection The fill screen is displayed 8 Select fill area The fill area screen is displayed Ready to copy L...

Page 127: ...ll Solid painting The entire copy is the selected fill To cancel the changes and exit from this screen select cancel 10 Select done to save the selection The fill screen is displayed 11 Select fill de...

Page 128: ...sing the arrow buttons Select normal to return to the normal setting To cancel the changes and exit from this screen select cancel 13 Insert the document to make copies or select done as required to s...

Page 129: ...the image is white and the background is black If red is selected the image is white and the background is red To cancel the changes and exit from this screen select cancel 3 Insert the document to m...

Page 130: ...ror image To cancel the changes and exit from this screen select cancel 2 Insert the document to make copies or select done as required to select additional features Ready to copy Load documents face...

Page 131: ...displays the paper exit selection button instead of the folder button Refer to page 161 Introduction Note Depending on what your machine is equipped with the screen above may have different icons and...

Page 132: ...r up to 40 customers Once your E sorter program is setup in custom presets you can select the E sorter program button to automate your copy jobs For detailed information on how to setup an E sorter pr...

Page 133: ...age 129 2 Select the E sorter button on the finishing screen The E sorter screen is displayed 3 Select off 4 Select done 5 Insert the documents to make copies copies of your documents are output in a...

Page 134: ...anner sheets are fed from tray 5 5 Select the number of desired sets using the numeric keypad Once the first document is fed the number of sets cannot be changed 6 Insert the first document from the d...

Page 135: ...ect close on the change setup screen 9 Insert the next document to be scanned If needed select additional features as required Repeat step 7 for each document The E sorter collated screen is displayed...

Page 136: ...stop copy button or clear all button to stop the operation The remaining sets are delivered Ready to copy E sorter Collated Counted 01 04 E sorter Collated Available Memory Done After loading all docu...

Page 137: ...is displayed 4 Select yes or no for banner sheet inserts Banner sheets are fed from tray 5 5 Enter the E sorter program number using the numeric keypad 6 Insert the first document from the document s...

Page 138: ...at steps 7 to 11 until all documents in the document set are scanned 12 Select done on the E sorter program screen to begin making copies of the remaining documents Enter Program Number of next docume...

Page 139: ...fied for detailed information on how to create the stamp refer to page 234 You may position a stamp anywhere on your copies but patterns may not be larger than 70 mm squared 4900 mm 2 The stamp image...

Page 140: ...lect a stamp pattern print all stamp patterns manually load stamp patterns to memory or delete all stamp patterns in memory Refer to page 139 Numbering This feature creates the numbering stamp You can...

Page 141: ...to page 245 To print all the stored stamp patterns To delete all the stamp patterns from machine memory Procedure 1 Select the finishing feature group tab If needed refer to page 129 2 Select the sta...

Page 142: ...ed Load floppy disk Select load floppy disk All stamp data is loaded to memory Clear memory Select clear memory All stamp data is removed from memory To cancel selection select cancel 6 Select done Th...

Page 143: ...g stamp pattern The numbering stamp may contain a maximum of 12 alphanumeric characters The font used for all characters is 14 point gothic and can not be changed There are two numbering options avail...

Page 144: ...3 Select on 4 Select numbering The numbering screen is displayed 5 Select print 6 Select fixed number 7 Select enter alphanumeric The alphanumeric screen is displayed Select Stamp number from Stamp p...

Page 145: ...the BS button to backspace and to erase unwanted characters To cancel the changes and exit from this screen select cancel 10 Insert the document to make copies or select done as required to select ad...

Page 146: ...ishing screen The stamper screen is displayed 3 Select on 4 Select numbering The numbering screen is displayed 5 Select print 6 Select sequential number 7 Select enter alphanumeric The alphanumeric sc...

Page 147: ...etters or numbers can be entered Note The characters entered are printed to the left of the sequential number 10 Select done The alphanumeric keypad screen is displayed Ready to Copy E sort Collated L...

Page 148: ...ter the beginning number for the last 4 digits If no change is made the sequential number begins with 0001 12 Insert documents to make copies or select done as required to select additional features R...

Page 149: ...nual method allows you to set up the location and orientation of the stamp pattern on your copies Option Function Manual The operator selects the start position of the stamp pattern with X and Y coord...

Page 150: ...layed 5 Select the desired stamp orientation normal 90 0 180 0 or 270 0 When the stamp image is scanned normally portrait the scanned position becomes the default for normal When 90 0 180 0 or 270 0 i...

Page 151: ...he X coordinate Measure from the left edge of the paper to the left side of the desired stamp pattern location 8 Use the numeric keypad to enter the dimension The range is 0 999 mm Cancel Done Stamp L...

Page 152: ...f the paper to the top of the desired stamp pattern location 11 Use the numeric keypad to enter the dimension The range is 0 999 mm 12 Insert the document to make copies or select done as required to...

Page 153: ...ouch screen Procedure 1 Select the finishing feature group tab If needed refer to page 129 2 Select the stamper button on the finishing screen The stamper screen is displayed 3 Select on 4 Select stam...

Page 154: ...set in custom presets is highlighted The stamp location and orientation are the same preset values in custom presets page 198 6 Insert the document to make copies or select done as required to select...

Page 155: ...mp pattern In order to include the date stamp to a stamp pattern the stamp pattern must be stored on to a floppy disk or in machine memory The date stamp font is 14 point gothic and can not be changed...

Page 156: ...n select cancel on the touch screen Procedure 1 Select the finishing feature group tab If needed refer to page 129 2 Select the stamper button on the finishing screen The stamper screen is displayed 3...

Page 157: ...date is used 7 Select the desired format M D Y Month day year D M Y Day month year Y M D Year month day 8 Insert the document to make copies or select done as required to select additional features R...

Page 158: ...n is displayed 3 Select on 4 Select date stamp The date stamp screen is displayed 5 Select print 6 Select the desired format M D Y Month day year D M Y Day month year Y M D Year month day Select Stamp...

Page 159: ...the clear button on the scanner control panel to clear wrong data 9 Insert the document to make copies or select done as required to select additional features Ready to Copy Load documents face down...

Page 160: ...ton on the finishing screen The stamper screen is displayed 3 Select on 4 Select stamp color The stamp color screen is displayed 5 Select red or black 6 Select done to return to the stamper screen Sel...

Page 161: ...pecial fold at the folder but the above screen displays P1 fan fold P2 cross fold and P3 special fold Ensue to power off and power on the folder after changing any of the folds other than what is disp...

Page 162: ...r output media is punch tab or reinforced media First fold only This feature performs the first fold only first fold is perpendicular to media travel All copies exit the front of the printer To cancel...

Page 163: ...utput tray top of printer Side Media exits from the printer side Procedure 1 Select the finishing feature group tab If needed refer to page 129 The finishing screen is displayed 2 To change the paper...

Page 164: ...ea to keep a catalog of your stored jobs and their feature settings There are two logs and the end of this chapter Stored jobs log and Job feature log Note Job numbers 79 and 80 have been setup to pro...

Page 165: ...ttings If desired press the review button For detailed information on how to use the review button refer to page 25 If delete is selected a confirmation screen is displayed Select yes to delete If sto...

Page 166: ...164 Stored jobs Store jobs log Job number Stored job description Notes miscellaneous information...

Page 167: ...ssion Off Fixed Maximum Normal Minimum Variable Maximum Normal Minimum Print color Black Red Black red Sharpness Maximum Normal Minimum Scan color Red Green Other _______ Blue Yellow Black Red Blue Gr...

Page 168: ...m Y ____ mm Numbering Print No print Fixed Sequential Date stamp Print No print Current Variable Folder connected Off Collation with banner sheet Yes No Program Number________ P1____________ P2_______...

Page 169: ...access the defaults If desired you can change any of these defaults to meet your specific needs The custom presets screen contains three feature groups system copy and storage disk manager The follow...

Page 170: ...10 20 30 minutes After the preset time has elapsed the machine automatically returns to the custom presets default settings After the preset time has elapsed the touch screen backlight will turn off A...

Page 171: ...s up the default fold for plot mode this feature is not used with some plotter software Options P1 no fold P2 P3 Loading stamp data page 190 Sets the default for stamp data to be loaded manually or au...

Page 172: ...n 0 mm 0 mm Max 841 mm 1189 mm 5 mm 10 mm Direction options Normal 90 o 180 o 270 o rotated D portrait Location options Min 0 mm 0 mm Max 594 mm 841 mm 5 mm 10 mm Direction options Normal 90 o 180 o 2...

Page 173: ...dia source default for manual mode Media cut mode and document orientation page 214 Sets up the media cut default for auto and manual mode Media cut Options Standard for auto or manual mode Synchroniz...

Page 174: ...he image density levels for black and red Black Options 9 levels Normal Red Options 9 levels Normal Document image type page 224 Sets the default document image type Options Line Line Picture Picture...

Page 175: ...uto mode document feed direction default Code 20 Options Landscape 1 portrait 0 Identifying the storage disk manager features This section provides a identifies the custom presets storage disk manager...

Page 176: ...defaults to meet your specific needs Procedure 1 Press the press to open latch lift up the scanner control panel cover 2 If the machine is in plot mode enter the copy mode Else continue to the next s...

Page 177: ...ture using the arrow buttons 6 Select open 7 Go to the desired selection System features page 176 Copy features page 194 Storage disk manager page 233 Press Custom Presets to return to Previous screen...

Page 178: ...played 5 Select scroll to move to different fields Use the numeric keypad to enter the data 6 Select done to store your changes and exit from this screen To cancel the changes and exit from this scree...

Page 179: ...pen The auto power off screen is displayed 5 Select the desired default time No 1 5 hours 6 Select done to store your changes and exit from this screen To cancel the changes and exit from this screen...

Page 180: ...er save screen is displayed 5 Select the desired time No 1 30 minutes 6 Select done to store your changes and exit from this screen To cancel the changes and exit from this screen select cancel 7 To e...

Page 181: ...after a job is complete You set the default time period If both auto clear and backlight are set to yes then each feature occurs at the same time Procedure 1 Enter custom presets If needed refer to pa...

Page 182: ...to the next step 6 Select the desired backlight option yes or no 7 Select done to store your changes and exit from this screen To cancel the changes and exit from this screen select cancel 8 To exit p...

Page 183: ...he document width screen is displayed 5 Select 8 5 inch or 9 inch 6 Select done to store your changes and exit from this screen To cancel the changes and exit from this screen select cancel 7 To exit...

Page 184: ...machine beeps once when a button is pressed Alarm When an unavailable button is pressed the machine beeps twice Ready to copy When the warm up cycle is complete the machine beeps 6 Select done to sto...

Page 185: ...ay it takes from plot mode to copy mode Refer to page 185 Folder Sets up the fold default for plot mode Refer to page 187 Set default time to plot Procedure 1 Enter custom presets If needed refer to p...

Page 186: ...e to store your changes and to exit from the current screen To cancel the changes and exit from this screen select cancel 8 To exit press the custom presets button 10 seconds Set Default Time to Plot...

Page 187: ...ect open The plotter setup screen is displayed 5 Select set delay time to copy The set delay time to copy screen is displayed Press Custom Presets to return to Previous screen System features Copy fea...

Page 188: ...sired time default 30 seconds 1 3 5 7 10 minutes 7 Select done to store your changes and exit from this screen To cancel the changes and exit from this screen select cancel 8 To exit press the custom...

Page 189: ...or plot mode There are three fold options available P1 P2 and P3 You can also select no fold this option is usually for systems with a stacker Procedure 1 Enter custom presets If needed refer to page...

Page 190: ...duces copies folded to A size but all panels may not be equal in size With fan fold you can add a binding margin Cross fold Produces copies folded in A size with all panels of equal size You can not a...

Page 191: ...einforce Select if your output media is punch tab or reinforced First fold only This feature performs the first fold only for fan or cross fold first fold is perpendicular to media travel All copies e...

Page 192: ...en set to manual the machine allows you to load the stamp data from the stamp pattern screen Procedure 1 Enter custom presets If needed refer to page 174 2 Select the system features tab 3 Use the arr...

Page 193: ...drive at power on Manual load Stamps are loaded from the stamp pattern screen 6 Select done to store your changes and exit from this screen To cancel the changes and exit from this screen select cance...

Page 194: ...Trail edge starting point of stamp location code 110 Enable synchronize cut in auto mode code 200 Default cut mode for auto mode when manual mode cut default is set to long copy code 210 For detailed...

Page 195: ...roll to move to the new field The current value is displayed in the current field 7 Enter the value in the new field using the numeric keypad service supplies code or it is listed on page 169 The new...

Page 196: ...y features tab 3 Use the arrow buttons to select the reduce enlarge presets feature 4 Select open The reduce enlarge presets screen is displayed Press Custom Presets to return to Previous screen Reduc...

Page 197: ...0 1 increments may be entered The new value is displayed in the window 6 Select done to store your changes and exit from this screen To cancel the changes and exit from this screen select cancel 7 To...

Page 198: ...nter custom presets If needed refer to page 174 2 Select the copy features tab 3 Use the arrow buttons to select the media type and width for auto mode feature 4 Select open The media type and width f...

Page 199: ...specify the media type select not selected 7 Repeat steps 5 and 6 for other sizes Else continue 8 Select done to store your changes and exit from this screen To cancel the changes and exit from this...

Page 200: ...Stamp orientation Normal 270 o Sets up the auto stamp orientation for the auto option on page 151 Procedure 1 Enter custom presets If needed refer to page 174 2 Select the copy features tab 3 Use the...

Page 201: ...0 or 270 0 is selected the stamp is rotated 90 0 180 0 or 270 0 from the default 8 Select enter x coordinate you are setting up the x coordinate of the stamp location Enter the desired dimension usin...

Page 202: ...eypad Measure from the lead edge of the paper to the top of the stamp location or refer to additional setting code 110 on page 173 10 Select done to store your changes and exit from this screen To can...

Page 203: ...uttons to select the date stamp format feature 4 Select open The date stamp format screen is displayed 5 Select the desired year format yyyy yy yy Press Custom Presets to return to Previous screen Red...

Page 204: ...n If off is selected the zero suppress option removes the month and day zeros Example The date stamp would read 2000 3 14 8 Select the desired symbol The selected symbol is printed between the year da...

Page 205: ...05 To setup the fold default for copy mode refer to page 159 To setup the fold default for plot mode refer to page 187 To go directly to the folder setup procedure go to page 205 Folder terminology Fa...

Page 206: ...s through the printer Finishing This feature is available when the fold can be altered by 5mm bigger or smaller Output processing This feature is available when your folder can do special stacking aft...

Page 207: ...tures tab 3 Use the arrow buttons to select the folder feature 4 Select open The folder setup screen is displayed Note To cancel the changes and exit from the screen select cancel Press Custom Presets...

Page 208: ...ve screen displays P1 fan fold P2 cross fold and P3 special fold Ensue to power off and power on the folder after changing any of the folds other than what is displayed on the above touch screen P1 As...

Page 209: ...lect the desired finished size Bigger Increases the folded width by 5 mm Standard Folded width for A series is 216 mm B series is 229 mm Smaller Decreases the folded width by 5 mm 8 Select done The fo...

Page 210: ...9 If available and desired select output processing If not available continue to step 12 The output processing is displayed 10 Select the desired option 11 Select done The fold program screen is displ...

Page 211: ...rgin screen is displayed 13 If available and desired select desired margin 14 Select on or off to set the binding margin default 15 Select done The fold program screen is displayed Finished Size Outpu...

Page 212: ...to step 19 The punch tab reinforce screen is displayed 17 Select no holes or add holes 18 Select done 19 Select done to return to the fold setup screen The folder setup screen is displayed Finished S...

Page 213: ...P1 P2 or P3 Repeat steps 5 16 Else continue 21 Select done to save the MAX 200 fold parameters for each program and exit from this screen 22 To exit press the custom presets button P1 P2 P3 Cancel Don...

Page 214: ...3 Use the arrow buttons to select the auto manual feature 4 Select open The auto manual mode screen is displayed Press Custom Presets to return to Previous screen Reduce Enlarge Presets Media Type an...

Page 215: ...he machine If manual is selected also select the media source default tray for manual 6 Select done to store your changes and exit from this screen To cancel the changes and exit from this screen sele...

Page 216: ...refer to page 174 2 Select the copy features tab 3 Use the arrow buttons to select the media cut mode and document orientation feature 4 Select open The media cut mode and document orientation screen...

Page 217: ...age 169 Long copy for manual mode only to set auto mode to synchronize or standard you must set code 210 refer to page 169 Variable length for manual mode only to set auto mode to synchronize or stand...

Page 218: ...e 174 2 Select the copy features tab 3 Use the arrow buttons to select the lead trail edge default for synchronize feature 4 Select open The lead trail edge default for synchronize screen is displayed...

Page 219: ...ton to clear wrong data A margin value can be set in 1 mm increments from 90 mm to 999 mm A minus margin value cuts the copy media shorter than the document 6 Select done to store your changes and exi...

Page 220: ...Procedure 1 Enter custom presets If needed refer to page 174 2 Select the copy features tab 3 Use the arrow buttons to select the variable length default feature 4 Select open The variable length defa...

Page 221: ...ected roll range is 210 mm 4161 mm Use the numeric keypad to enter dimension 7 If needed repeat step 5 and 6 for other rolls Else continue 8 Select done to store your changes and exit from this screen...

Page 222: ...d refer to page 174 2 Select the copy features tab 3 Use the arrow buttons to select the background suppression level default feature 4 Select open The background suppression level default screen is d...

Page 223: ...ult 2 is selected go to step 7 6 Adjust the variable and fixed default levels using the arrow buttons When complete go to step 8 Background Suppression Level default Custom Presets Document Image Type...

Page 224: ...t the fixed default level using the arrow buttons 8 Select done to store your changes and exit from the default screen To cancel the changes and exit from the default screen select cancel 9 To exit fr...

Page 225: ...e the arrow buttons to set the default image density for black and red 6 Select done to store your changes and exit from this screen To cancel the changes and exit from this screen select cancel 7 To...

Page 226: ...feature 4 Select open The document image type screen is displayed 5 Select the desired document image type default line line picture picture photo low contrast or dark contrast 6 Select done to store...

Page 227: ...selected Others specify colors other than red blue green yellow and achromatic colors 6 Select done to store your changes and exit from this screen To cancel the changes and exit from this screen sele...

Page 228: ...o recognize a color Procedure 1 Enter custom presets If needed refer to page 174 2 Select the copy features tab 3 Use the arrow buttons to select the color recognition range feature 4 Select open The...

Page 229: ...beginning point of the recognition range Use the right arrow buttons to specify the end point of the recognition range Select the reset to return to the default settings To cancel the changes and exi...

Page 230: ...Example Current red marker color range 50 70 New red marker color range 0 70 Problem Lets imagine the red edit marker that you are using is not being recognized Look at the current red marker setting...

Page 231: ...sets If needed refer to page 174 2 Select the copy features tab 3 Use the arrow buttons to select the marker area recognition feature 4 Select open The marker area recognition screen is displayed Pres...

Page 232: ...MRKR include line Machine recognizes inside the marker line and includes the marker line 6 Select the desired marker color default red blue or yellow 7 Select done to store your changes and exit from...

Page 233: ...odes are Auto mode documentation feed direction default code 20 For detailed information on the identified codes refer to page 173 Procedure 1 Enter custom presets If needed refer to page 174 2 Select...

Page 234: ...roll to move to the new field The current value is displayed in the current field 7 Enter the value in the new field using the numeric keypad service supplies code or it is listed on page 173 The new...

Page 235: ...s you to setup the stamp image parameters and then create and store the stamp pattern The stamp creation deletion feature also allows you to delete a specific stamp pattern Once you setup the stamp pa...

Page 236: ...nce the image is stored it is referred to as the stamp pattern The example at the far left corner has combined a scanned image the X the date stamp 9 16 95 and the numbering stamp PRELIMINARY The dott...

Page 237: ...ments are used by the scanner to create the stamp Note If you are going to include the date stamp and or the numbering stamp ensure to include enough room for these features The first set of measureme...

Page 238: ...Y coordinates X3 The distance from the left edge of the stamp pattern to the left edge of the date Y3 The distance from the top of the stamp pattern to the top of the date Fourth set of measurements...

Page 239: ...disk to save the stamp pattern you have created If needed refer to the format procedure on page 245 Procedure 1 Enter custom presets If needed refer to page 174 2 Select the storage disk manager tab...

Page 240: ...position dimensions sets the width and height of the stamp pattern Note All stamp patterns can not exceed 70 mm squared 4900 mm 2 8 If needed enter the X3 and Y3 position of date dimensions sets the p...

Page 241: ...an 4900 mm 2 X2 Y2 you can reduce the size by changing the X2 Y2 measurements or select the scanning setup option and reduce the image size The scanning setup screen is displayed Done Setting for R E...

Page 242: ...when you want to disable the background suppression option If image density is selected use the arrow buttons to adjust the black and red density levels If the R E for stamp size is needed select the...

Page 243: ...floppy You can store up to 40 stamp patterns Before the stamp is stored a confirm screen is displayed Select confirm The stamp creation deletion screen is displayed 15 To exit from the stamp creation...

Page 244: ...ed refer to page 174 2 Select the storage disk manager tab 3 Use the arrow buttons to select the stamp creation deletion feature 4 Select open The stamp creation deletion screen is displayed Press Cus...

Page 245: ...you want to delete Only raised buttons are available for deletion An overlay screen is displayed 7 Select yes to delete no to cancel deletion If yes is selected a confirm screen is displayed Select co...

Page 246: ...lete the stamps you no longer need 9 Select close when you are done The stamp creation deletion screen is displayed 10 Select close to exit the screen 11 To exit custom presets press the custom preset...

Page 247: ...nly Custom presets feature Function Format Select to format the floppy disk for MAX 200 Refer to page 245 Duplication Select to create a stamp pattern back up disk Refer to page 247 Format Procedure 1...

Page 248: ...format disk The format disk for screen is displayed 6 Ensure a floppy disk is loaded into the disk drive 7 Select start The disk is formatted 8 Select confirm to return to the disk manager screen 9 S...

Page 249: ...er to page 174 2 Select the storage disk manager tab 3 Use the arrow buttons to select the disk manager format duplication feature 4 Select open The disk manager format duplication screen is displayed...

Page 250: ...tart When complete remove the source disk from the floppy drive 8 Load a MAX 200 formatted destination disk into the disk drive If needed refer to page 245 9 Select start 10 When the duplication proce...

Page 251: ...to each customer The chart below is setup for program number 1 As you can see this is a convenient tool for users to automate the copy function for jobs that have a complex distribution list Program 1...

Page 252: ...to page 174 2 Select the storage disk manager tab 3 Use the arrow buttons to select the E sorter program settings feature 4 Select open The E sorter program settings screen is displayed Press Custom P...

Page 253: ...change a specific E sorter program that is already stored Delete Select to delete an entire E sorter program 6 Select a program number Available numbers are shown raised 7 Refer to the selected optio...

Page 254: ...12 The store screen is displayed 10 Use the numeric keypad to enter the stored job number the screen above displays stored job number 7 Only the following settings are transferred to the program auto...

Page 255: ...Select close to exit this screen 14 To exit custom presets press the custom presets button Select Customer Number using arrow keys Enter number of copies using numeric Store 5 Cancel Done Stored Job...

Page 256: ...tity of 2 9 To assign or change the stored job number setting to this program select stored job no Use the numeric keypad and enter the stored job number To exit the store job screen select done Else...

Page 257: ...ettings screen is displayed 9 Select close to exit from this screen 10 To exit press the custom presets button E sorter Programme Settings Close Store Change Delete 20 15 10 5 19 14 9 4 18 13 8 3 17 1...

Page 258: ...ner or solvents on the scanner platen glass Procedure 1 Lift up on the release lever to open the scanner cover 2 Clean the platen glass and roller with a soft clean cloth dampened with water or glass...

Page 259: ...There are no indicators or messages displayed on the scanner control panel Ensure that the circuit breaker is switched on Call for electrical assistance to ensure power is at the scanner or printer c...

Page 260: ...e quality selections are appropriate for the documents being copied If the media is moist replace it Copies are wrinkled If the media is moist load fresh media Media jams repeatedly Check for jammed o...

Page 261: ...occurs the scanner stops feeding the document and a error message is displayed The copy in progress will be fed out to the output tray Procedure 1 Document jam message is displayed 2 Lift the release...

Page 262: ...nto memory and the jammed copies are remade once the jam is cleared Procedure 1 Document jam message is displayed 2 The printer diagram indicates the media jam area 3 Go to the appropriate media jam p...

Page 263: ...all the RFC drawers 1 Pull out the RFC drawer 2 Ensure each roll is not folded or torn If needed cut it with a scissors or manual cutter page 53 3 Rotate the media roll toward the back of the RFC draw...

Page 264: ...is lit there is a problem in the cut sheet tray Procedure 1 Pull out the cut sheet paper tray 2 If applicable remove any jammed paper 3 Remove the media stack 4 Reload the cut sheet media into the tr...

Page 265: ...the RFC drawer 2 and the xerographic area of the machine Procedure 1 If indicator lamp 6 is lit open the RFC drawer 1 cover or if indicator lamp 7 is lit open the RFC drawer 2 2 Remove the media jam...

Page 266: ...d xerographic area Procedure 1 Carefully pull out any cut sheet media on the manual feed tray If there is no media on the tray go to the next step 2 If no paper is visible open the front door of the p...

Page 267: ...dia try not to tear the media 5 Remove the media jam 6 Push to unlock the stopper 7 Close the upper area of the printer If needed push down on the center of the manual feed tray Caution To avoid hitti...

Page 268: ...e printer 2 Rotate the latch handle counterclockwise to open the upper area of the printer 3 Raise the upper area of the printer until the stopper is latched Caution When removing media try not to tea...

Page 269: ...mp 9 continued 5 Push to unlock the stopper 6 Close the upper area of the printer If needed push down on the center of the manual feed tray Caution To avoid hitting the tray ensure the tray is in the...

Page 270: ...printer Note If the open light is off or blinking the latch handle can not open the upper area of the printer 4 Lift the upper area of the printer until the stopper is latched Warning The fuser area...

Page 271: ...t stops 8 Push the stopper to unlock 9 Close the upper area of the printer If needed push down on the center of the manual feed tray Caution To avoid hitting the tray ensure the tray is in the closed...

Page 272: ...a Procedure 1 Open the printer left doors Warning The area inside the left doors of the printer reaches high temperatures Take care when removing a media jam in this area 2 Remove the media jam Cautio...

Page 273: ...played Procedure 1 Open the printer front door 2 Rotate the toner cartridge counterclockwise until it stops The toner cartridge may be difficult to turn The toner cartridge lid is closed automatically...

Page 274: ...272 Problem solving Replacing the toner cartridge continued 6 Rotate the toner cartridge clockwise until it stops Make sure that both arrow symbols are aligned 7 Close the printer front door...

Page 275: ...user area is extremely hot Never touch areas other than the handle when clearing a media jam 2 Rotate the fuser handle counterclockwise and gently pull the fuser out Warning Sharp fuser parts are labe...

Page 276: ...ng service the machine serial number is required you can access the serial number by selecting the meter check feature For detailed information on how to obtain the serial number refer to page 24 The...

Page 277: ...he plotter software refer to the plotter software user guide Procedure 1 Select the scanning mode from the host workstation 2 After a short wait the scanner interface screen is displayed 3 Insert the...

Page 278: ...ode the MAX 200 must be in copy mode For detailed information on how to enter copy mode refer to page 277 Custom presets has three plotter setup features they are Feature Function Set default time to...

Page 279: ...r enter custom presets the machine must be in copy mode Use the procedure in this section to enter copy mode from plot mode Procedure 1 Select copy mode The basic feature group screen is displayed Cop...

Page 280: ...cifications Physical characteristics Printer Height 54 inches Width 37 inches Depth 64 inches Weight 1807 lb Maximum elevation 0 6560 feet Floor space requirements Back Front Width Height Depth Printe...

Page 281: ...ight 574 6 lb Floor space requirements Back Front System requirements Height clearance 96 inches from floor to nearest overhead obstruction within the floor space requirements Moveably Requires a serv...

Page 282: ...range Relative humidity 15 to 85 Temperature 50 0 F to 90 0 F Heat output Running 11 068 BTU hr Standby 2700 BTU hr Audible noise scanner and printer Running 49 5 db A or less Standby 64 db A continuo...

Page 283: ...in multiple prints Skew Maximum of 1 5 mm per 200 mm length Lead edge deletion Roll media outside diameter of 100 mm or greater 5 mm Roll media outside diameter of less than 100 mm 5 mm Cut sheet 5 m...

Page 284: ...ety data sheet MSDS information United States 1 800 828 6571 Other countries Please call your regional Xerox Engineering Systems office For more information visit the Xerox environment web site at htt...

Reviews: