86
A Appendix
6.
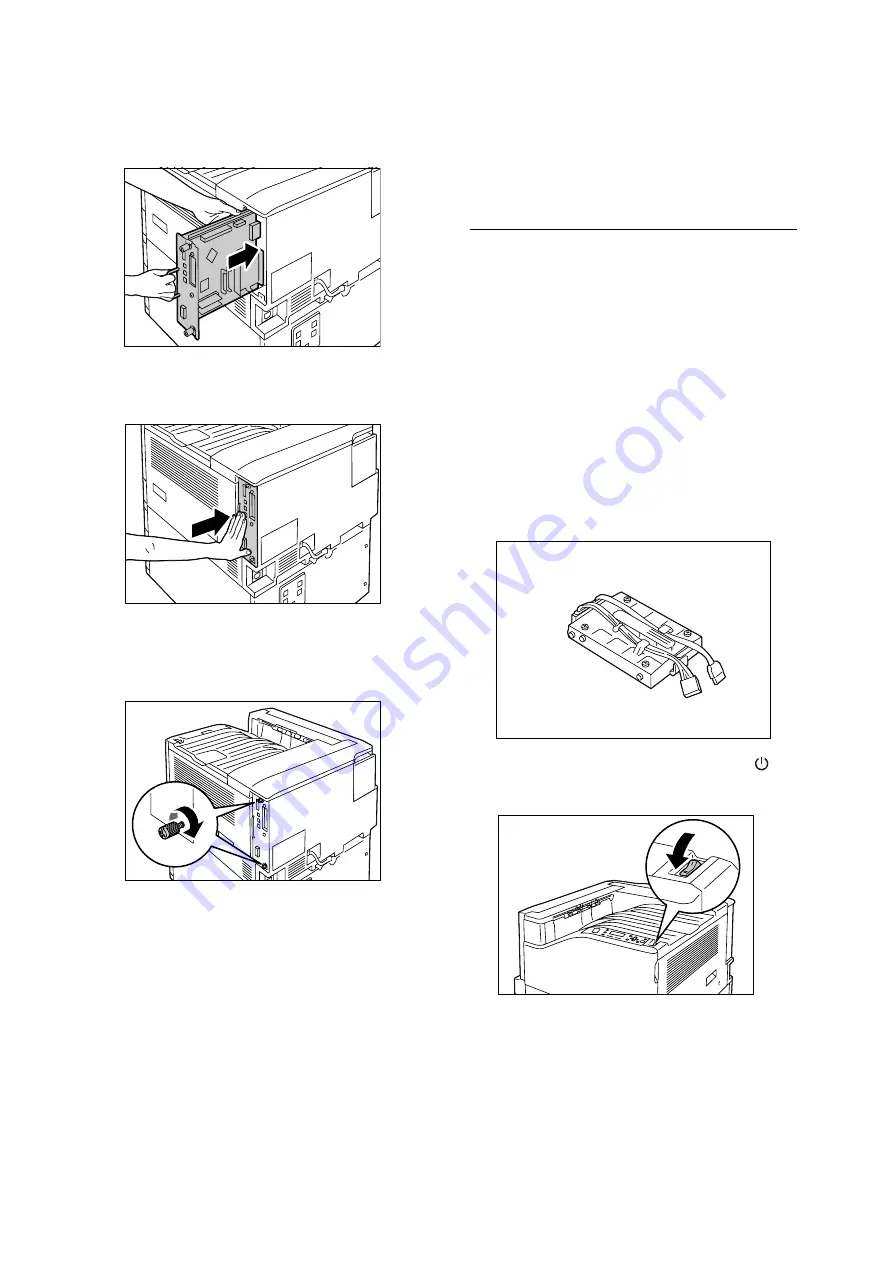
Reinsert the control board back into the
printer. Holding its handle, slide the control
board back into the printer.
Press the control board in as far as it will go.
7.
Tighten the two screws to secure the control
board in place.
8.
Connect the power cord to the printer.
Press the <|> side of the printer's power
switch to turn on the power.
9.
Print the [Configuration Report] and confirm
that the [Total Size] value of the [Memory]
item in the [Print Service Settings] section is
correct.
Refer to
• List printing procedure: “Printing a Report/List” (P. 36)
The installation is now complete.
Note
• After installing additional memory, use the properties
dialog box of the print driver to change the printer
configuration. For details, refer to the online help for the
print driver.
Installing the Hard Disk
The hard disk must be installed in any of the
following instances.
• To enable the following features
Sample Set, Secure Print, E-mail Print, Private
Charge Print, Delayed Print, Font Downloading,
SMB folder, Feature Enhance Kit, IEEE802.1x
authentication, IPsec certificate
• To enhance the following installed features
Number of forms that can be registered,
electronic sort feature performance, spool
capacity, number of log entries
This section describes how to install the hard disk
on the printer.
1.
Switch the power off by pressing the < >
side of the power switch.
2.
Unplug the power cord from the power outlet
and the printer.
Hard disk
Summary of Contents for DocuPrint C2255
Page 1: ...DocuPrint C2255 Quick Reference Guide...
Page 106: ......


