All information, illustrations and specifications in this manual are based on the latest information
available at the time of publication. We reserve the right to make changes at any time without notice.
34
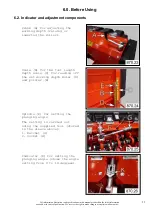
6.0. Before Using
6.5. Adjusting the angular position
5.
Attach a ratchet (C) with a
matching socket (D) to the
spindle (E).
Adjust by turning:
clockwise for 0 to 18
counterclockwise for 18 to 0
6.
The setting can be read off
on the indicator (F)
7.
We recommend the following
angles:
for
hollow tines position 0
for
solid tines position 6-12
Position 0
Position 6
Position 12
Position 18
8.
The final position of the
spindle (E) depends on the
flap (B), which is pivoted
up to fix the setting in
place.
9.
Secure the folding plug (A)
to the spindle (E).


