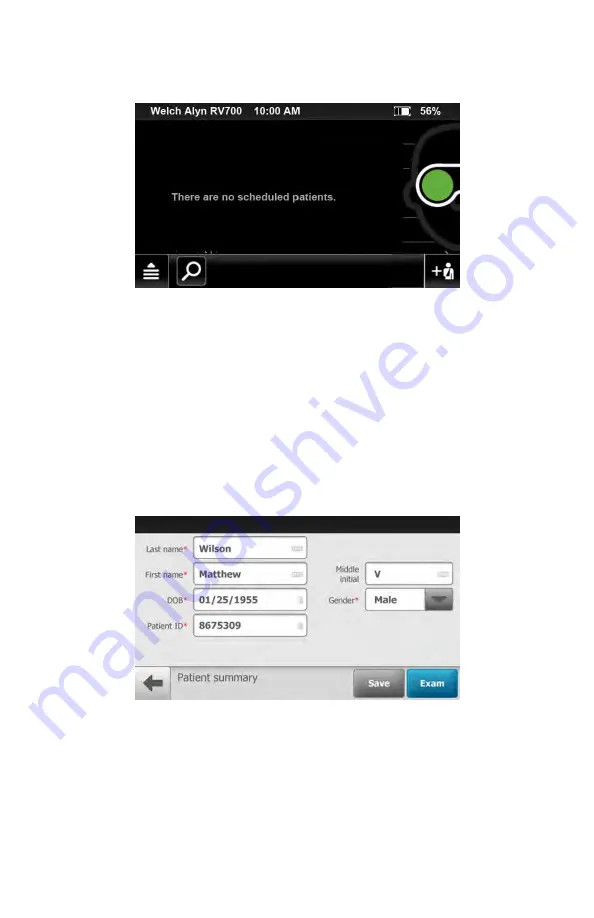
2. The
Patient summary
screen appears. Required fields are noted with a red
asterisk.
3. Touch within the patient's last name or first name field to launch the on-
screen keyboard. Enter the patient's last name and first name. (Middle initial is
optional.)
4. Enter the patient's DOB (Date of Birth). (Touch within the DOB field to launch
the on-screen keyboard and to enter the patient's Date of Birth.)
5. Enter the patient's gender using the drop-down menu to select Male, Female,
Unknown, or Other.
6. Enter the patient's ID.
7. Once all the required fields are complete, touch
Exam
to open a new exam.
The
Pre-acquisition
screen appears.
62 Using the RetinaVue 700 Imager
Welch Allyn RetinaVue™ 700 Imager
Summary of Contents for RetinaVue 700
Page 1: ...Welch Allyn RetinaVue 700 Imager Directions for use Software version 1 XX...
Page 21: ...Directions for use First time set up of the RetinaVue 700 Imager 17...
Page 26: ...22 First time set up of the RetinaVue 700 Imager Welch Allyn RetinaVue 700 Imager...
Page 102: ...98 Using the RetinaVue 700 Imager Welch Allyn RetinaVue 700 Imager...
Page 120: ...116 Controls Welch Allyn RetinaVue 700 Imager...
Page 140: ...136 Device radio Welch Allyn RetinaVue 700 Imager...
Page 152: ...148 General compliance and standards Welch Allyn RetinaVue 700 Imager...
Page 156: ...152 RetinaVue 700 Imager Accessories Welch Allyn RetinaVue 700 Imager...
Page 158: ...Material No 729216...


