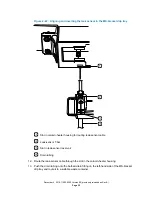
Figure 2–9: Detaching the column heater from its rear enclosure
Column heater
Rear enclosure
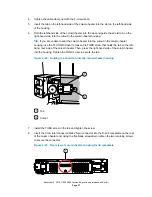
14. Using the flat-blade screwdriver, loosen the two retaining screws, and then remove the CH-
A interconnect cable's 25-pin connector from the D-sub receptacle on the rear of the
column heater.
Figure 2–10: Rear view of column heater showing D-sub receptacle
D-sub receptacle on rear of column heater
15. Coil the interconnect cable inside the CH-A rear enclosure and set the column heater
aside.
16. Examine the front, left-hand foot of the CH-A rear enclosure to ensure that the foot rests in
the CH-A–to–SM retainer bracket installed on the sample manager's top cover.
December 4, 2019, 715005052 Version 02 (previously released as Rev.B)
Page 26


