


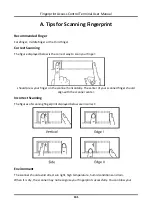

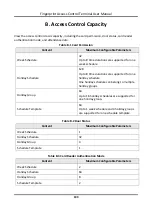

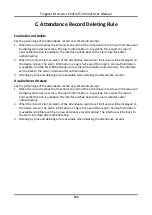
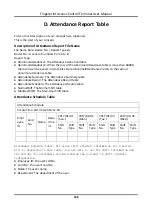


Fingerprint Access Control Terminal User Manual
125
9.9 Network Center Parameters Settings
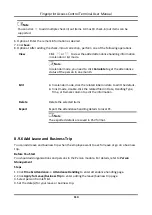
You can set the notify surveillance center, center's IP address, the port No., the protocol (EHome),
the EHome account user name,etc. to transmit data via EHome protocol.
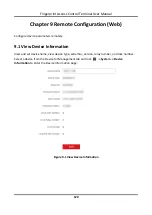
On the Device for Management page, click
Remote Configuration
→
Network
→
Network Center
Parameters
to enter the Network Center Parameters Settings tab.
Select a center from the drop-down list.
After enabling the function, you can set the center's address type, IP address/domain name, and
port No., create EHome user name, etc.
Note
If set the EHome type as EHome5.0, you should create an EHome key as well.
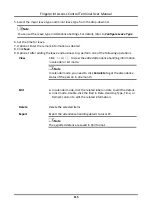
Click
Save
.
After creating the EHome information, you can add the device via EHome protocol.
9.10 Configure Wi-Fi
Steps
1. On the Device for Management page, click
→
Network
→
Wi-Fi
to enter the
Wi-Fi Settings
tab.
2. Check
Enable
to enable the Wi-Fi function.
3. Enter the SSID name and password or you can select a network from the Wi-Fi list.
4. Set the Wi-Fi
Security Mode
from the drop-down list.
5. Optional: Click
Refresh
to refresh the network status.
6. Optional: Set WLAN parameters.
1) On the
Wi-Fi Settings
page, click
WLAN
to enter the
WLAN
page.
2) Uncheck
DHCP
and set the IP address, the subnet mask, the default gateway, the MAC
address, the DNS1 IP Address, and the DNS2 IP address.
7. Click
Save
.
9.11 Set Relay Parameters
Click
Maintenance and Management
→
Device
to enter the device list.
Click
to enter the remote configuration page.
Click
Alarm
→
Relay
. Select a relay and click
and set the relay name and output delay time.
Summary of Contents for VIS-3013
Page 2: ......
Page 21: ...Fingerprint Access Control Terminal User Manual 7 Figure 4 1 Terminal Diagram...
Page 156: ......


