31
7. Select the type of directory to be either
LDAP
or
Active Directory
based on the LDAP server
configuration on your network.
If LDAP directory type is selected, Bind Requires DN checkbox under Advanced settings will be
enabled (or) if Active Directory is selected, Bind Requires DN checkbox under Advanced
settings will be disabled.
8. Click
Advanced
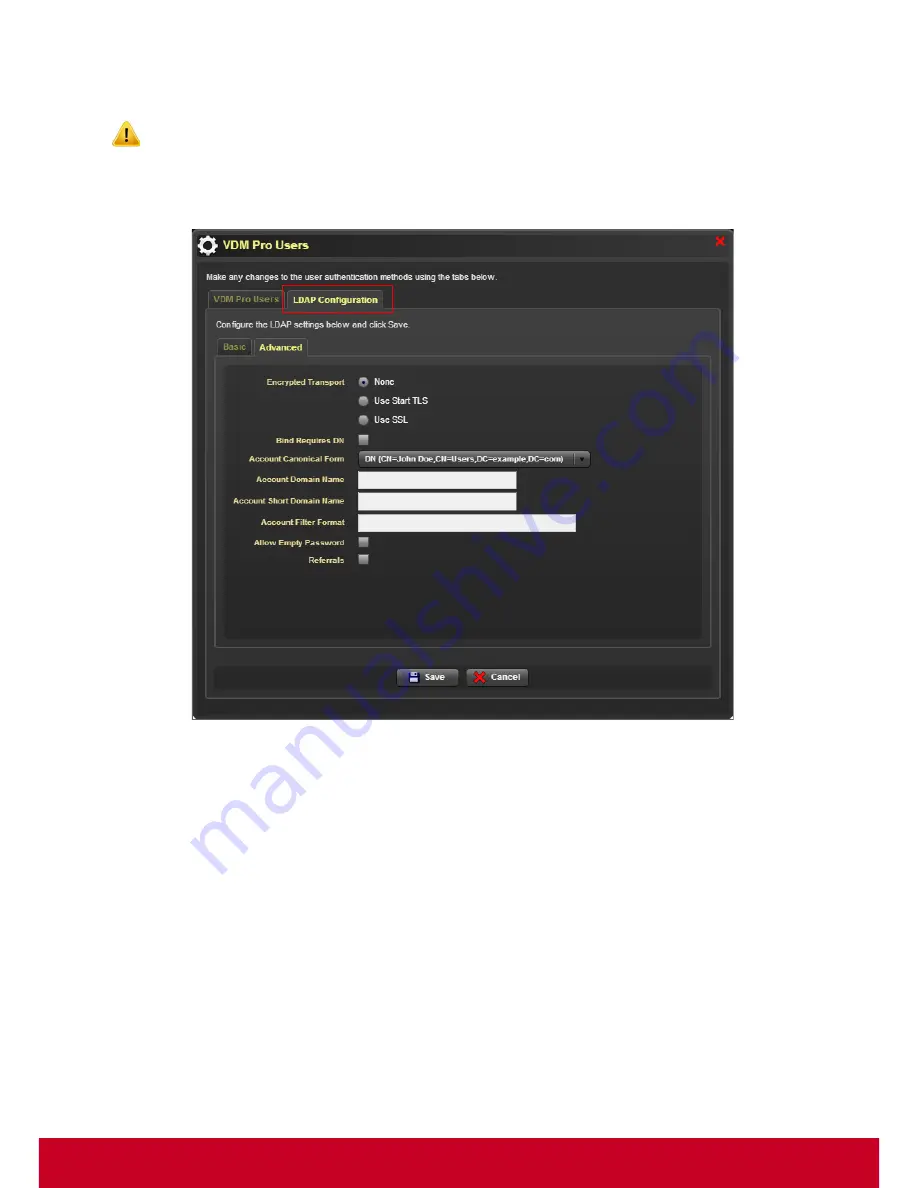
tab to configure LDAP settings as shown in the screenshot below.
Figure 25: Advanced LDAP Configuration
9. Select
None
or
Use Start TLS
or
Use SSL
from the Encrypted Transport button.
10. Check the
Bind Requires DN
checkbox to retrieve the domain name for the account used to bind
if the username is not already in DN form.
11. Select an account format that indicates the form to which the account names are canonicalized
from the
Account Canonical Form
drop-down list.
12. Enter the name of the account domain in the
Account Domain Name
text box.
13. Enter the short name of account domain in
Account Short Domain Name
text box.
14. Enter the filter format to search for the accounts in the
Account Filter Format
text box.
15. Check the
Allow Empty Password
checkbox to allow empty password during bind.
16. Check the
Referrals
checkbox to allow referrals.
17. Click
Save
to save the LDAP configuration successfully.


