COSTURA EN ZIG-ZAG
Preparar la máquina como se
indica.
Para evitar que en la termi-
nación de la costura se
deshile, preparar la máquina
para la puntada recta y coser
en reversa al principio y al
final de la costura.
3 diferentes modelos de la
costura en zig-zag se pueden
escoger como se indica.
English
Español
Section
5
5. SELECTING THE
STITCH
The desired stitch will be
obtained by turning the Pat-
tern Selection Dial.
* When operating the selec-
tor, make sure the needle is
in the highest position.
5. ESCOGER LA
PUNTADA
Girar el selector para escoger
la puntada que se requiere.
* Asegurarse que la aguja
esté siempre en su posición
más alta al operar el selec-
tor.
6
5
7
8
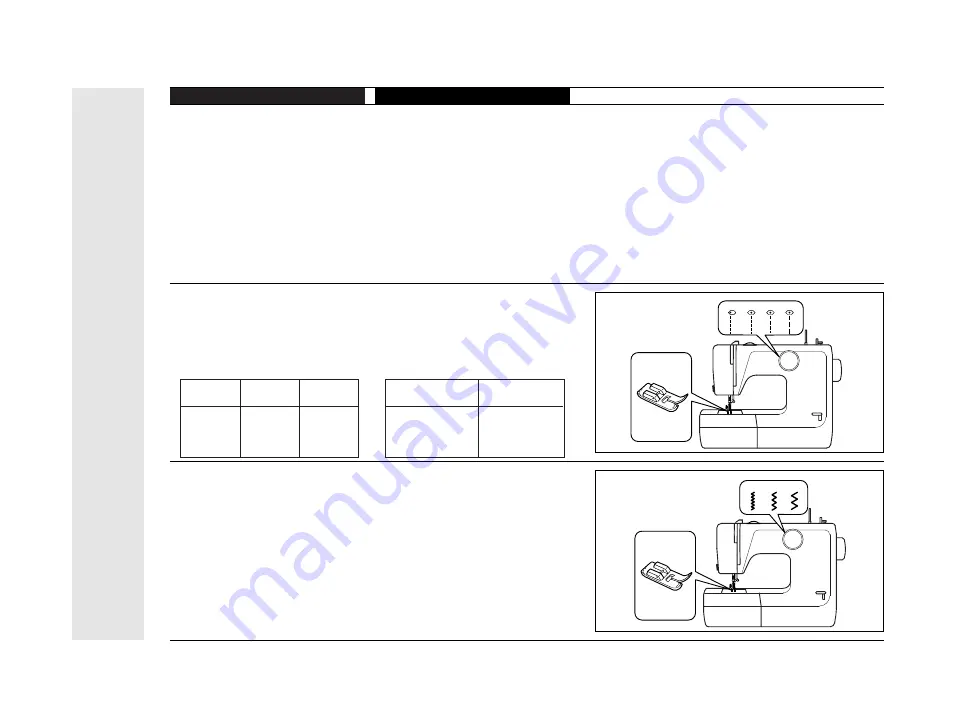
STRAIGHT SEWING
Set machine as shown, 4
kinds of straight stitch lengths
can be selected as shown
below.
COSTURA RECTA
Preparar la máquina como se
indica. 3 diferentes longitudes
en la costura recta y se pueden
escoger come se indica.
Stitch
Selector
No.5
No.6
No.7
No.8
Stitch
Length
2 mm
2 mm
3.2 mm
5 mm
Needle
Position
Left
Centre
Centre
Centre
LA SELECCIÓN
DE LA PUNTADA
No.5
No.6
No.7
No.8
EL LARGO DE
LA PUNTADA
2 mm
2 mm
3.2 mm
5 mm
9
11
10
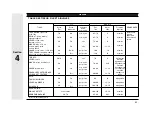
ZIGZAG SEWING
Set the machine as shown.
To prevent seam ends unrav-
elling, set machine for straight
stitch and sew in reverse at
beginning and ending of
seam.
3 kinds of zigzag patterns can
be selected as shown.
77
Summary of Contents for JSB21
Page 29: ...Section 2 2 ACCESSORIES ACCESORIOS ACCESSOIRES ZUBEHÖR TOEBEHOREN ACCESSORI 29 ...
Page 134: ...134 ...
Page 135: ......
Page 136: ...CT_VERITAS JSB21_IM_2020_V1 ...


