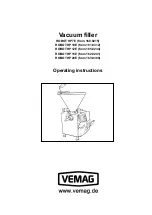
ROBOT HP7E / HP10E / HP12E / HP15E / HP20E
1. Safety instructions
1-4
© VEMAG 2010
1.5 Special safety instructions
Danger!
To prevent injury, switch off the machine before any work (assembly, dis-
mantling, cleaning, maintenance, repair). Then switch off the main switch
to disconnect the machine from the mains.
Danger!
To prevent injury in the area of the double screws, switch off the machine
before undoing the locking nut. Then switch off the main switch to dis-
connect the machine from the mains. The filling horn holder or linking
gear (optional) may only be fitted or removed with the machine switched
off.
Before starting up the machine, always perform the following steps:
• Check that the machine is in proper condition. Leaking oil indicates
leaks which must be eliminated immediately. In this case, inform your
in-house maintenance department or VEMAG Customer Service
immediately.
• Check that the safety devices on the hopper and filling horn holder are
working properly.
Section 5
If you notice any damage, inform VEMAG Customer Service immedi-
ately.
Danger!
To prevent injury, switch off the machine before doing any work on the
hopper. Then switch off the main switch to disconnect the machine from
the mains. Do not climb onto the machine to check the hopper/hopper
contents, use only the step provided. Under no circumstances use a lad-
der or other aid to get at the hopper of the machine.
Danger!
No-one may stand in the area of the lifting/tipping device (optional). Do
not put any objects in this area. Only trolleys to DIN 9797 with a capacity
of 200 l or 300 l (optional) are permitted.
Summary of Contents for 160.0215
Page 8: ......
Page 10: ...ROBOT HP7E HP10E HP12E HP15E HP20E 0 Foreword 0 2 VEMAG 2010...
Page 22: ...ROBOT HP7E HP10E HP12E HP15E HP20E 2 Description 2 8 VEMAG 2010...
Page 32: ...ROBOT HP7E HP10E HP12E HP15E HP20E 3 Installation and commissioning 3 10 VEMAG 2010...
Page 58: ...ROBOT HP7E HP10E HP12E HP15E HP20E 6 Graphical control 6 12 VEMAG 2010 USB stick plugged in...
Page 60: ...ROBOT HP7E HP10E HP12E HP15E HP20E 6 Graphical control 6 14 VEMAG 2010 Mode group Mode View...
Page 64: ...ROBOT HP7E HP10E HP12E HP15E HP20E 6 Graphical control 6 18 VEMAG 2010...
Page 66: ...ROBOT HP7E HP10E HP12E HP15E HP20E 6 Graphical control 6 20 VEMAG 2010...
Page 68: ...ROBOT HP7E HP10E HP12E HP15E HP20E 6 Graphical control 6 22 VEMAG 2010...
Page 100: ...ROBOT HP7E HP10E HP12E HP15E HP20E 6 Graphical control 6 54 VEMAG 2010...
Page 102: ...ROBOT HP7E HP10E HP12E HP15E HP20E 6 Graphical control 6 56 VEMAG 2010...
Page 112: ...ROBOT HP7E HP10E HP12E HP15E HP20E 6 Graphical control 6 66 VEMAG 2010...
Page 128: ...ROBOT HP7E HP10E HP12E HP15E HP20E 7 Cleaning 7 16 VEMAG 2010...
Page 164: ...ROBOT HP7E HP10E HP12E HP15E HP20E 10 Appendix 10 12 VEMAG 2010 10 8 Hydraulic plan...
Page 168: ...ROBOT HP7E HP10E HP12E HP15E HP20E 10 Appendix 10 16 VEMAG 2010...


