1
Before you log on, insert the Connections CD that came with your
ISDN TA.
2
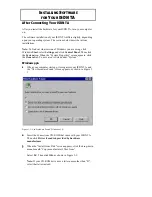
Once you log on and Windows finishes starting up, click Windows
Start, select Settings, and click Control Panel.
Then double-click the Modem icon.
3
If you have other modems or ISDN devices installed on your
computer, the “Modems Properties” screen appears. Click the Add
button. When the “Install New Modems” screen appears, click
Next
If you do not have other modems or ISDN devices installed on
your computer, the “Install New Modems” screen appears. Click
Next.
4
Windows detects your ISDN TA but calls it a “Standard Modem.”
Click the Change button.
5
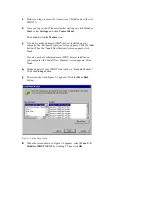
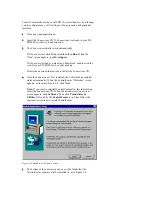
The screen shown in Figure 3-5 appears. Click the Have Disk
button.
Figure 3-5 “Have Disk” screen
6
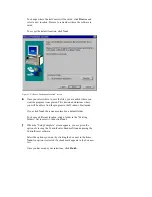
When the screen shown in Figure 3-6 appears, select 3Com U. S.
Robotics ISDN TA EXT by clicking it. Then click OK.

