background image

15

Version 1.612

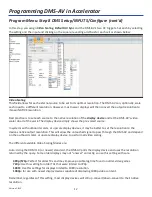
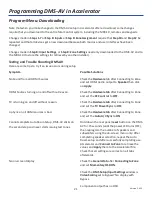
On Screen Display

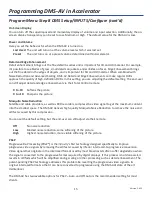
You can turn off the superimposed and momentary display of volume and input selection. Additionally, the on-
screen display transparency can be set to Low, Medium or High.  The default value for the DMS-AV is Low. 

Power and Volume

Here you set the behavior for when the DMS-AV is turned on. 

Last Used

The unit will turn on at the volume level which it was last set

Preset

The unit turns on at a preset volume determined within Accelerator.

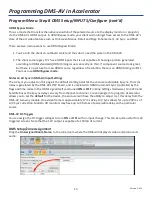
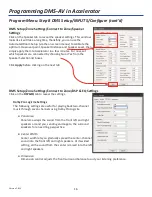
Detail and Edge Enhancement

Detail enhancement brings out the fine detail in scenes and is important for SD and HD material. For example,
it’s possible to see blades of grass, small details on jackets, and wrinkles on faces. Edge Enhancement brings
out the fine detail in the edges of objects, and is important for SD and HD material. When combined with
Noise Reduction and Advanced Scaling, DMS-AV Detail and Edge Enhancement can make regular DVDs
approach the quality of high-definition DVDs. In this setting, you are adjusting the default setting. The end-user
can still adjust detail and edge enhancement via their Total Control remote.

0 to -10 

Softens the picture

0 to +10 

Sharpens the picture 

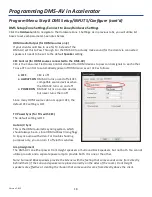
Mosquito Noise Reduction

Satellite and cable providers, as well as DVR recorders, compress the video signal to get the maximum content
into the smallest space. The DMS-AV delivers high-quality Mosquito Noise Reduction to remove the noise and
artifacts caused by this compression. 

You can set the default setting, but the end-user can still adjust via their remote.

Off

No noise reduction

Low 

Modest noise reduction, some softening of the picture.

High

Highest noise reduction, more visible softening of the picture.

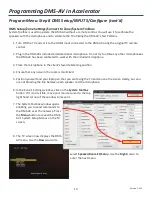
PReP

Progressive Re-Processing (PReP®) is the industry’s first technology designed specifically to improve
progressive video signals by removing the artifacts caused by inferior interlaced-to-progressive conversion.
Video signals that originate in the interlaced format used by most broadcasters often suffer degradation when
the signal is converted to the progressive format required by digital displays. If this process is not done well, it
results in artifacts which will be amplified during scaling or other processing such as detail enhancement. The
patent-pending PReP technology addresses this problem be reverting the progressive video signal to its
original interlaced format so that it can be reconverted to progressive using the DMS-AVs state of the art
deinterlacer. 

The DMS-AV has two available options for PReP – Auto and Off. Auto is the recommended setting for most
clients.

Programming DMS-AV in Accelerator

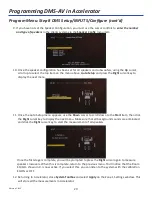
Program Menu: Step 8 DMS Setup/INPUTS/Configure (cont’d)

Summary of Contents for Total Control DMS-AV TSP-2000

Page 1: ...DMS AV Home Theater Amplifier Programming and Setup via Accelerator ...

Page 2: ... System Design Checklist 3 Pre Programming Checklist 5 Using this Manual 6 Program Menu Step 3 Add URC Devices 7 Program Menu Step 6 Network Setup URC Devices 8 Program Menu Step 7 AV Inputs and Outputs 9 Program Menu Step 8 DMS Setup INPUTS Configure 10 Downloading to DMS AV 21 Appendix Optional Control for DMS AV TV Calibration 22 Version 1 612 Table of Contents ...

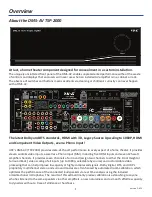
Page 3: ...a real time analysis using the included omnidirectional microphone The results of this extraordinarily precise calibration is astonishing to anyone who has listened to the same speakers via other amplifiers a new naturalness and a smooth effortless quality to dynamics without a trace of stridence or harshness At last a home theater component designed for concealment in a custom installation The uniq...

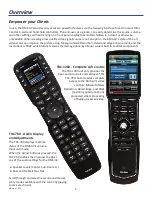
Page 4: ...mage done by inferior scalers built in to older components TRC 780 Audio Display and Adjustments The TRC 780 displays real time status of the DMS AV s volume input and mode When the Adjust button is pressed the TRC 780 enables the end user to adjust any of the audio settings for the DMS AV Speaker Levels Center Sub Rear etc Bass and Treble EQ or Flat Scroll through and select new surround modes on...

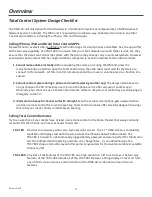
Page 5: ...RC dealers URC provides frequent multi day hands on trainings on Accelerator check with your sales representative for availability This manual will attempt to provide all the hands on information you need but URC training provides the fastest way to gain programming expertise via a thorough hands on experience with a trainer standing by to answer questions URC recommends that if you have never use...

Page 6: ... the first time they use it but on the phone call or after any use of another app Obviously your client can use a Total Control remote while on the phone or while they are airplaying an iPad game to the TV 3 iPads are too heavy to channel surf with all night Even the coolest smart phone gets awkward when used as a remote control for an entire evening Total Control remotes offer carefully designed ho...

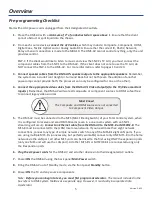
Page 7: ...omponent sources to HDMI so feel free to connect legacy video sources 5 The DMS AV must be connected to the MFS MAC Filtering Switch of your Total Control system when it is configured to receive and send DMS Streams even in a one room system with an SNP 1 streaming will occur Connect an Ethernet cable from the DMS AV to the MFS 8 or MFSPOE 8 The MFS 8 must be connected to the LAN local area network...

Page 8: ...y click on Help then User Guides Adobe Acrobat Reader is required to open each of the included manuals This manual will review only the steps in the programming process where the DMS AV is present All other steps are explained in detail in the Accelerator Programming Reference Manual The following pages will review using Accelerator to configure the DMS AV for the following programming steps Step 3...

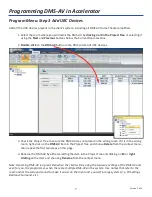
Page 9: ... DMS AV item in the Project Tree and choose Delete from the context menu then repeat the first two steps on this page 4 Rename the DMS AV by either selecting the item in the Project Tree and clicking on F2 or right clicking on the item and choosing Rename from the context menu Note Renaming DMS AV is a great idea when the client will be using the two way settings of the DMS AV and even for you the ...

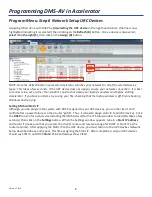
Page 10: ...rying Setting DMS AV Static IP Although you can program the system with DHCP assigned to your URC devices you run the risk of an IP conflict after a power failure or other router glitch Thus it is best to assign static IP to all URC devices Click the DHCP column for each device including the DMS AV wait for the IP Status window to load this takes a few seconds then click on the Settings button When...

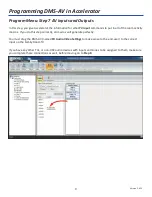
Page 11: ...te perfectly You must drag the DMS AV named FR Audio Video Settings to make sense to the end user to the correct input on the Family Room TV If you have any other TVs or non URC audio devices with inputs and zones to be assigned to them make sure you complete those connections as well before moving on to Step 8 Programming DMS AV in Accelerator Program Menu Step 7 AV Inputs and Outputs ...

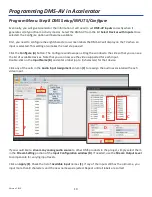
Page 12: ...u can now see the video supported for each input Double click on the Input Name B and enter a label up to 8 characters for that device Click any of the cells in the Audio Input Assignment column C to reassign the audio associated with each video input If you would like to stream any analog audio source to other DMS products in the project simply select them in the Stream Setting portion of the Inp...

Page 13: ...cally connected SNP 1 Doesn t Need to be Connected The SNP 1 does NOT have to be connected in this step Since the SNP 1 STREAMS over the network it does not have to be connected to the DMS AV Programming DMS AV in Accelerator Program Menu Step 8 DMS Setup INPUTS Configure cont d ...

Page 14: ...the resolution to the devices native output resolution This will allow the untouched signal to pass through the DMS AV and depend on the outboard scaler or upscale display device to perform all video scaling The different available Video Scaling Modes are Auto Using the HDMI 1 3 or newer standard the DMS AV polls the display device and uses the resolution returned by the query Some older displays m...

Page 15: ...ng point for the end user adjustable lip sync This sync delay is generated by the DMS AV s DSP board and is unrelated to HDMI Automatic Sync controlled by the flags and time codes in the HDMI signal itself and turned ON or OFF in Zone Settings Hardware On CATV and Satellite boxes the lip sync delay can vary from channel to channel or even program to program Accelerator allows you to set the default...

Page 16: ...MS Setup Zone Settings Connect to Zone General Once you ve connected to the DMS AV the Zone 1 settings window will open with the General tab displayed No change will be saved by the DMS AV unless you click on Apply Do not move to another tab without clicking Apply See notes on the next page for each of the General Settings Programming DMS AV in Accelerator Program Menu Step 8 DMS Setup INPUTS Confi...

Page 17: ...well as DVR recorders compress the video signal to get the maximum content into the smallest space The DMS AV delivers high quality Mosquito Noise Reduction to remove the noise and artifacts caused by this compression You can set the default setting but the end user can still adjust via their remote Off No noise reduction Low Modest noise reduction some softening of the picture High Highest noise r...

Page 18: ... Zone DSP EQ Settings Click on the DSP EQ tab to reveal the settings Dolby Pro Logic IIx Settings The following settings are useful for playing back two channel music through seven channels using Dolby ProLogic IIx Panorama Panorama wraps the sound from the front left and right speakers around you sending an image to the surround speakers for an exciting perspective Center Width Center width lets ...

Page 19: ...eriencing all the details in the soundtrack enabling late night viewing of high energy surround sound without disturbing others Available options for night mode are Auto Off Low Medium and High depending on the incoming bitstream type The client can readjust this parameter in the Sound Adjust section of the on screen display or on the TRC 1280 the TKP 2000 or their smart phone or tablet Variable EQ...

Page 20: ... AV turns on and off POWER ON DMS AV turns on source devices but never turns them off Since many HDMI sources do not support CEC the default CEC setting is OFF TV Power Sync for TVs with CEC The default setting is OFF Auto A V Sync This is the HDMI automatic syncing system which should always be on since HDMI utilizes timing flags to lip sync audio with video For trouble shooting purposes only you ca...

Page 21: ...g position 4 Ensure that any noise in the room is minimized 5 Position yourself and your laptop so that you are facing the TV and can see the screen clearly but you are not blocking the line between each speaker and the microphone 6 In the Zone 1 Settings window click on the System Toolbox button If it is not visible move your mouse cursor to the top right hand corner of the window to reveal it 7 ...

Page 22: ...he Right cursor key to display the next menu Make sure that all background sounds are eliminated and click the Right cursor key to start the measurement of all speakers Once the first stage is complete you will be prompted to press the Right cursor again to measure speaker crossovers When this is complete return to the previous menu You ll notice that the Room EQ item shown in 9 is now active If yo...

Page 23: ... Hardware tab after Connecting to Zone and set the CEC control to OFF TV is turning on and off without reason Check the Hardware tab after Connecting to Zone and set the TV Power Sync to OFF Lip Sync on all HDMI sources is bad Check the Hardware tab after Connecting to Zone and set the Auto A V Sync to ON Cannot complete Auto Room Setup DMS AV sticks on Hold down the rear panel reset button on the ...

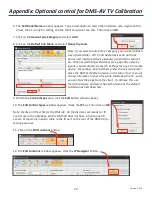
Page 24: ...omatically calibrating the room speakers by following these steps 1 From Program Menu Step 4 click on Create New Driver 2 When the Create a New Driver window opens select Start Blank Device Not Found 3 The Choose Device Type window opens select General Device and then click Next 4 When the Device Driver Edit window opens type URC within the Brand field 5 Click on the Add button Appendix Optional co...

Page 25: ...s prefer to have Accelerator place the DMS Test Pattern device on the Main top menu of all user interfaces to save time while calibrating the TV Later you can hide the page from the client To achieve this use the AUX category and select None Top Menu as the default Sub Menu as described here 9 Within the Control Types area click the Edit button shown above 10 The Edit Control Types window appears ...

Page 26: ...s as you like by selecting a command then dragging it to a new position Click Apply once you have finished rearranging The Layout Order relates the position of the command with the Universal Layout for all Total Control user interfaces For example the Test Pattern Off command is currently number 1 so it will appear in the top left hand corner of all user interfaces Appendix Optional control for DMS ...

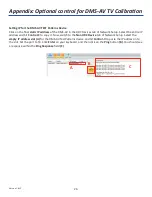
Page 27: ...ver to the room Click 2 Select Database My Database 3 Select Module Type 1 Way IP Database 4 Select Category AUX 5 Select Brand URC 6 Select Model DMS AV Test Patterns Then click on Add Selected Module Note Check the Project Tree and delete if it is in the wrong room by right clicking on the item and choosing delete from the context menu then redoing step 17 Appendix Optional control for DMS AV TV...

Page 28: ...rol C to copy it Now switch to the Non URC Device tab of Network Setup Select the empty IP address slot A for the DMS AV Test Patterns device and hit Control V to paste the IP address into the slot Set the port to 53 Click Enter on your keyboard and then click on the Ping button B You should see a response within the Ping Response field C Appendix Optional control for DMS AV TV Calibration A B C ...

Page 29: ...Version 1 612 500 Mamaroneck Avenue Harrison NY 10528 Phone 914 835 4484 Fax 914 835 4532 www universalremote com ...

Reviews: