background image

RPM SENSOR 

The RPM sensor comes stand

ure 

the best possible signal from
fall of during a race. If that h

no longer be able to see you
 

le, 

The ignition on a gokart is the worst source of electrical 
noise and it is therefore a good idea to keep the RPM cable 

ignition cable. 

cable touch the cylinder or the 

 tear the isolation and shield 

and cause disturbance. The most important issue is to 
separate the RPM cable from the ignition cable just after 
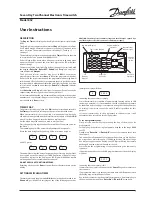
the sensor. This is clearly shown on the picture. Do not let 

the two cables run together! 
The cable is mounted in the connector marked RPM on the main box. Tighten the connector 
hard with your fingers. 

RECEIVERS

ard with every Unipro Laptimer. We use an active sensor to ens

 all kind of engines. Mount the sensor with care. You do not want it to 

appens, the Laptimer will turn itself off after 5 minutes and you wil

r lap times. 

Mount the sensor with at least two strips. 
The RPM sensor is mounted at the end of the ignition cab
near the spark plug cap, with at least two strips. 
 

away from the 
 
Please do not let the RPM 
cylinder head because it can


The Unipro Laptimer supports all kind

things. If the track has a loop, we rec

AMB Loop receiver 

Mounting the Loop receiver. 
The Loop receiver is mounted as low as possible on the left 
side of the seat. Drill a 6.5 mm hole from the inside of the 
seat. The distance from the underside of the Loop receiver to 
the asphalt must not exceed 100 mm

 of receivers. The different receivers are good for differen
ommend using the Loop Receiver. 

 
The Loop receiver is mounted parallel with the seat and needs 
to point backwards against the rear axle. Make sure, that 
nothing comes between the receiver and the track. 

 
Use plenty of strips to secure the cable to the Main Box. 
When the receiver is mounted, the cable is fixed to the middle of the kart, all the way to the 
Main Box. Use plenty of strips to secure the cable. 
 
The cable is mounted in the connector named RECV 1 on the Laptimer. Tighten the connector 
hard with your fingers. 

UNIPRO – The original Laptimer 


8


Summary of Contents for 6002

Page 1: ...ick Guide Unipro Laptimer 6002 7002 Version 1 32 Go faster faster UNIPRO ApS VIBORG HOVEDVEJ 24 DK 7100 VEJLE DENMARK Tel 45 75 85 11 82 Fax 45 75 85 17 82 www uniprolaptimer com mail uniprolaptimer c...

Page 2: ...ce and race using the basic functions 18 Operating modes 18 First lap mode 18 Running mode 19 Pit mode 19 Clear all laps 20 Take advantage of the advanced features 20 Split times Split points 20 Split...

Page 3: ...elemetry tire temperatures and more your investment is even safer If you have a special request either for new accessories or for a new feature please let us know We constantly try to develop our prod...

Page 4: ...Do you have the necessary accessories If you have bought the basic package you should have following parts to your Laptimer Main Box Display Unit Receiver Loop Magnet or IR RPM Sensor You may also ha...

Page 5: ...Choose a hole that gives a good placement at the top of the steering wheel On some steering wheels it is necessary to make the hole a little bigger Remove the nut the gray washer and one of the two bl...

Page 6: ...can see where to drill the hole It is a good idea to look from the back before drilling w The enclosed screw is screwed throug ease the mounting of the main box Use a 5 mm umbracho Figure 2 Main Box w...

Page 7: ...Unit and start to install the different sensors The cable for the Display Un Main Box along the steering the Display Unit Tighten the use your fingers Make sure the cable isn t squeezed It is very imp...

Page 8: ...RPM sensor is mounted at the end of the ignition cab near the spark plug cap with at least two strips away from the Please do not let the RPM cylinder head because it can The Unipro Laptimer supports...

Page 9: ...ent of the magnet receiver is at the very front of the bottom plate with the cable facing The distance between the receiver and asphalt must not exceed 50 mm Make sure that the cable is fixe properly...

Page 10: ...ing for the sensor is mounted between the cylinder head and the spark plug Use plenty of strips to secure the cable from the cylinder head to the Main Box You may need different types if you use diffe...

Page 11: ...drive a kart with water cooled engine the heat of the cooling water is of course The water sensor is mounted on the hose that goes from the cooler to the engine It is best to mount the sensor on the h...

Page 12: ...Main Box Tighten th The wheel sensor kit is used the Laptimer For instance speed splits tire wear count The sensor disc The sensor disc is mounted o ost of the corners on the track On most tracks thi...

Page 13: ...ll be able to make some e di the sensor and the sensor disc is between 3 and 10 millimeters If you experience problems with the speed this distance is the first thing to check is Then tighten the thre...

Page 14: ...the cable to the Main Box The cabl WHEEL on the Main the frame in a nice large curve so rn without the cable being caught or he loop large enough to allow sensor when you change the front frame with...

Page 15: ...down at power on SETUP Used for entering setup and service mode Changes between min max values in pit mode Temp 1 warning All the LEDs can be used as shift light indicators Temp 3 warning Temp 2 warni...

Page 16: ...setup mode Y th R ceiver type This is t The Unip receivers You can active loop and and but choose the receiver type connected to the Laptimer I se a loop receiver you can skip the explanation about s...

Page 17: ...he Pit to the finish line In thi pass two magnets when going out from the Pit This means that on the out lap or first lap the Laptimer ignores the first two magnets and then start the Laptimer when pa...

Page 18: ...perating modes is turned on with the When the Laptimer button it timer will automatically ange to first lap mode when it detects a signal from the RPM sensor This way you cannot drive around in pit mo...

Page 19: ...and its nt la shown for 5 conds before changing back to data display h You can also turn both features of Difference between c position In the shown example the curre p is 8 98 seconds better than th...

Page 20: ...a in the Laptimer for each section of the track There are two ways of using splits with your Unipro Lapt 1 Splits with magnet stripes 2 Splits with wheel sensor PLITS WITH MAGNET STRIPES No settings a...

Page 21: ...tion this way 1 Turn the Laptimer off by pressing down for 1 second 2 Press and hold down while pressing once 3 When the display turns on let go of the and you will be in Undo mode 4 Use or to change...

Page 22: ...n the display 6 Press to accept all laps are cleared split points in the Laptimer are erased and you are ready to drive out and 7 Now all laps and set the new split points 8 Every time you come to a s...

Page 23: ...u use the speed kit you must measure and set the wheel circumference Press SETUP until you see the wheel circumference screen Wheel circumference screen The wheel circumference is entered in millimetr...

Page 24: ...t reen It is here you define how many temperature inputs you are using Choose the right combination of the 3 temperature inputs The reason to turn the inputs on or off is to save battery power and to...

Page 25: ...again to change to PC mode 4 Press to enable the infrared communication 5 Press OK on the Data Analyser to turn it on 6 On the Analyser go the main menu with Transfer as the top point Just move the cu...

Page 26: ...wn Th best times are marked with green and the best ro marked in blue The best theoretica calculated from the best split times sort the table from each of the colu The basic idea of the PC Analyser pr...

Page 27: ...aptimer The x axis can he vertical gray lines are the split points showing how many percent of the total lap the engine has been in a certain RPM range This gives a fast overview in which range the en...

Page 28: ...nd easy way to compare two drivers or PC Analyser program and it s free to download from our com Speed graph The speed graph is showing the evolution for a complete lap The is logged 10 times per seco...

Reviews: