


VIDEOSTUDIO HELP
Table of Contents
|
Index
Back
60
For precise control, click on a Trim handle, hold it, and use the left
or right arrow keys on your keyboard to trim one frame at a time.
The Mark in / out points can also be set by pressing
[F3]
and
[F4]
,
respectively.
You can also use
Zoom
controls to display each frame of your video
in the Timeline and trim one frame at a time. The
Scroll Bar
makes
navigating through your project quicker and easier. A wheel mouse can
also be used to scroll, and to zoom by pressing
[Ctrl]
.
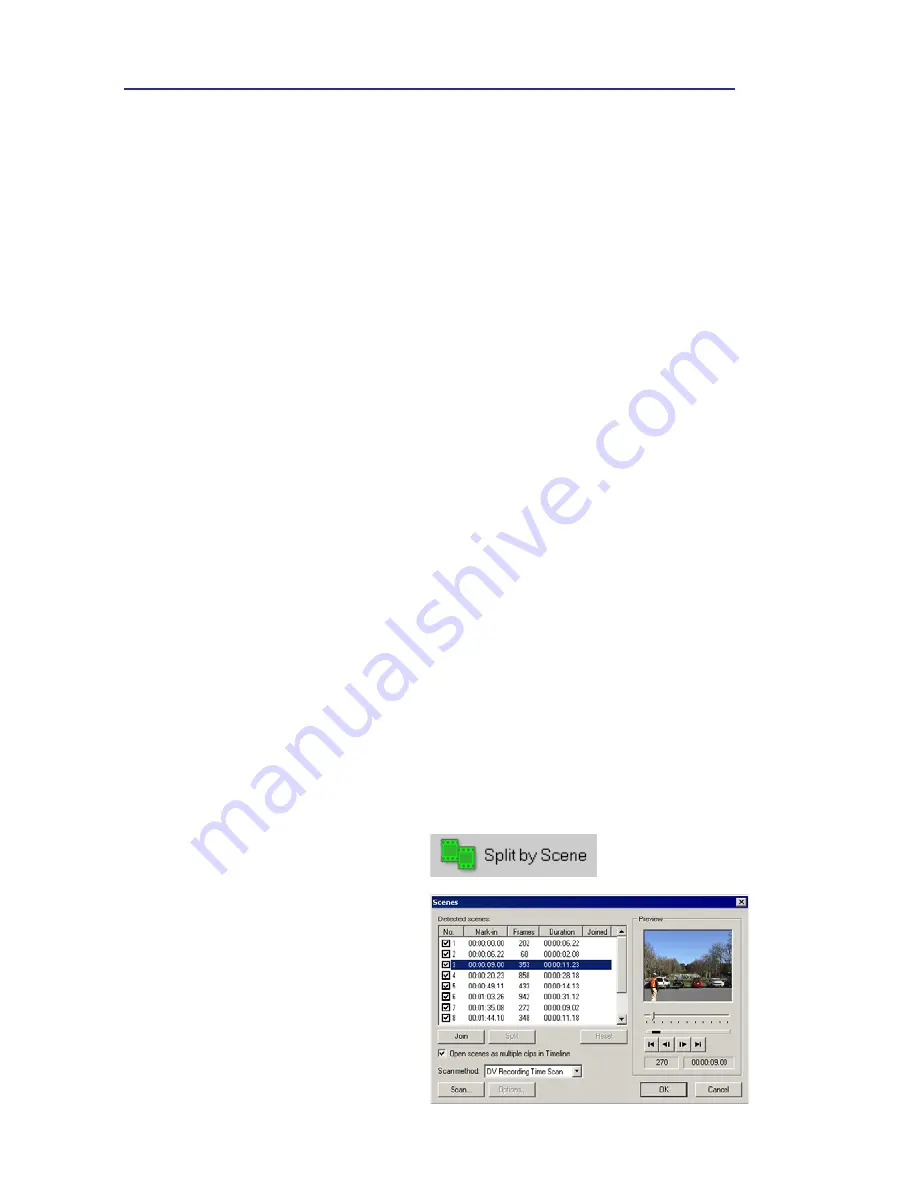
Split by Scene
Use the
Split by Scene
feature in the Edit Step to detect different
“scenes” in a video file and automatically break it down into several
clip files.
The way VideoStudio detects scenes depends on the type of video
file. In a captured DVI AVI file, scenes can be detected in two ways:
•
DV Recording Time
detects scenes according to their date and time of
recording.
•
Frame Content
detects content changes, such as motion change, camera
shifting, brightness change, etc., and splits them into separate video files.
In an MPEG-1 or MPEG-2 file, scenes can only be detected based
on content changes (i.e., by
Frame Content
).
To use Split by Scene on a DV
AVI or MPEG file:
1.
Go to the
Edit
Step and select
a captured DV AVI file or an
MPEG file in the Timeline.
2.
Click
Split by Scene
in the
Options Panel. This will
launch the
Scenes
dialog box.
3.
Choose your preferred scan
method (
DV Recording Time
or
Frame Content
).


