
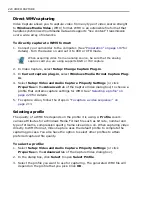


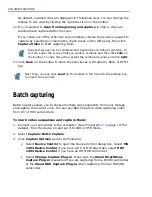


CHAPTER 2: CAPTURING VIDEO 229
Changing a file's properties
Whenever you capture a video sequence, you must first specify a file in which to
save the resulting video. There will be times, however, when you wish to save this
video again to change its attributes, such as frame rate or the compression
scheme. (This is particularly true if you have a hardware compressed file, such as
MJPEG or MPEG, and you wish to play it back on another machine which does not
have the same hardware setup.)
Being able to accurately pinpoint frames also gives you more flexibility in editing
video. For example, you can first capture your video as low resolution files and
therefore have them occupy much less disk space. You can then edit them
considerably faster in Video Editor and, when ready to compile the final version,
you can recapture the exact frames at a higher quality. (You can also import the
DVP file from Video Editor, including any edits you have done, and have the device
capture the original video based on your edits.)
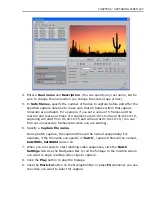
To capture from a controllable device, you first need to specify the frames you
want to capture by marking those frames and creating a batch list. You also need
to indicate a file to save the marked sequences to as well as provide a name for
your reel or video source. This is especially useful if your batch list contains
marked sequences from a number of different tapes or sources. When you perform
the capture, Video Capture will prompt you when it is time to insert the next reel.
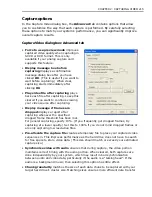
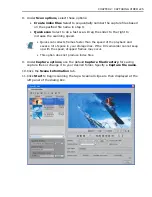
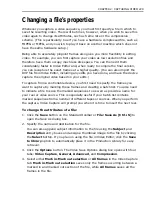
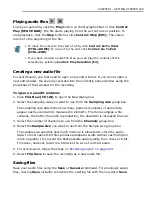
To change the attributes of a file:
1. Click the Save button on the Standard toolbar or File: Save As [Ctrl+S] to
open the Save As dialog box.
2. Specify the name and destination for the file.
You can also append subject information to the file using the Subject and
Description entry boxes and assign a thumbnail image to the file by clicking
the Select button. If you plan on using the file in Video Editor, click the Save
to library option to automatically place it in the Production Library for easy
retrieval.
3. Click the Options button. The Video Save Options dialog box opens with four
tabs: Video Capture, General, Advanced, and Compression.
4. Select either Mark in-Mark out selection or All frames in the Video Capture
tab. Mark in-Mark out selection saves only the frames occurring between a
marked in and marked out section of the file, while All frames saves all the
frames in the file.
Summary of Contents for MEDIASTUDIO PRO 8.0
Page 1: ...User Guide Ulead Systems Inc September 2005 P N C22 180 110 0A0001 ...
Page 17: ...PART I VIDEO EDITOR ...
Page 44: ...44 VIDEO EDITOR ...
Page 94: ...94 VIDEO EDITOR ...
Page 138: ...138 VIDEO EDITOR ...
Page 172: ...172 VIDEO EDITOR ...
Page 193: ...PART II VIDEO CAPTURE ...
Page 200: ...200 VIDEO CAPTURE DV mode MPEG 2 mode ...
Page 234: ...234 VIDEO CAPTURE ...
Page 235: ...PART III AUDIO EDITOR ...
Page 246: ...246 AUDIO EDITOR ...
Page 267: ...PART IV MORE PROGRAMS ...
Page 296: ...296 MORE PROGRAMS ...
Page 297: ...INDEX ...


