


T3-OPX installation
Page | 67
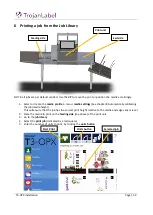
10.1
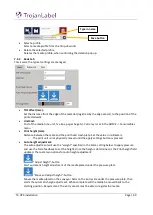
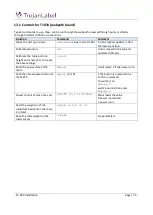
Sensor overview
③
Locking the fiber-optic cables
⑦
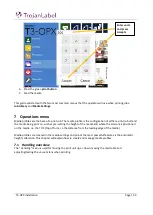
LED indicator orange, lights up when switching output is active
⑧
Numeric display 2 x 4-digit, green: switching threshold, operating mode, red: actual value, Teach-in and function
parameter
⑨
step pushbutton > (manual switching threshold: higher/next function parameter)
⑩
step pushbutton < (manual switching threshold: lower/previous function parameter)
⑪
Mode/Enter-button
⑫
Teach-in button
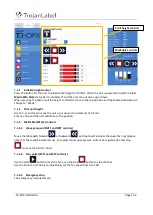
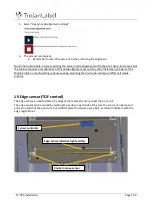
10.2
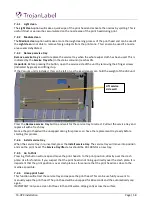
Adjusting the sensor to the media
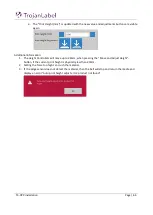
1.
Move the print unit to a height position where the media can pass underneath, it does not need to
100% set to the height but within 10mm above the media.
2.
Adjust the sensor ensure that switching threshold is not activated. This means that the green value
(switching threshold), should be less than the actual value. Use the step buttons (9) and (10) to
adjust the value. Remember that the sensor should not be over the belts, but over the black
surface on the table.
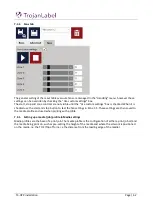
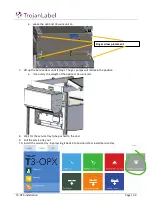
3.
Place the media under the sensor, the Led indicator (7) should light up orange, when the media is
removed then the led indicator shall switch off. Use the step buttons to tweak the sensitivity up or
down. The threshold value is instantly saved
11
User replaceable parts
This chapter describes all parts that can replaced by the operator (excluding ink cartridge replacement
which is explained in chapter 3.11 “Installing Ink Cartridges”)
11.1
Ink cartridge part numbers
Part number
Description
27610001
High Yield Cyan Ink Cartridge (~16,000 pages)
27610002
High Yield Magenta Ink Cartridge (~16,000 pages)
27610003
High Yield Yellow Ink Cartridge (~16,000 pages)
27610004
High Yield Black Ink Cartridge (~20,000 pages)
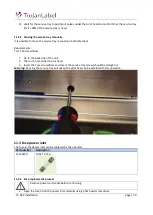
11.2
Service tray replacement
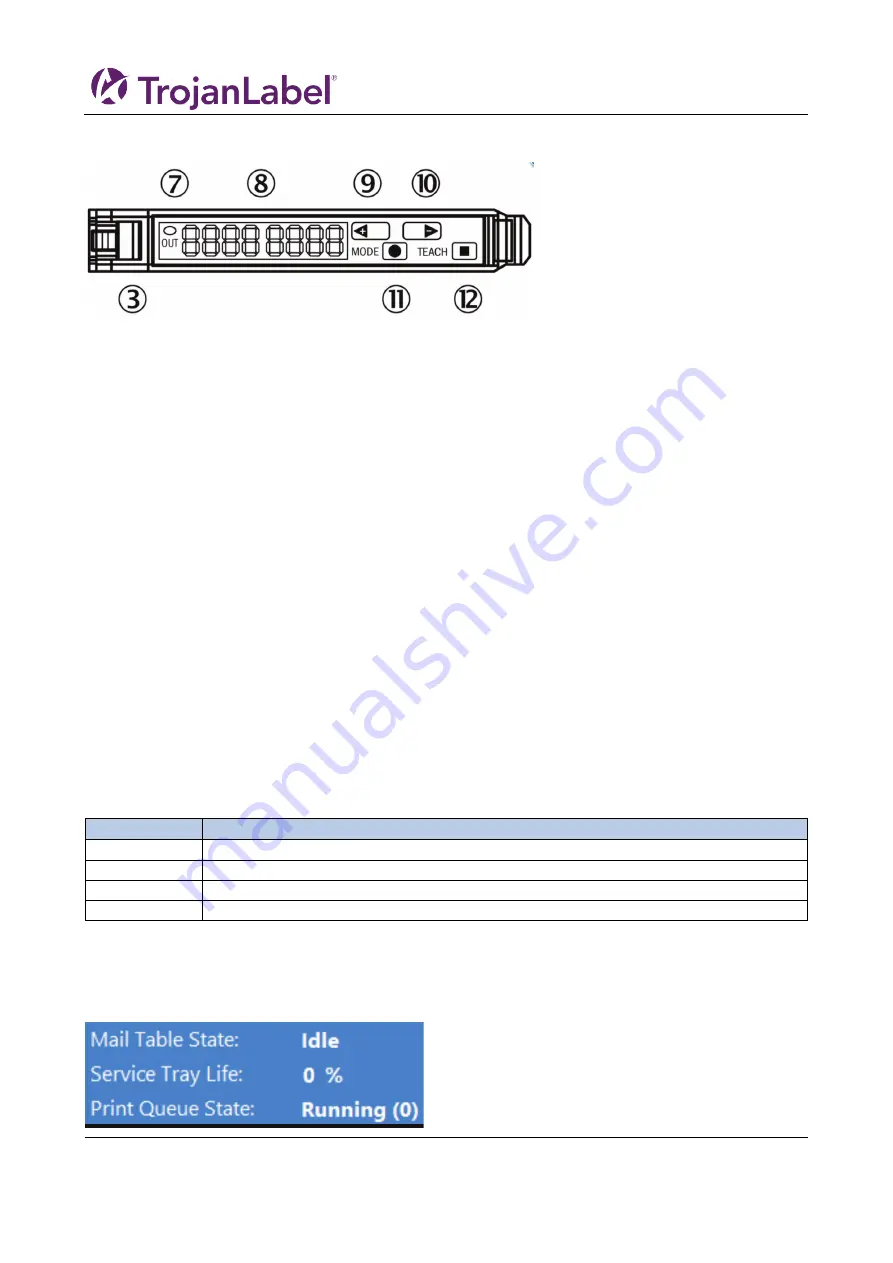
When the end of Service tray life has been reached, which is indicated by the Service tray life in the status
menu display “0%”, replace the service tray:
Summary of Contents for T3-OPX
Page 1: ...T3 OPX user guide Version 1 2...
Page 5: ...T3 OPX installation Page 4...
Page 7: ...T3 OPX installation Page 6 1 1 1 Emissions...
Page 13: ...T3 OPX installation Page 12...
Page 17: ...T3 OPX installation Page 16 2 2 Backside Height controllers 3 Inlets Ink lid Serial plate...
Page 20: ...T3 OPX installation Page 19...
Page 34: ...T3 OPX installation Page 33 i The process will use the purge height in the settings menu...


