


T3-OPX installation
Page | 20
3
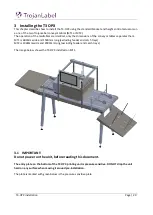
Installing the T3 OPX
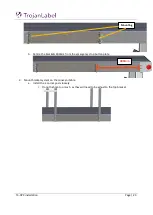
This chapter describes how to install the T3-OPX using the standard bracket and height control actuators on
a one of the two TrojanLabel conveyor tables (MT1 or MT2).
The operation of the mailtables are identical, only the dimensions of the conveyor tables separates them.
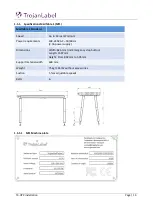
MT1 is 600mm wide and 1500mm long (excluding feeder and catch trays)
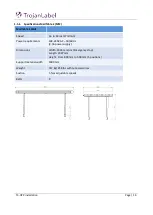
MT2 is 1000mm wide and 2000mm long (excluding feeder and catch trays)
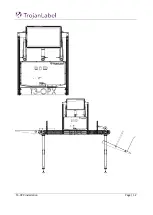
The image below shows the T3-OPX installed on MT1.
3.1
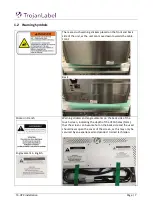
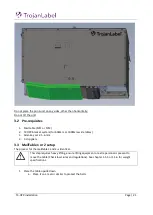
IMPORTANT:
Do not power on the unit, before reading this document.
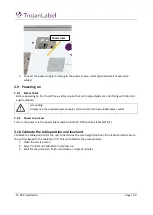
The entry plate on the bottom of the T3 OPX printing unit is pressure sensitive. DO NOT drop the unit
hard on any surface when moving it around pre-installation.
The plate is marked with green below is the pressure sensitive plate
Summary of Contents for T3-OPX
Page 1: ...T3 OPX user guide Version 1 2...
Page 5: ...T3 OPX installation Page 4...
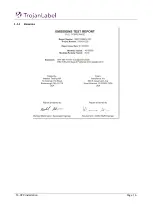
Page 7: ...T3 OPX installation Page 6 1 1 1 Emissions...
Page 13: ...T3 OPX installation Page 12...
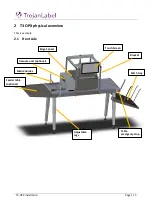
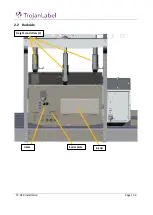
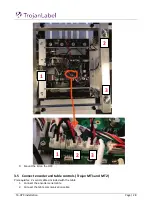
Page 17: ...T3 OPX installation Page 16 2 2 Backside Height controllers 3 Inlets Ink lid Serial plate...
Page 20: ...T3 OPX installation Page 19...
Page 34: ...T3 OPX installation Page 33 i The process will use the purge height in the settings menu...


