1
2
3
4
5
6
7
8
9
10
11
12
8-5
10
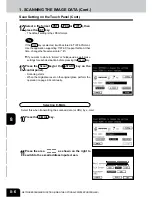
Press the MAILBOX key.
Selecting MAILBOX
Stores the scanned data as a file in an arbitrary folder (mailbox) in the hard disc of the optional printer
controller.
* See the Printing Guide (User Document CD-ROM) for how to retrieve the data.
11
Press the area as shown on the screen on
the right, then enter the mailbox ID.
- Key in 4 numbers between 0000 and 9999 with the digital keys
on the control panel.
More than one scanned data with the same file names can be
stored in the same mailbox ID. They are distinguished by
scanned date and time.
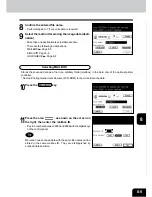
8
Confirm the entered file name.
- Perform steps 6 to 7 if any correction is required.
9
Select the method for storing the image data (desti-
nation).
- More than one destination is selectable at a time.
- There are the following 3 destinations.
MAILBOX
Page 8-5
Page 8-6
HOLDQUEUE
Page 8-8
Summary of Contents for e-studio 210c
Page 1: ...OPERATOR S MANUAL FOR COPYING FUNCTIONS DIGITAL COLOUR PLAIN PAPER COPIER ...
Page 26: ...1 2 3 4 5 6 7 8 9 10 11 12 1 12 BEFORE MAKING COPIES ...
Page 60: ...1 2 3 4 5 6 7 8 9 10 11 12 3 16 SETTING OF BASIC COPY MODES ...
Page 70: ...1 2 3 4 5 6 7 8 9 10 11 12 4 10 COLOUR EDITING AND ADJUSTMENT ...
Page 92: ...1 2 3 4 5 6 7 8 9 10 11 12 USING THE EDITING FUNCTIONS 5 22 ...
Page 172: ...1 2 3 4 5 6 7 8 9 10 11 12 9 30 WHENTHE GRAPHIC SYMBOLS FLASH ONTHETOUCH PANEL ...

