background image

1

2

3

4

5

6

7

9

10

11

12

8

4-14

EDIT MENU

7

Select the desired paper cassette, image density,

reproduction ratio and copy quantity.

8

Press the 

 key.

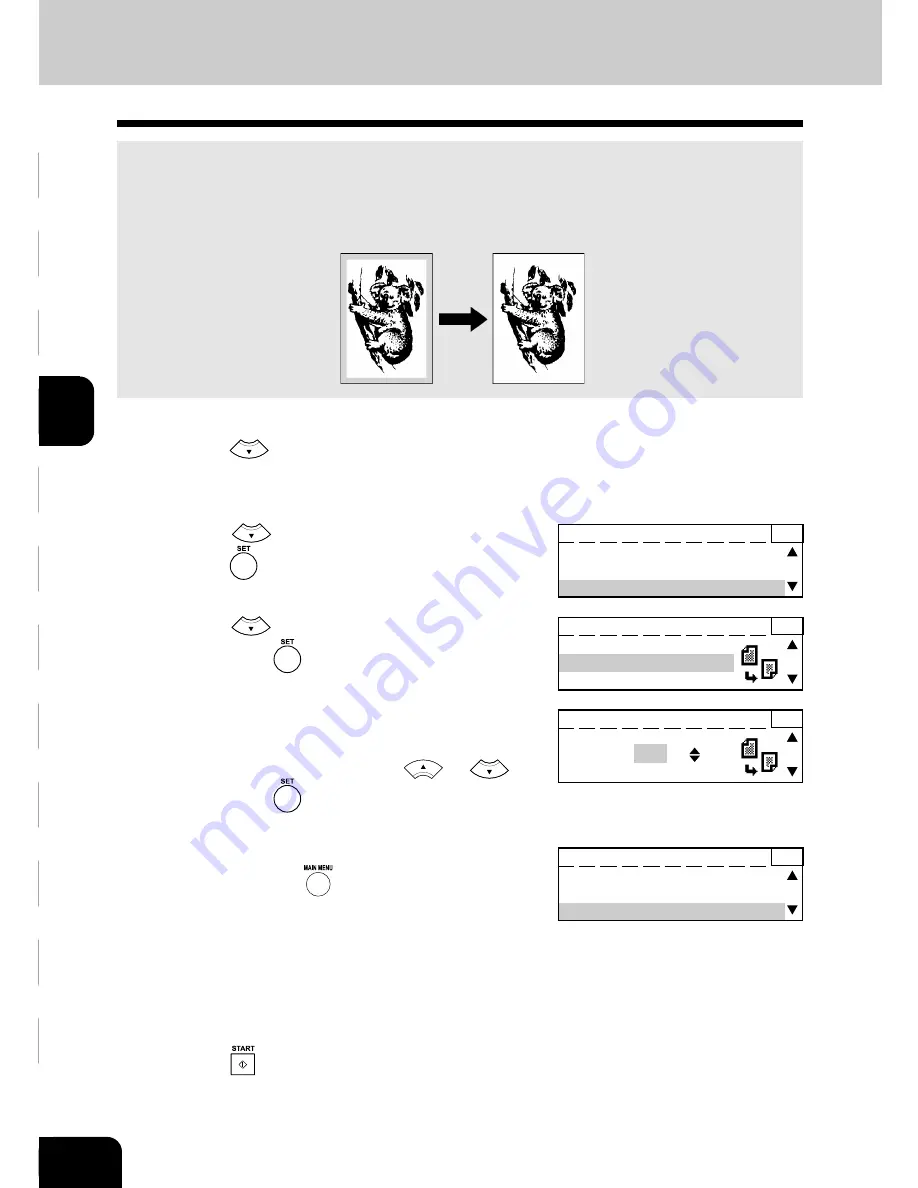
4. EDGE ERASE COPYING

If the edges of an original are torn or dirty, they are reproduced as black stains on the copy.
Using the edge erase mode, a white border will be created along the outside edges of the copy eliminating
the marks. The default edge erase margin is 10 mm, but you can select any margin within the range of 4
to 20 mm.
Example of Edge Erase Copying

1

Press the 

 key on the control panel while in the

initial screen for copying.  The “EDIT MENU” screen

appears.

2

Press the 

 key to display “Edge Erase.”   Then

press the 

 key.

3

Press the 

 key and select the “ON.”

Then press the 

 key.

4

The current edge erase margin appears on the

screen.  To change the edge erase margin, select

the desired margin by using the 

 or 

 key.

Then press the 

 key.

• The edge erase margin changes at increments of 1 mm.

5

The selected edge erase margin appears on the

screen.  Press the 

 key to return to the initial

screen for copying.

6

Place the original(s) on the feed tray or on the glass.

READY

1

DUAL PAGE

:OFF

IMAGE SHIFT

:OFF

EDGE ERASE

:OFF

READY

1

DUAL PAGE

:OFF

IMAGE SHIFT

:OFF

EDGE ERASE

:10mm

EDGE ERASE

1

OFF

ON

EDGE ERASE

1

20mm

10mm

 4mm

Summary of Contents for e-studio 160

Page 1: ......

Page 2: ......

Page 3: ...DP 20 Post Consumer Paper Hammermill Unity DP 50 Post Consumer Paper If you have any questions regarding the use of recycled paper in your digital multi function contact your authorized service technician FCC NOTICE This equipment has been tested and found to comply with the limits for a Class A digital device pursuanttoPart15oftheFCCRules Theselimitsaredesignedtoprovidereasonableprotection agains...

Page 4: ...ode Super Energy Saver Mode The copier consumes less than 70 watts e STUDIO160 200 80 watts e STUDIO250 in the Sleep Mode Super Energy Saver Mode Sleep Mode Super Energy Saver Mode Default Time The default time for the Sleep Mode Super Energy Saver Mode is 25 minutes e STUDIO160 60minutes e STUDIO200 250 Low Power Mode The copier consumes less than 111 6 watts e STUDIO160 127 0 watts e STUDIO200 1...

Page 5: ...re designed to keep the digital multi function system and all its parts in trouble free working order Reduction of machine wear is due to Toshiba s intimate knowledge of the digital multi function s characteristics ensuring the highest standard of care Machine Balance From the beginning Toshiba supplies and machines were made for each other Whenever Toshiba designs a new machine it also designs a ...

Page 6: ...ges fully recyclable In addition harmful dust and ozone levels have been reduced to improve the working environment Human Friendly Genuine Toshiba toners are people friendly Before approving our toners for sale we test them to be sure they pass the strictest of health standards This takes the worry out of handling the toner ISO 9000 and ISO 14000 Toshiba toner plants are ISO 9001 or ISO 9002 and I...

Page 7: ...s situation which if not avoided may result in minor or moderate injury partial damage of the equipment or surrounding assets or loss of data Note Indicates a procedure you should follow to ensure the optimal performance of the digital multi function system and problem free copying Tip Describes information useful to know when operating the digital multi function system Advice Describes an operati...

Page 8: ...TUDIO160 50 to 200 e STUDIO200 250 25 to 400 50 to 200 when the optional Reversing Automatic Document Feeder or Automatic Document Feeder is used Duplex copies can be made automatically from two sided originals Optional Reversing Automatic Document Feeder and Automatic Duplexing Unit are required Single sided copies can be made automatically from two sided originals Optional Reversing Automatic Do...

Page 9: ...aper 1 7 Changing the Paper Size of the Cassette 1 8 Turning ON the Power Switch Auto Job Start 1 10 Cassette Size Setting 1 11 4 DEPARTMENT CODES 1 13 2 HOW TO MAKE COPIES 2 1 1 GENERAL COPYING PROCEDURE 2 2 2 SETTING ORIGINALS 2 4 Originals 2 4 Placing the Original on the Glass 2 5 Using the Automatic Document Feeder optional or the Reversing Automatic Document Feeder optional 2 6 3 INTERRUPT CO...

Page 10: ...LS 4 26 11 JOB MEMORY 4 27 12 PAPER TYPE 4 29 13 MENU LIST 4 30 5 PROGRAM MENU 5 1 1 WALKUP SCREEN 5 2 2 TIMERS 5 3 Auto Clear 5 3 Auto Low Power 5 4 Automatic Sleep 5 5 3 WEEKLY TIMER 5 7 4 SPEAKER VOLUME 5 10 5 DEPARTMENT CODE 5 11 Department Code Setting 5 11 Clearing Department Code Counters 5 13 Deleting Department Code 5 14 Change Department Code Setting 5 15 Report Printing 5 17 Canceling R...

Page 11: ...6 REMOVING JAMMED STAPLES 7 24 7 CALLING FOR SERVICE 7 27 8 PERIODIC MAINTENANCE 7 28 8 USER TEST MODE 8 1 1 AUTOMATIC TEST MODE 8 2 AUTO TEST 8 2 2 INDIVIDUAL TEST MODE 8 3 INDIVIDUAL TEST Summary 8 3 3 ADF TEST 8 4 4 KEY TEST 8 6 5 LED TEST 8 7 6 LCD TEST 8 8 7 SPEAKER TEST 8 9 8 SWITCH TEST 8 10 9 TEST PRINT 8 11 10 PRINTING A TEST RESULT 8 12 9 MAINTENANCE 9 1 1 DAILY INSPECTION 9 2 2 CLEANING...

Page 12: ... use is as follows Temperature 10 30 C 50 86 F Humidity 20 85 RH 2 To ensure optimal operation allow clearances of at least 32 on the left 32 on the right and 4 in the rear refer to the illustration below 2 To obtain the best possible results this machine should be used in conjunction with a dedicated AC power line at the following ratings 110 127 VAC 50 60 Hz 1 4 kW or less Note 1 The use of othe...

Page 13: ...commended that high quality 20 lb Xerographic bond paper be used Paper of lower quality may contain inherent properties such as excess paper dust and may lead to premature servicing 2 Be sure to turn OFF the power switch unless using auto timer mode When you leave your office at night If a power failure occurs Caution When turning OFF the power switch be sure to do so only after the machine cyclin...

Page 14: ... or accidents beyond the reasonable control of TOSHIBA TEC CORPORATION including without limitation acts of God war riot civil commotion malicious or deliberate damage fire flood or storm natural calamity earthquakes abnormal voltage or other disasters c additions modifications disassembly transportation or repairs by any person other than service technicians authorized by TOSHIBA TEC CORPORATION ...

Page 15: ...E DIGITAL MULTI FUNCTION SYSTEM 1 3 Main Components 1 3 Control Panel 1 4 Message Display Panel 1 6 3 PAPER 1 7 Acceptable Paper Types and Sizes Handling and Storing Paper 1 7 Changing the Paper Size of the Cassette 1 8 Turning ON the Power Switch Auto Job Start 1 10 Cassette Size Setting 1 11 4 DEPARTMENT CODES 1 13 ...

Page 16: ...ler KK 1600 Automatic duplexing unit MD 0101 Stack feed bypass MY 1016 Automatic document feeder MR 2012 Reversing automatic document feeder MR 3011 Finisher includingTransportation bridge MJ 1011 e STUDIO200 250 only Paper feed unit MY 1015 Large Capacity Feeder KD 1010 e STUDIO200 250 only The Job separator MJ 5001 or Offset tray MJ 5002 can be installed in place of the Finisher The Paper feed p...

Page 17: ... Copy receiving tray Power switch Original glass Control panel Front cover Cassette Manual pocket Side cover Brightness control Brightness control Used to adjust the brightness of the message display panel Manual pocket The manual pocket is not an accessory If you need one please ask your service technician Paper stopper ...

Page 18: ...COPY Press this key to switch from the other modes to the COPY mode This manual describes the settings and operation in the COPY mode in detail Paper Jam Lamp This lamp blinks when an original or copy paper is jammed Recording Paper Lamp This lamp blinks in the COPY mode when no paper is loaded in the selected paper cassette Toner Lamp This lamp illuminates when the toner is about to run out or ru...

Page 19: ...e settings of the digital multi function system or adjust the default settings INTERRUPT Key Use this key to interrupt the copying job in process and to perform another copying job You can resume the interrupted copying job by pressing this key again SUPER ENERGY SAVER Key Press this key if the digital multi function system is unused for a long time and the digital multi function system goes into ...

Page 20: ... a different screen is display Page 1 13 The Message Display Panel indicates the digital multi function s status It also illustrates operational procedures or settings using brief sentences or icons Message Display Panel 2 DESCRIPTION OF THE DIGITAL MULTI FUNCTION SYSTEM Cont Message Copy quantity Light Dark Zoom Paper size of the currently selected paper source Finishing READY 1 PAPER LT AUTO FIN...

Page 21: ...ype of paper Plain paper 17 21 lb only Plain paper 17 21 lb only Multi sheet feeding Plain paper 17 21 lb only 1 sheet feeding Plain paper 17 43 lb tracing paper OHP film labels Feeder Cassette Paper feed unit option Paper feed pedestal option Large capacity feeder option Sheet feed bypass option Handling and Storing Paper Pay attention to the following points Avoid using paper that is specially t...

Page 22: ...g procedure 3 Push the right unlock side of the size selection lever to unlock it 4 While pushing the size selection lever in the direction of the arrow set the side guide to the desired paper width as indicated on the bottom surface of the cassette 2 Move the width guide to the desired paper size position as indicated on the bottom surface of the cassette 1 Pull the cassette out until it stops 3 ...

Page 23: ...11 7 Install the cassette into the digital multi function system 6 Place paper in the cassette Up to 550 sheets of paper 2 4 inches recommended by Toshiba can be set Do not add paper above the line indicated on the guide Do not use creased folded wrinkled or damp sheets of paper Side guide Approx 0 5 mm Side guide Approx 0 5 mm Note Make sure that a gap of approx 0 5 mm less than 1 mm in total is ...

Page 24: ...al multi function system is warming up place the original on the glass select the desired copy modes and press the key Wait warming up Auto Start When the machine reaches its proper operating temperature copying will automatically start Tip Even after you have pressed the key you can change the copy modes if copying has not yet started To cancel the auto job start mode press the key 1 Open the pow...

Page 25: ...03 FAX SETUP appears on the menu only when the FAX option is installed DEFAULT SETTINGS 01 MACHINE DEFAULTS 02 COPY SETUP 03 FAX SETUP MACHINE DEFAULTS 01 CASSETTE SIZE 02 WALKUP SCREEN 03 TIMERS 4 Select 01 CASSETTE SIZE and press the key Tip 02 WALKUP SCREEN appears on the menu only when the FAX option is installed 5 Press the or key to select the paper cassette to be specified and press the key...

Page 26: ...g the paper size of the stack feed bypass if the key is pressed while paper are not placed on the stack feed bypass or the auto clear time has passed the setting is returned to its initial condition paper size setting is cleared for resetting In this case perform the setting again If paper are placed on the stack feed bypass during the initial condition the screen of step 6 appears and you can set...

Page 27: ...de is shown with asterisks When a correct department code is entered the following message appears 3 Make copies as you would normally When you have finished making copies either press the key twice or wait 45 seconds When a wrong department code is entered the following message appears Enter the correct department code Enter DEPARTMENT CODE 1 PAPER APS AUTO FINISHING SORT ZOOM 100 EDIT READY 1 PA...

Page 28: ...1 2 3 4 5 6 7 9 10 11 12 8 1 14 BEFORE MAKING COPIES ...

Page 29: ... MAKE COPIES 1 GENERAL COPYING PROCEDURE 2 2 2 SETTING ORIGINALS 2 4 Originals 2 4 Placing the Original on the Glass 2 5 Using the Automatic Document Feeder optional or Reversing Automatic Document Feeder optional 2 6 3 INTERRUPT COPYING 2 8 ...

Page 30: ...or the reversing automatic document feeder optional Page 2 6 The initial default settings of the digital multi function system at the time of installation are as shown on the right You can change these initial settings Page 5 18 1 The copy modes that are automatically set when the power is turned on or when the key is pressed on the control panel are called the initial default settings Copying Pro...

Page 31: ...i function system starts copying After completion of the copying the message READY appears again For the e STUDIO160 when an original is scanned from the glass a message appears prompting you to specify the size of the original that you would like to copy Use the or key to specify the size of the original Then press the key The machine will start copying COPYING 1 PAPER LT R AUTO FINISHING SORT 10...

Page 32: ...Size capable of automatic detection Regular size Letter format LD LG LT LT R ST R COMP for e STUDIO200 250 only Regular size Letter format LD LG LT LT R ST R COMP Regular size Letter format LD LG LT LT R ST R COMP Types of original Sheets Three dimensional objects Books Plain paper thermal paper for word processor or fax long originals originals with filing holes 2 3 and 4 holes 13 lb 29 lb Multi ...

Page 33: ...iginal Book type Originals 1 Raise the original cover or the automatic document feeder optional and set the original in the direction shown in the figure If the original is not set in the correct direction copies will not be delivered in the correct page order 2 Lower the original cover or the automatic document feeder optional slowly Do not try to force the original cover or reversing automatic d...

Page 34: ...Automatic Document Feeder optional or the Reversing Automatic Document Feeder option 2 SETTING ORIGINALS Cont 1 After aligning the edges of the originals well place them on the original feed tray facing up and align the slides to the width of the originals Slide ...

Page 35: ... holes or torn originals 3 Taped pasted or clipped cut out originals 6 Damp originals Also the following originals should be handled carefully 1 Folded or curled originals should be smoothed out before being used 2 Originals with the same width can be set at a time Do not mix originals with different widths 3 Originals sticking to each other or originals that are surface treated may fail to separa...

Page 36: ...s one at a time 2 Place the original If the previous original remains on the glass open the original cover or automatic document feeder optional or the reversing automatic document feeder optional and replace it with the original to be interrupt copied 3 Press the key Repeat steps 2 to 4 if you need to interrupt copying again 4 After interrupt copying is finished press the key again When the follo...

Page 37: ...TION 3 2 Automatic Paper Selection APS 3 2 Manual Paper Selection 3 4 Bypass Copying 3 5 Bypass Copying by Specifying the Copy Size 3 7 2 REDUCTION AND ENLARGEMENT COPYING 3 8 3 COPYING WITH COPY DENSITY SELECTION 3 13 4 ORIGINAL IMAGE QUALITY SELECTION 3 15 ...

Page 38: ... For automatically selectable original sizes Page 2 4 1 Check that APS mode is selected in the upper left portion of the Message Display 4 Enter the desired copy quantity using numeric keys A copy quantity up to 999 can be keyed in The copy quantity default is set at one When an incorrect quantity is set press the key and key in the correct number If you press the key all current digital multi fun...

Page 39: ... 8 Press the or key to select the original size and press the key Select original size 1 LT LD LT R LG ST R For the e STUDIO160 when an original is placed on the glass for copying the following message appears Select original size ...

Page 40: ... selection For these types of originals use the manual paper selection 1 Press the key with the initial screen shown in the COPY mode 2 Use the or keys and select the paper cassette that you would like to feed paper from Please note that the cassettes must be pre defined with the size of paper loaded Page 1 8 3 Place the original s on the original feed tray or on the glass Setting Original Page 2 ...

Page 41: ...glass Setting Original Page 2 4 2 Select desired copy mode 4 Place sheets of copy paper on the stack feed bypass The following message appears 3 Align the slide of the stack feed bypass to the width of the paper to be loaded For type of paper that can be used in bypass copying Page 1 7 Select paper size Press the or key to select the paper size of the stack feed bypass and press the key Extend the...

Page 42: ...ng the numeric keys 6 Press the key Tip If the paper misfeeds in the bypass and the Paper Jam Lamp flashes remove the sheets from the bypass and replace them Page 7 13 If the size of paper to be loaded is not identical to one specified in the default setting the default settings must be reset Page 1 11 ...

Page 43: ...its direction are displayed Then press the key 3 Select the desired duplex printing mode dual page copying sort copying offset magazine sort 2 in 1 4 in 1 or alternation as well as the image density and the reproduction ratio Please note that the reversing automatic document feeder optional and the automatic duplexing unit optional are required for duplex printing and magazine sort 4 Key in the de...

Page 44: ...d copy paper are used select a ratio corresponding to the paper size Selectable Ratio Using Automatic Magnification Selection AMS 1 Press the key ZOOM UP DOWN The Down and Up arrow keys select the desired reproduction ratio at 1 increments XY ZOOM This function allows you to alter the reproduction ratio in the X and Y directions of your copies Highly transparent originals such as OHP films and tra...

Page 45: ...en select the paper cassette Manual Paper Selection Page 3 3 READY 1 PAPER LT AUTO FINISHING SORT ZOOM AMS EDIT Change direction of org Use reduction cassette Select original size 1 LT LD LT R LG ST R For the e STUDIO160 when an original is placed on the glass for copying the following message appears Select original size Press the or key to select the original size and press the key Select the ca...

Page 46: ...by means of pressing the key However as for the magnification the one remaining after setting will be applied 1 Place the original to be copied in the glass 2 Press the key or key Press the key and go to step 3 or press the key and go to step 4 3 Use the or keys and select REDUCE ENLARGE Press the key 4 Use the or key to select the ORIGINAL size READY 1 PAPER LT AUTO FINISHING SORT ZOOM 78 EDIT Wh...

Page 47: ...ntinuously Further holding down the key changes the reproduction ratio by 10 When the original is scanned on the original glass the reproduction ratio can be specified to 50 to 200 for the e STUDIO160 and 25 to 400 for the e STUDIO200 250 When the original is scanned in the automatic document feeder optional or reversing automatic document feeder optional the reproduction ratio of 50 to 200 can be...

Page 48: ...inal glass the reproduction ratio can be specified to 50 to 200 for the e STUDIO160 and 25 to 400 for the e STUDIO200 250 When the original is scanned in the automatic document feeder optional or reversing automatic document feeder optional the reproduction ratio of 50 to 200 can be specified 4 Xxxx Yxxx appears next to zoom on the display 5 Select the desired paper cassette image density and copy...

Page 49: ...O 2 Place the original and press key The digital multi function system automatically detects the density of the original and makes copies at the optimum exposure Copying in the Manual Mode 1 Press the key 2 Press the or key to select the desired image density To produce lighter copies press the key Each time you press the key the density indicating mark moves one step to the left and your copies a...

Page 50: ...s to the initial screen for copying The specified copying density appears on the message display 4 Place the original to be copied in the feeder or glass and press the key Copies are made in the selected image density READY 1 PAPER LT 2 FINISHING SORT ZOOM 100 EDIT 3 COPYING WITH COPY DENSITY SELECTION Cont ...

Page 51: ...s The Text Photo mode is selected as the default mode This mode is used for making copies of regular originals 1 Place the original s on the feed tray or on the glass 2 Each time you press the key the image mode switches Press the key repeatedly until the lamp located above left of the desired image mode illuminates Tip Image mode selection may not be allowed depending on the messages displayed Fo...

Page 52: ...1 2 3 4 5 6 7 9 10 11 12 8 3 16 BASIC MENU ...

Page 53: ...8 2 Sided Originals 1 Sided Copies 4 9 Book Type Originals 2 Sided Copies 4 10 2 DUAL PAGE COPYING 4 12 3 IMAGE SHIFT COPYING 4 13 4 EDGE ERASE COPYING 4 14 5 2 IN 1 4 IN 1 4 15 6 MAGAZINE SORT 4 18 7 ANNOTATION 4 21 8 EDITING 4 23 Mirror Image 4 23 Negative Positive Reversal 4 24 9 JOB BUILD 4 25 10 COPYING MIXED SIZE ORIGINALS 4 26 11 JOB MEMORY 4 27 12 PAPER TYPE 4 29 13 MENU LIST 4 30 ...

Page 54: ...llows you to set the type of originals 1 sided 2 sided or book type and the desired type of copying 1 sided or 2 sided Original Copy and require the optional automatic duplexing unit to be installed and require the optional reversing automatic document feeder to be installed ...

Page 55: ...the key Then press the key Press the key to return to the initial screen for copying Tip The menu that appears here varies depending on whether the auto duplexer unit optional and the reversing automatic document feeder optional are installed or not 2 Confirm that DUPLEX is highlighted on the screen Press the key 6 Press the key 5 Place the original s on the feed tray or on the glass 4 Select the ...

Page 56: ...s copying mode requires the automatic duplexing unit optional to be installed 1 DUPLEX COPYING Cont 1 Press the key on the control panel while in the initial screen for copying The EDIT MENU screen appears 2 Confirm that DUPLEX is highlighted on the screen Then press the key 3 Select 1 2 by pressing the key Then press the key Press the key to return to the initial screen for copying 4 Select the d...

Page 57: ... the same direction top to bottom When placing originals horizontally Arrange the originals so that the odd and even pages are placed alternately in opposite directions and then set them in the automatic document feeder optional or the reversing au tomatic document feeder optional 5 4 3 2 1 5 4 3 2 1 TOP TOP TOP TOP TOP TOP TOP TOP TOP TOP ...

Page 58: ...ace the first page of the originals first side on the glass 6 Press the key For the e STUDIO160 when the automatic paper selection APS mode or automatic magnification selection AMS is selected a message appears prompting you to specify the size of the original that you would like to copy Use the or key to specify the size of the original Then press the key The digital multi function system will st...

Page 59: ...ion top to bottom When setting originals horizontally The first side and second side should be placed in the oppo site direction top to bottom Vertical placement First side Second side Horizontal placement First side Second side 9 Repeat steps 5 to 8 until all the originals are copied 10 After the last original is scanned select NO with the key and then press the key ...

Page 60: ...mode requires the reversing automatic document feeder optional and the automatic duplexing unit optional to be installed 1 Press the key on the control panel while in the initial screen for copying The EDIT MENU screen appears 2 Confirm that DUPLEX is highlighted on the screen Then press the key 3 Select 2 2 by pressing the key Then press the key Press the key to return to the initial screen for c...

Page 61: ... Then press the key Press the key to return to the initial screen for copying 4 Select the desired paper cassette reproduction ratio image density and copy quantity The automatic paper selection mode is selected as the default mode 5 Place the originals on the feed tray 6 Press the key READY 1 DUPLEX 1 1 DUAL TYPE OFF IMAGE SHIFT OFF 2 Sided Originals 1 Sided Copies How to place originals Always s...

Page 62: ...increment or key to decrement the value Specify the value within a range of 8 mm to 30 mm 6 Press the key READY 1 DUPLEX 1 1 DUAL TYPE OFF IMAGE SHIFT OFF Book Type Originals 2 Sided Copies 5 Select the start and end page Select the desired copy mode using the or key RIGHT RIGHT Copying is started from a right page of the book and it ends on a right page RIGHT LEFT Copying is started from a right ...

Page 63: ...orarily be stacked inside the digital multi function system Place page 1 of the original first 13 Set the next original Turn the page of the book and set it in the same way as previously Select YES when you need to copy both left and right pages Select YES SINGLE when you need to copy the one page only 14 Press the key 15 Repeat steps 12 and 13 until you finish copying the book 9 Press the key to ...

Page 64: ... ON you are given an opportunity to select the appropriate book margin Any value ranging from 8 mm to 30 mm is acceptable When 20 mm is entered a line that appears at the center of the copy is masked in a range of 20 mm When a copy is made a 10 mm margin is established on both sides of the line When both the Edge Erase width and the Book Margin are specified a bigger value would be specified for t...

Page 65: ...lect on which side the margin is to be created Then press the key Select either LEFT MARGIN or RIGHT MARGIN to be set 4 Specify the margin by using the or key Press the key The default margin is 7 mm Any value ranging from 4 mm to 15 mm is acceptable 5 Upon pressing the key the programmed margin appears on the screen Press the key to return to the initial screen for copying 6 Place the originals o...

Page 66: ...n the control panel while in the initial screen for copying The EDIT MENU screen appears 2 Press the key to display Edge Erase Then press the key 3 Press the key and select the ON Then press the key 4 The current edge erase margin appears on the screen To change the edge erase margin select the desired margin by using the or key Then press the key The edge erase margin changes at increments of 1 m...

Page 67: ...n enlargement copying is not available with this function 1 2 3 4 5 6 7 8 1 2 3 4 5 6 7 8 2 4 6 8 1 3 5 7 7 8 3 4 1 2 5 6 1 sided originals 2 IN 1 1 sided copys 2 sided originals 4 IN 1 1 sided copys 2 sided copys 1 Place the original on the original feed tray 2 Press the key The EDIT MENU screen appears 3 Press the key to display 2IN1 4IN1 Then press the key 4 Press the key and select 2IN1 or 4IN...

Page 68: ... on the screen Press the key to return to the initial screen for copying 8 Select the desired paper cassette image density and copy quantity 9 Press the key 2IN1 1 Original Copy 2 2 2 1 READY 1 IMAGE SHIFT OFF EDGE ERASE OFF 2IN1 4IN1 2IN1 2 1 Note To select the paper cassette press the key select AMS and then select the desired paper cassette ...

Page 69: ... to specify the size of the original Then press the key The digital multi function system will start scanning the document When the first original has been scanned the Next Original screen appears 3 Select YES set the next original and press the key While the Next Original screen is being shown if the key is pressed the scanned data is deleted and 2 in 1 4 in 1 copying is terminated Select YES or ...

Page 70: ...ol panel while in the initial screen for copying The EDIT MENU screen appears 3 Press the key to display ON Then press the key 4 Press the key and specify whether the originals are single side or duplex Then press the key 5 MAGAZINE SORT X 2 appears Press the key to return to the initial screen for copying 6 Select the desired image density and copy quantity READY 1 EDGE ERASE OFF 2IN1 4IN1 OFF MA...

Page 71: ...ed data is deleted and MAGAZINE SORT is terminated Select YES or NO and press the key For the e STUDIO160 a message appears prompting you to specify the size of the original that you would like to copy Use the or key to specify the size of the original Then press the key The digital multi function system will start scanning the document When the first original has been scanned the Next Original sc...

Page 72: ...4 5 6 7 9 10 11 12 8 4 20 EDIT MENU 9 For the subsequent originals repeat step 8 above 10 When scanning of the last original has finished select NO Next Original 3 YES NO 11 Press the key 6 MAGAZINE SORT Cont ...

Page 73: ... the key on the initial screen for copying The EDIT MENU screen appears 2 Press the key to display ANNOTATION Then press the key while ANNOTATION is displayed 3 Press the key and select the desired annotation type Then press the key 4 Press the key to return to the initial screen for copying Date and time are automatically printed according to the format which is preset in the digital multi functi...

Page 74: ...n is being shown if the key is pressed the scanned data is deleted and the ANNOTAION is terminated Select YES or NO and press the key 8 For the next and subsequent originals repeat step 7 above 9 When the last original is finished being scanned select NO 10 Press the key 7 ANNOTATION Cont Select original size 1 LT LD LT R LG ST R For the e STUDIO160 when the automatic paper selection APS mode or a...

Page 75: ...en for copying The EDIT MENU screen appears 2 Press the key to display EDITING Then press the key 3 Press the key to display MIRROR Then press the key 4 EDITING MIRROR appears Press the key to return to the initial screen for copying 5 Select the desired paper cassette image density reproduction ratio and copy quantity 6 Place the original on the glass or the feed tray and press the key READY 1 MA...

Page 76: ...anel while in the initial screen for copying The EDIT MENU screen appears 2 Press the key to display EDITING Then press the key 3 Press the key and select NEG POS Then press the key 4 EDITING NEG POS appears Press the key to return to the initial screen for copying 5 Select the desired paper cassette image density reproduction ratio and copy quantity 6 Place the original on the glass or the feeder...

Page 77: ...tray and press the key 7 After the original is scanned the screen on the right appears When scanning the next original without changing any settings place it on the glass or feed tray and select Scan next page Then press the key In scanning the next original if the scan density and Edge Erase settings are changed select Change current settings to change the settings Then press the key When all ori...

Page 78: ...ge density and copy quantity as required 5 Place the originals on the original feed tray 6 Press the key 10 COPYING MIXED SIZE ORIGINALS Put original in doc feeder 1 EDITING OFF BUILD JOB OFF MIX SIZE ON A set of originals with different paper sizes can be copied together in the same operation as long as the originals all have the same width Note This copy function requires the optional reversing ...

Page 79: ...The EDIT MENU screen appears 3 Press the key to display JOB MEMORY Then press the key 4 Select MEMORY by pressing the key Then press the key 5 Select the job number to be saved from MEMORY1 to MEMORY4 Then press the key Tip When a memory location with a copy job programmed is selected the Job Memory icon is highlighted The stored copy mode is not erased when the digital multi function system is tu...

Page 80: ...ct the desired Job number from MEMORY1 to MEMORY4 Then press the key Press the key to return to the initial screen for copying Tip When the selected memory location contains a pre programmed job the Job Memory icon is highlighted with a box 5 Place the original on the glass or the feed tray and press the key The original is copied in the combination of modes you have recalled READY 1 EDITING OFF J...

Page 81: ...reen for copying 6 Refer to the procedures described in Bypass Copying Page 3 4 or Bypass Copying by Specifying the Copy Size Page 3 6 Then make a copy Selection of Thick paper or Transparency mentioned above applies only to the preceeding copying jobs 12 PAPER TYPE READY 1 MIX SIZE OFF JOB MEMORY PAPER TYPE TRANSPARENCY You can select special paper for copying This special paper is fed from the s...

Page 82: ... panel while in the initial screen for copying The EDIT MENU screen appears Print out the digital multi function s menu list READY 1 JOB MEMORY PAPER TYPE OFF MENU LIST MENU LIST Printing accepted The menu list will be printed out 2 Press the key to display MENU LIST Then press the key ...

Page 83: ...AKER VOLUME 5 10 5 DEPARTMENT CODE 5 11 Department Code Setting 5 11 Clearing Department Code Counters 5 13 Deleting Department Code 5 14 Change Department Code Setting 5 15 Report Printing 5 17 Canceling Resuming Department Management 5 18 6 COPY SETUP 5 19 7 DATE AND TIME 5 23 8 CHANGE DISPLAY PANEL LANGUAGE 5 26 9 FUNCTION LIST 5 27 10 TOTAL COUNTER 5 28 ...

Page 84: ...e key 3 Select 01 MACHINE DEFAULTS and press the key Tip 03 FAX SETUP can be selected only when the FAX option is installed PROGRAM 01 DEFAULT SETTINGS 02 LISTS 03 INITIAL SETUP DEFAULT SETTINGS 01 MACHINE DEFAULTS 02 COPY SETUP 03 FAX SETUP 5 Select the desired function to display on the initial screen and press the key Tip 03 SCAN can be selected only when the printer option is installed 4 Selec...

Page 85: ...ZE 02 WALKUP SCREEN 03 TIMERS 4 Select 02 TIMERS and press the key PROGRAM 01 DEFAULT SETTINGS 02 LISTS 03 INITIAL SETUP 5 Select 1 AUTO CLEAR and press the key 6 Press the or key to specify a waiting time for 1 AUTO CLEAR Select the waiting time from the following 15 30 45 60 75 90 105 120 135 150 180 210 240 270 or 300 seconds TIMERS AUTO 300SEC CLEAR 45 15SEC 7 Press the key Tip 02 WALKUP SCREE...

Page 86: ... LISTS 03 INITIAL SETUP PROGRAM 01 MACHINE DEFAULTS 02 COPY SETUP 03 FAX SETUP 2 TIMERS Cont Tip 03 FAX SETUP can be selected only when the FAX option is installed 4 Select 03 TIMERS and press the key 5 Select 2 AUTO LOW POWER and press the key 6 Select the desired Automatic Low Power Time by using the or key Then press the key Select the waiting time from the following 1 2 3 4 5 10 15 20 25 30 35...

Page 87: ...esired Automatic Sleep Time by using the or key Select the waiting time from the following 3 5 10 15 20 25 30 35 40 45 50 55 60 70 80 90 100 110 120 150 180 210 or 240 minutes How to Change the Sleep Time 5 Select 3 AUTO SLEEP and press the key TIMERS AUTO 240MIN SLEEP 45 3MIN TIMER 1 AUTO CLEAR 2 AUTO LOW POWER 3 AUTO SLEEP MACHINE DEFAULTS 01 CASSETTE SIZE 02 WALKUP SCREEN 03 TIMERS 3 Select 01 ...

Page 88: ...9 10 11 12 8 5 6 PROGRAM MENU 2 TIMERS Cont 7 Press the key Clearing the Super Energy Saver mode Press the key 8 Press the key when finished Clearing the Automatic Sleep mode Press any key except for the key and key ...

Page 89: ...ft ON 3 WEEKLY TIMER How to Set the WeeklyTimer 1 Press the key to enter the program menu 2 Select 01 DEFAULT SETTINGS and press the key 3 Select 01 MACHINE DEFAULTS and press the key 4 Select the 04 WEEKLY TIMER and press the key 5 Select 2 ON and press the key PROGRAM 01 DEFAULT SETTINGS 02 LISTS 03 INITIAL SETUP PROGRAM 01 MACHINE DEFAULTS 02 COPY SETUP 03 FAX SETUP MACHINE DEFAULTS 02 WALKUP S...

Page 90: ...ess the key 8 Enter a turn off time for the digital multi function system and press the key 9 Repeat steps 6 to 8 to make aWEEKLYTIMER setting for each day of the week 10 Select 8 Done and press the key 11 Press the key to return to the initial screen for copying When the TIME FORMAT is at 12 HOUR be sure to select AM PM SUNDAY ON TIME HH MM 08 45 SUNDAY ON TIME HH MM 12 34 AM SUNDAY OFF TIME HH M...

Page 91: ...WEEKLYTIMER and press the key 5 Select 1 OFF and press the key When the Weekly Timer is turned off any existing times settings are still stored When the weekly timer is resumed the settings made for the Weekly Timer are available WEEKLY TIMER 1 OFF 2 ON 6 Press the key to return to the initial screen for copying Tip 03 FAX SETUP can be selected only when the FAX option is installed Tip 02 WALKUP S...

Page 92: ...PEAKER VOLUME 4 Select 05 SPEAKER VOLUME and press the key SPEAKER VOLUME 1 ALARM VOLUME 2 KEY TOUCH VOLUME 3 RINGER VOLUME 5 Select the desired volume control and press the key 6 Press the or key to adjust the volume of the beep tone Adjust the volume of the beep tone in eight levels 0 to 7 ALARM VOLUME VOLUME 7 0 0 7 Press the key The screen returns to SPEAKER VOLUME Selection 8 Repeat steps 5 t...

Page 93: ...TUP DEFAULT SETTINGS 01 MACHINE DEFAULTS 02 COPY SETUP 03 FAX SETUP MACHINE DEFAULTS 04 WEEKLY TIMER 05 SPEAKER VOLUME 06 DEPARTMENT CODE DEPARTMENT CODE 1 YES 2 NO DEPARTMENT CODE 1 RECOVER OLD DATA 2 NEW 3 Select 01 MACHINE DEFAULTS and press the key 4 Select 06 DEPARTMENT CODE and press the key 5 Select 1 YES or 2 NO and press the key Select 1 YES when registering the department code for the fi...

Page 94: ...all other department codes So please remember the entered master code MASTER CODE MASTER CODE NUMBER 01 ENTER MASTER CODE 12345 Department Code Entry 9 Enter a department number and press the key Enter a value within a range of 2 to 99 10 Enter a department name and press the key Up to 20 characters can be entered for the department name Important The optional FAX board is required to enter charac...

Page 95: ...ARTMENT CODE ENTER DEPARTMENT NUMBER 1 99 03 6 Enter the department number to be counter cleared and press the key When 1 is entered the counters of all department codes will be cleared When other value 2 to 99 is entered the counter of the entered department code will be cleared 7 Select 4 COUNT CLEAR and press the key The department number counter is cleared and the screen returns to the departm...

Page 96: ...tments as necessary 9 Press the key to return to the initial screen for copying DEPARTMENT CODE ENTER DEPARTMENT NUMBER 1 99 03 DEPARTMENT CODE 1 DELETE 2 MODIFY 3 RETAIN 6 Enter the department number to be deleted and press the key Enter a value within a range of 2 to 99 7 Select 1 DELETE and press the key The selected department number is deleted and the screen returns to the department number e...

Page 97: ...ENT CODE ENTER DEPARTMENT NUMBER 1 99 07 6 Enter the department number to change a setting and press the key The department code change is used to alter the master or individual department codes This procedure can only be performed by a supervisor who possesses the master department password Enter this password before proceeding 8 Enter the department name and press the key Tip The optional FAX bo...

Page 98: ...ENT NUMBER 07 ENTER DEPARTMENT CODE 04096 9 Enter a department code and press the key The same department code cannot be entered for other departments 10 Change or delete a setting for other departments as necessary 11 Press the key to return to the initial screen for copying Already assigned ...

Page 99: ...ect 02 LISTS and press the key PROGRAM 01 DEFAULT SETTINGS 02 LISTS 03 INITIAL SETUP 3 Select 1 DEPARTMENT CODE and press the key The DEPARTMENT CODE list is printed out as the following message appears LISTS 1 DEPARTMENT CODE 2 FUNCTION 3 SUPPLY ORDER The copy count report is printed out for the department code used to initiate this print procedure or all department codes if the master code was u...

Page 100: ...ACHINE DEFAULTS 02 COPY SETUP 03 FAX SETUP 3 Select 01 MACHINE DEFAULTS and press the key MACHINE DEFAULTS 04 WEEKLY TIMER 05 SPEAKER VOLUME 06 DEPARTMENT CODE 4 Select 06 DEPARTMENT CODE and press the key 5 Select 1 YES or 2 NO and press the key Select 1 YES to enable or 2 NO to disable the department management function DEPARTMENT CODE 1 YES 2 NO 6 Press the key to return to the initial screen f...

Page 101: ...r the program menu 2 Select 01 DEFAULT SETTINGS and press the key 3 Select 02 COPY SETUP and press the key Tip 03 FAX SETUP can be selected only when the optional FAX board kit is installed 4 Select 01 APS AMS and press the key 5 Select 1 APS or 2 AMS as the default Select 3 NO if neither Automatic Paper Selection APS nor Automatic Magnification Selection AMS is required for the initial value 6 Pr...

Page 102: ...MS 02 IMAGE MODE 03 LIGHT DARK IMAGE MODE 1 PHOTO 2 TEXT PHOTO 3 TEXT 2 Select 01 DEFAULT SETTINGS and press the key 3 Select 02 COPY SETUP and press the key Tip 03 FAX SETUP can be selected only when the optional FAX board kit is installed 4 Select 02 IMAGE MODE and press the key 5 Select the value to be specified as the default and press the key The screen returns to the COPY SETUP screen 6 Pres...

Page 103: ...s to the COPY SETUP screen When 2 MANUAL is selected proceed to step 6 6 Press the or the key to enter the manual mode To produce lighter copies press the key Each time you press the key the density indicating mark moves one step to the left and your copies are produced proportionally lighter To produce darker copies press the key Each time you press the key the density indicating mark moves one s...

Page 104: ...tion method is set as the default Then the screen returns to the COPY SETUP screen Tip 2 NON SORT OFFSET and 4 SORT OFFSET can be selected only when the Offset Tray or Finisher is installed 5 ALTERNATION can be selected only when the Paper Feed Unit or Stack Feed Bypass is installed 5 ALTERNATION cannot be selected when the Finisher is installed 6 STAPLE is selectable only when the Finisher option...

Page 105: ...FAX board kit is installed 1 Press the key to enter the program menu 2 Select 03 INITIAL SETUP Then press the key Selection of the Time Format 1 Select 02 TIME FORMAT Then press the key 2 Set the system for 12 hours or 24 hours operation Then press the key PROGRAM 01 DEFAULT SETTINGS 02 LISTS 03 INITIAL SETUP INITIAL SETUP 01 DATE TIME 02 LANGUAGE 03 TERMINAL ID TIME FORMAT 1 24 HOUR 2 12 HOUR DAT...

Page 106: ...D YYYY system for 12 hours is selected 1 Select 01 SETTING Then press the key 2 Enter the month 01 to 12 day 01 to 31 and year 2003 etc by using the numeric keys 3 Select the day by using the or key MONTH MODE 1 NUMERIC 2 NAME SETTING MM DD YYYY DAY HH MM 01 15 2003 WED 11 30 PM SETTING MM DD YYYY DAY HH MM 01 01 2003 TUE 11 30 PM DATE MODE 01 YYYY MM DD 02 MM DD YYYY 03 DD MM YYYY DATE TIME 01 SE...

Page 107: ...Check that all the settings are correct If you find an error highlight the area to be corrected using the key Then specify the correct value or make a choice among several alternatives by using the numeric keys or the or key 7 Press the key to accept Press the key to return to the initial screen for copying SETTING MM DD YYYY DAY HH MM 01 15 2003 WED 11 30 PM SETTING MM DD YYYY DAY HH MM 01 15 200...

Page 108: ...nguage and press the key The menu appears in the selected language on the message display panel Note If a language not supported with the digital multi function system is selected English is displayed 5 Press the key to return to the initial screen for copying PROGRAM 01 DEFAULT SETTINGS 02 LISTS 03 INITIAL SETUP INITIAL SETUP 01 DATE TIME 02 LANGUAGE 03 TERMINAL ID LANGUAGE 01 English 02 Français...

Page 109: ...menu 2 Select 02 LISTS by using the or key and press the key PROGRAM 01 DEFAULT SETTINGS 02 LISTS 03 INITIAL SETUP 3 Select 2 FUNCTION by using the or key and press the key The FUNCTION LIST is printed out as the following message appears LISTS 1 DEPARTMENT CODE 2 FUNCTION 3 SUPPLY ORDER Tip 3 SUPPLY ORDER can be selected only when the optional FAX board kit is installed Printing accepted ...

Page 110: ...ou cannot clear this counter 1 Press the key to enter the program menu TOTAL PRINT COUNTER 123456 PROGRAM 04 MENU LIST 05 TEST MODE 06 TOTAL PRINT COUNTER 2 Select 06 TOTAL PRINT COUNTER by using the or key 3 Press the key Press the key to return to the initial screen for copying The total number of copies of the digital multi function system is displayed ...

Page 111: ...CTION 1 FINISHING MODE SELECTION 6 2 2 NON SORT COPYING 6 3 3 SORT COPYING 6 4 4 OFFSET COPYING 6 6 5 ALTERNATION 6 7 6 STAPLING 6 10 When the optional finisher is installed option for e STUDIO200 250 6 10 When the optional Stapler kit is installed 6 13 ...

Page 112: ...job to be output onto separate paper trays Stapler option Sets of copies can be manually stapled when the stapler with work surface is attached Finisher option for e STUDIO200 250 only When the Finisher is attached the OFFSET SORT OFFSET and STAPLE functions become available Trays Paper stopper Note When longer paper such as Ledger size is designated to output onto the lower tray please use the pa...

Page 113: ...RT is displayed Then press the key Tip NON SORT OFFSET and SORT OFFSET can be selected only when the Offset Tray or Finisher is installed 3 Place the originals in the feeder or on the glass 4 Select the desired paper cassette reproduction ratio and image density 5 Press the key 4 4 4 4 4 3 3 3 3 3 5 5 5 5 5 5 4 3 2 1 2 2 2 2 2 1 1 1 1 1 2 NON SORT COPYING READY 1 FINISHING SORT SORT OFFSET NONSORT...

Page 114: ...tal multi function system starts scanning the original Press the key to stop scanning the original temporarily Press the key to resume scanning 5 4 3 2 1 5 4 3 2 1 5 4 3 2 1 5 4 3 2 1 5 4 3 2 1 5 4 3 2 1 Press START to resume 3 PAPER LT R AUTO FINISHING SORT ZOOM 100 If the key is pressed again when scanning has stopped the scanned data is deleted and the sort copying is terminated Select YES or N...

Page 115: ...nished being scanned the Next Original screen appears 5 Select YES set the next original and press the key The digital multi function system starts scanning the original While the Next Original screen is being shown if the key is pressed the scanned data is deleted and the sort copying is terminated Select YES or NO and press the key 6 For the next and subsequent originals repeat step 5 7 When sca...

Page 116: ...sage appears Remove paper from offset Remove the copies from the tray and press the key to continue Refer to the procedures described in NON SORT COPYING when NONSORT OFFSET is selected Page 6 3 Refer to the procedures described in SORT COPYING when SORT OFFSET is selected Page 6 4 READY 1 FINISHING SORT OFFSET NONSORT NONSORT OFFSET When the Offset Tray or Finisher is attached the sets of copies ...

Page 117: ...de Select ALTERNATION from the FINISHING menu by pressing the key Then press the key 4 Key in the desired copy quantity using the numeric keys 5 Select the desired image density and reproduction ratio 6 Press the key The digital multi function system starts copying In this copying mode as sets of copies are output the sets are alternated lengthwise and crosswise on top of each other 2 Press the ke...

Page 118: ... original has been finished being scanned select NO 1 Press the key The FINISHING screen appears Copying 3 PAPER ST AUTO FINISHING ALTERNATION ZOOM 100 The digital multi function system starts scanning the original Press the key to stop scanning the original temporarily Press the key to resume scanning Press START to resume 3 PAPER ST AUTO FINISHING ALTERNATION ZOOM 100 If the key is pressed again...

Page 119: ...5 6 7 9 10 11 12 8 9 Press the key or the key The digital multi function system starts copying In this copying mode as sets of copies are output the sets are alternated lengthwise and crosswise on top of each other ...

Page 120: ... Document Feeder Placed on the glass 1 Place the originals in the feeder 3 Select the STAPLE mode Select STAPLE from the FINISHING menu by pressing the key Then press the key 4 Key in the desired copy quantity using the numeric keys 5 Select the desired image density and reproduction ratio 6 Press the key The digital multi function system starts copying In this copying mode Stapled each set of cop...

Page 121: ...INISHING screen appears Copying 3 PAPER LT R AUTO FINISHING ALTERNATION ZOOM 100 The digital multi function system starts scanning the original Press the key to stop scanning the original temporarily Press the key to resume scanning Press START to resume 3 PAPER LT R AUTO FINISHING STAPLE ZOOM 100 If the key is pressed again when scanning has stopped the scanned data is deleted and the stapling is...

Page 122: ...n sets of copies are inserted aligned to the guide they will be stapled automatically The stapling direction varies depending on the orientation of the sets This function is only available when the optional Stapler kit KK 1600 is installed To staple sets of copies diagonally align them to the guide in the front 6 STAPLING Cont When the optional Stapler kit is installed ...

Page 123: ...OLS 7 2 2 LOADING PAPER 7 3 Adding Paper to the Cassettes 7 3 Adding Paper to the Large Capacity Feeder option for e STUDIO200 250 7 4 3 REPLACING TONER CARTRIDGE 7 5 4 CLEARING PAPER JAM 7 8 5 ADDING STAPLES 7 20 6 REMOVING JAMMED STAPLES 7 24 7 CALLING FOR SERVICE 7 27 8 PERIODIC MAINTENANCE 7 28 ...

Page 124: ...FLASHES 1 DESCRIPTION OF THE GRAPHIC SYMBOLS The message display panel shows the status of the digital multi function system When one of the graphic symbols flashes go to the pages referenced and take the recommended action Page 7 8 to 19 Page 7 3 Page 7 5 ...

Page 125: ...paper recommended by Toshiba can be set in each cassette Do not add paper above the line indicated on the guide Do not use creased folded wrinkled or damp sheets of paper 3 Push the cassette straight in until it comes to a stop Be sure to push the cassette in carefully and fully CASSETTE1 empty Open CASSETTE1 Load Paper Close CASSETTE1 Adding Paper to the Cassettes Note Make sure that a gap of app...

Page 126: ...y and Be sure that the centre lever is not open Refer to the labels attached in the large capacity feeder Do not add paper above the line indicated on the guide Up to 2500 sheets of paper recommended by Toshiba can be set Paper starts being fed from the elevator tray at first and when it runs out of paper the paper on tray moves to the position Do not use creased folded wrinkled or damp sheets of ...

Page 127: ... service technician When the toner in the toner cartridge becomes low the Toner Lamp lights up and the following message appears Toner is low 1 PAPER LT AUTO FINISHING SORT ZOOM 100 EDIT Tip While Toner is low is displayed the digital multi function system is still able to make copies maximum 100 copies When Toner is low is displayed the error lamp lights After copying 100 sheets maximum the messa...

Page 128: ...thly shake the new Toner Cartridge back and forth several times 5 Pull the tab or remove the sealing tape from the new cartridge 6 Install the new Toner Cartridge sliding it into the digital multi function system 7 After installing theToner Cartridge move the charger wire cleaning lever in and out of the Process Unit several times to clean the charger wire 3 REPLACING TONER CARTRIDGE Cont ...

Page 129: ... ratio of the original size and density of original background 2 Size and density of originals 3 The existence of solid black when making copies when a book is copied and the original cover is partially opened 4 Temperature and humidity in the room when making copies 5 Copy density and image quality mode As indicated in the figure below the life of the toner cartridge varies depending on the copy ...

Page 130: ... the cover Paper Misfeeds in the Reversing Automatic Document Feeder optional When a paper misfeed occurs in the digital multi function system the Paper Jam Lamp flashes and the message below appears An illustration and short description indicates the procedures to remove jammed paper Press the or key to scroll through the individual pages of the procedures Misfeed in xxxx xxxx represents the posi...

Page 131: ... handles on the internal paper guide assembly and pivot the assembly to the right 4 Rotate the blue knob on the side to remove any misfed originals Then return the paper guide assembly to its normal position By rotating the knob in the reverse direction of the arrow you can also remove misfed originals from the under side of the RADF as shown ...

Page 132: ...t the original tray When holding the cover to lift up the original tray please be careful not to get your fingers caught 8 Lift the RADF to expose the under side Then press the blue lever to release the access panel 6 Remove any misfed originals 7 Lower the original tray and close the RADF cover ...

Page 133: ...y misfed originals Then close the access panel 1 Open the side cover This cover is located below the optional duplex unit and optional bypass unit if installed Paper Misfeeds in Cassette 2 optional 2 Remove any misfed paper Then close the cover ...

Page 134: ...SHES 4 CLEARING PAPER JAM Cont 1 Open the side cover 2 Remove any misfed paper Then close the cover Paper Misfeeds in Paper Feed Pedestal optional B Paper Misfeed in the Large Capacity Feeder option for e STUDIO200 250 2 Remove any misfed paper 1 Open the cover ...

Page 135: ...matic duplexing unit to open it 2 Open the paper guide Paper Misfeeds in the Automatic Duplexing Unit optional 3 Remove any misfed paper Then lower the paper guide and latch the duplexer into position 1 Remove the misfed paper from the bypass guide Reset the paper on the bypass tray Paper Misfeeds on the Bypass Guide optional ...

Page 136: ...ess the two blue levers To release any paper in the fuser unit Caution As the Fuser Section is heated pay special attention when handling it If hot allow the fuser to cool prior to touching 3 Rotate the knob indicated with a blue arrow toward the inside and remove any misfed paper 4 After clearing all paper return the two blue levers Close the exit cover and the right side cover Return the duplex ...

Page 137: ...ser cover and open the fuser cover by holding the blue felt part Caution As the Fuser Section is heated pay special attention when handling it If hot allow the fuser to cool prior to touching 3 Take out the jam clearance tool from the manual pocket or other storage place and remove the paper jammed inside the fuser unit Tip The manual pocket is not an accessory If you need one please ask your serv...

Page 138: ... levers To release any paper in the fuser unit 4 CLEARING PAPER JAM Cont 5 After clearing paper return the two blue levers Close the fuser cover and tighten the two blue screws Close the exit cover and the right cover Return the automatic duplexing unit to normal position if installed ...

Page 139: ... cover 2 Open the offset tray cover or job separator cover if installed Paper Misfeeds in the Exit Unit 3 Remove any misfeed paper inside the exit unit 4 After removing all paper close the offset tray cover or job separator cover if installed Close the exit cover and the right side cover Return the duplex unit to its normal position if installed ...

Page 140: ...misfed paper inside the relay unit Paper Misfeed in the Relay Unit option for e STUDIO200 250 If paper is misfed at the inner part of the relay unit remove it pushing down the blue lever Remove the misfed paper from the fuser unit side if it is easier 1 Holding the cover handle of the relay unit open it ...

Page 141: ...feed in the Finisher option for e STUDIO200 250 2 Lifting the blue lever pull out any misfed paper 3 Remove any misfed paper in the paper exit area 1 By pulling the lever move the finisher carefully away from the digital multi function system ...

Page 142: ... the digital multi function system 4 Remove the empty staple case upward from the staple cartridge 5 Push in a new staple case into the staple cartridge completely inside until a click is heard Do not remove the seal holding the staples before the staple case is set in the cartridge 2 Holding the sides of the staple cartridge slide it out 3 Turn the staple cartridge upside down ...

Page 143: ... repeat the above procedure from steps 1 to 4 Set staple cartridge 7 Turn the staple cartridge to its normal position and push it back into the stapler Insert the cartridge until it is caught by the claw and fixed with a click sound 6 Pull out the seal holding the staples straight ...

Page 144: ...ystem before replacing the staples 1 Slide forward and lift up the staple cover 2 Pull out the staple cartridge 3 Press the cartridge knob to remove the empty staple case 4 Insert a new staple case into the cartridge Do not peel off the sticker from the staple case before inserting the staple case into the cartridge Staple kit option ...

Page 145: ...he case 6 Attach the cartridge to the stapler Insert the cartridge until it clicks 7 Close the staple cover 8 With digital multi function system power on insert a sheet of paper into the stapler several times to advance the staples into position 5 to 10 times ...

Page 146: ... STAPLES Finisher Page 7 20 3 Remove any jammed staples using your fingertip or something sharp 4 Holding the knob return part to its original position A A 2 Holding the knob lower part 5 Return the staple cartridge to its original position Insert the cartridge until it is caught by the claw and fixed with a click sound 6 Attach the finisher to the digital multi function system ...

Page 147: ... down and replace the staple guide Use this procedure to remove jammed staples Be sure to turn off the digital multi function system before removing the jammed staples 1 Slide forward and lift up the staple cover 2 Press the lever 1 and pull up the staple guide knob 2 2 1 Staple kit option ...

Page 148: ... 4 5 6 7 9 10 11 12 8 7 26 WHEN THE GRAPHIC SYMBOL FLASHES 5 Close the staple cover 6 Restore power to the digital multi function system Confirm proper operation of the stapler 6 REMOVING JAMMED STAPLES Cont ...

Page 149: ...ated in the digital multi function system After you turn on the power switch if a certain temperature is not attained within a certain period of time the safety circuit assumes that something abnormal has happened This causes the operation of the digital multi function system to stop and display Call for service This can occur when the temperature is low even though the digital multi function syst...

Page 150: ...YMBOL FLASHES Note When the either of the following messages appears on the message display 8 PERIODIC MAINTENANCE Time for maintenance Maintenance Drum This indicates that assistance from a qualified service technician is required Call for service or ...

Page 151: ...ODE 1 AUTOMATIC TEST MODE 8 2 AUTO TEST 8 2 2 INDIVIDUAL TEST MODE 8 3 INDIVIDUAL TEST Summary 8 3 3 ADF TEST 8 4 4 KEY TEST 8 6 5 LED TEST 8 7 6 LCD TEST 8 8 7 SPEAKER TEST 8 9 8 SWITCH TEST 8 10 9 TEST PRINT 8 11 10 PRINTING A TEST RESULT 8 12 ...

Page 152: ... prints one test page PHONE BOOK DATA TEST Only when optional FAX kit is installed Checks the phone book data PCL BOARD TEST Checks the optional PCL print kit Note AUTO TEST cannot be performed if image data is stored in the memory 1 Press the key to enter the program menu 2 Select 05 TEST MODE and press the key 3 Select 01 AUTO TEST and press the key Auto Test appears on the screen indicating tha...

Page 153: ...ODE and press the key 3 Select 02 INDIVIDUALTEST and press the key PROGRAM 01 DEFAULT SETTINGS 02 LISTS 03 INITIAL SETUP 04 MENU LIST 05 TEST MODE TEST MODE 01 AUTO TEST 02 INDIVIDUAL TEST 03 TEST RESULT LIST INDIVIDUAL TEST 01 ADF TEST 02 KEY TEST 03 LED TEST 04 LCD TEST 05 SPEAKER TEST 06 SWITCH TEST 07 TEST PRINT 4 Select and perform the desired test 5 Press the key to return to the digital mul...

Page 154: ...DF TEST and press the key 5 Load the documents in the document tray 6 Press the key PROGRAM 01 DEFAULT SETTINGS 02 LISTS 03 INITIAL SETUP 04 MENU LIST 05 TEST MODE TEST MODE 01 AUTO TEST 02 INDIVIDUAL TEST 03 TEST RESULT LIST INDIVIDUAL TEST 01 ADF TEST 02 KEY TEST 03 LED TEST 04 LCD TEST 05 SPEAKER TEST 06 SWITCH TEST 07 TEST PRINT ADF TEST LOAD DOCUMENTS IN FEEDER ADF TEST PRESS START KEY ADF TE...

Page 155: ...ded is consistent with the number of documents unload select 1 YES and press the key If the documents are not fed properly even once select 2 NO and press the key The results of the ADF test can be confirmed with the self test report Page 8 12 If the result of the ADF test is judged to be NG call your service representative ADF TEST PAGE NUMBER CORRECT 1 YES 2 NO ...

Page 156: ... pressing the key the result will be NG 6 Press the key the result of the key test is displayed on the screen The results of the KEY test can be confirmed with the self test report Page 8 12 If the result of the KEY test is judged to be NG call your service representative PROGRAM 01 DEFAULT SETTINGS 02 LISTS 03 INITIAL SETUP 04 MENU LIST 05 TEST MODE TEST MODE 01 AUTO TEST 02 INDIVIDUAL TEST 03 TE...

Page 157: ... 1 OK and press the key If even one LED did not light select the 2 NG and press the key The results of the LED test can be confirmed with the self test report Page 8 12 If the result of the LED test is judged to be NG call your service representative PROGRAM 01 DEFAULT SETTINGS 02 LISTS 03 INITIAL SETUP 04 MENU LIST 05 TEST MODE TEST MODE 01 AUTO TEST 02 INDIVIDUAL TEST 03 TEST RESULT LIST INDIVID...

Page 158: ...played five seconds after the elements turn off 7 If all elements of the LCD turned on and off normally select 1 OK and press the key If even one element fails to turn on and off select 2 NG and press the key The results of the LCD test can be confirmed with the self test report Page 8 12 If the result of the LCD test is judged to be NG call your service representative PROGRAM 01 DEFAULT SETTINGS ...

Page 159: ...s are output normally 6 After checking press the key 7 If the volumes are output normally select 1 OK and press the key If even one of them is not output normally select 2 NG and press the key The results of the SPEAKER test can be confirmed with the self test report Page 8 12 If the result of the SPEAKER test is judged to be NG call your service representative PROGRAM 01 DEFAULT SETTINGS 02 LISTS...

Page 160: ... 5 Follow the procedure displayed on the screen The results of the switch test can be confirmed with the self test report Page 8 12 If the result of the switch test is judged to be NG call your service representative PROGRAM 01 DEFAULT SETTINGS 02 LISTS 03 INITIAL SETUP 04 MENU LIST 05 TEST MODE TEST MODE 01 AUTO TEST 02 INDIVIDUAL TEST 03 TEST RESULT LIST INDIVIDUAL TEST 01 ADF TEST 02 KEY TEST 0...

Page 161: ... press the key The PRINT TEST pattern is printed out and the following message appears If the result of the PRINT test is judged to be NG call your service representative Printing accepted PROGRAM 01 DEFAULT SETTINGS 02 LISTS 03 INITIAL SETUP 04 MENU LIST 05 TEST MODE TEST MODE 01 AUTO TEST 02 INDIVIDUAL TEST 03 TEST RESULT LIST INDIVIDUAL TEST 01 ADF TEST 02 KEY TEST 03 LED TEST 04 LCD TEST 05 SP...

Page 162: ...r the program menu 2 Select 05 TEST MODE and press the key 3 Select 03 TEST RESULT LIST and press the key The self test report is printed out and the following message appears Printing accepted PROGRAM 01 DEFAULT SETTINGS 02 LISTS 03 INITIAL SETUP 04 MENU LIST 05 TEST MODE TEST MODE 01 AUTO TEST 02 INDIVIDUAL TEST 03 TEST RESULT LIST TEST MODE 01 AUTO TEST 02 INDIVIDUAL TEST 03 TEST RESULT LIST ...

Page 163: ...9 1 1 2 3 4 5 6 7 9 10 11 12 8 9 MAINTENANCE 1 DAILY INSPECTION 9 2 2 CLEANING THE WIRE 9 3 3 SIMPLE TROUBLESHOOTING 9 5 ...

Page 164: ...h a neutral detergent Then dry with a soft cloth Cleaning the Automatic Document Feeder optional or Reversing Automatic Document Feeder optional Clean the automatic document feeder optional roller or reversing automatic document feeder optional roller with alcohol or a soft cloth moistened with a neutral detergent Make sure that the soft cloth is squeezed well Then dry with a soft cloth Note Befor...

Page 165: ...TO TURN OFF THE POWER before cleaning the charger wire Cleaning the charger wire 1 Open the front cover 2 Clean the charger Hold the cleaning knob pull it out slowly and fully to the front and then push it back to the inside carefully and completely Repeat this 2 or 3 times Note Make sure that the charger knob is pushed in fully inside 3 Close the front cover ...

Page 166: ...ened open the side cover 2 Clean the transfer charger wire using the attached charger cleaning accessory 3 Close the side cover automatic duplexing unit and stack feed bypass When any of the following is generated on the copy clean the transfer charger wire White lines in the direction of paper feed Uneven tone or dim images BE SURE TO TURN OFF THE POWER before cleaning the transfer charger wire ...

Page 167: ...ti function system in the Energy Saving mode Is a department code required Is the code correct Is the Warming up message displayed Check the following items and if the problem still occurs call for service Digital multi function does not start Items to be checked Is the power cord plug firmly inserted in the outlet Is the front cover firmly closed Is the bypass feed unit cover firmly closed Counte...

Page 168: ... cloth Set the image density properly Reference page _ 9 2 9 2 3 12 Items to be checked Is the original cover firmly closed Is the original glass dirty Is the original cover dirty Is the image density set properly Countermeasure Replace the toner cartridge Set the image density properly Reference page 7 4 3 12 Items to be checked Has the message Toner empty appeared on the screen Is the image dens...

Page 169: ... reproduction ratio suitable for the paper size Set a smaller image shift value Reference page 3 7 4 13 Items to be checked Are the original size and direction and the reproduction ratio suitable for the paper size Is the margin on the copy set properly Countermeasure Refer to the Copying Function Combination Matrix in the Operator s Manual and set again Reference page 10 8 Items to be checked Are...

Page 170: ...1 2 3 4 5 6 7 9 10 11 12 8 9 8 MAINTENANCE ...

Page 171: ...10 1 1 2 3 4 5 6 7 9 10 11 12 8 10 SPECIFICATIONS OPTIONS 1 e STUDIO160 200 250 SPECIFICATIONS 10 2 2 SPECIFICATION OF OPTIONS 10 3 3 PACKING LIST 10 8 4 COPY FUNCTION COMBINATION MATRIX 10 9 ...

Page 172: ...i Copying Sort memory Std 8 MB Max 136 MB Single sided 250 sheets Double sided 125 sheets Sheets books and three dimensional objects Automatic feeding LD to ST R Manual feeding LD to ST R 60 sec or less e STUDIO160 70 sec or less e STUDIO200 250 7 9 sec or less e STUDIO160 6 0 sec or less e STUDIO200 250 Up to 999 copies numeric key entry Preset ratio 50 60 65 78 100 121 129 154 200 Zoom 50 to 200...

Page 173: ...ulti function system 20 9 inches W x 18 1 inches D x 4 3 inches H Approx 11 9 lbs Reversing Automatic Document Feeder Model Name Copy Sides Number of Originals Acceptable Original Size Power Source Dimensions Weight MR 3011 Single side Duplex Up to 100 originals 13 to 22 lb or stacked height of originals 0 63 inches or less Maximum LD Minimum ST R Paper weight 13 to 34 lb 1 side original 13 to 28 ...

Page 174: ...ied from the digital multi function system 20 9 inches W x 21 1 inches D x 4 2 inches H Approx 17 lbs 2 SPECIFICATION OF OPTIONS Cont Paper Feed Pedestal Large capacity Feeder for e STUDIO200 250 only Model Name Type Number of Cassettes Acceptable Paper Size Acceptable Paper Weight Cassette Capacity Power Source Dimensions Weight KD 1009 Paper Feed Pedestal Console Type One LD LG LT LT R ST ST R C...

Page 175: ...ource Dimensions Weight MJ 5002 LD LG LT LT R ST ST R 17 to 43 lb 1 55 inches 250 sheets Approx 1 2 inches Supplied from the digital multi function system 19 7 inches W x 16 3 inches D x 6 7 inches H Approx 6 8 lbs Specifications and appearance are subject to change without notice Model Name Acceptable Paper Size Acceptable Paper Weight Maximum Capacity Power Source Dimension Weight Cassette Modul...

Page 176: ... or 80 sheets is reached first 2 x Whichever of 50 copies or 600 sheets is reached first Whichever of 50 copies or 400 sheets is reached first Whichever of 50 copies or 300 sheets is reached first Staples loaded Stack Feed Bypass Model Name Acceptable Paper Loading Capacity Power Source Dimensions Weight MY 1016 Continuous feed 17 to 22 lb Single sheet feed 22 to 43 lb 100 sheets Height of 0 6 inc...

Page 177: ... for Paper Feed Unit Paper Feed Pedestal Large capacity Feeder and Automatic Duplexing Unit Model Name GH 1030 Memory Kit Model Name GC 1050 64 MB Other Optional Kits GF 1110 GA 1031 GD 1061 GD 1070 Network interface card Printer kit FAX kit Internet FAX kit Specifications and appearance are subject to change without notice Specifications and appearance are subject to change without notice Packing...

Page 178: ...os Mirror Alternation Book 2 Staple Mix Size 2nd Function Offset Sort Offset Sort Text Photo Photo Mode Text Mode AMS APS Image Shift D Edge Erase C Dual Page Lighter Dark Auto Manu Zoom Manual B Yes Yes Yes Yes Yes Yes Yes Yes Yes Yes Yes Yes Yes Yes Yes A Yes A Yes Yes Yes Yes Yes Yes Yes Yes Yes Yes Yes No 2 Yes Yes No No 6 No 1 2 Yes Yes Yes Yes Yes No No No No 7 No 7 Yes No No No No 2 No No Y...

Page 179: ...s A Yes A Yes E Yes E No No 7 No 7 No 1 Yes Yes Yes Yes F Yes No No Yes No No No Yes Yes Yes Yes Yes Yes Yes Yes Yes Yes Yes E Yes No No No Yes Yes No 1 No 1 Yes F Yes No No Yes No 1 Yes No Yes Yes No Yes Yes Yes Yes Yes Yes Yes Yes E Yes No No No Yes Yes No 1 No 1 Yes F Yes No No Yes No 1 Yes Yes Yes Yes No Yes Yes Yes Yes Yes Yes Yes Yes E Yes No No No Yes Yes No 1 No 1 Yes F Yes No No Yes No 1 ...

Page 180: ...10 10 10 SPECIFICATIONS OPTIONS ...

Page 181: ...Printed in China e STUDIO160 200 250 NAD OME02000800 ...

Page 182: ... 2002 TOSHIBA TEC CORPORATION All rights reserved 6LA5574400 R02092022900 TTEC 2002 11 ...

Reviews: