User Manual
10-21
Hard Disk Option
Installing Accessories
5.
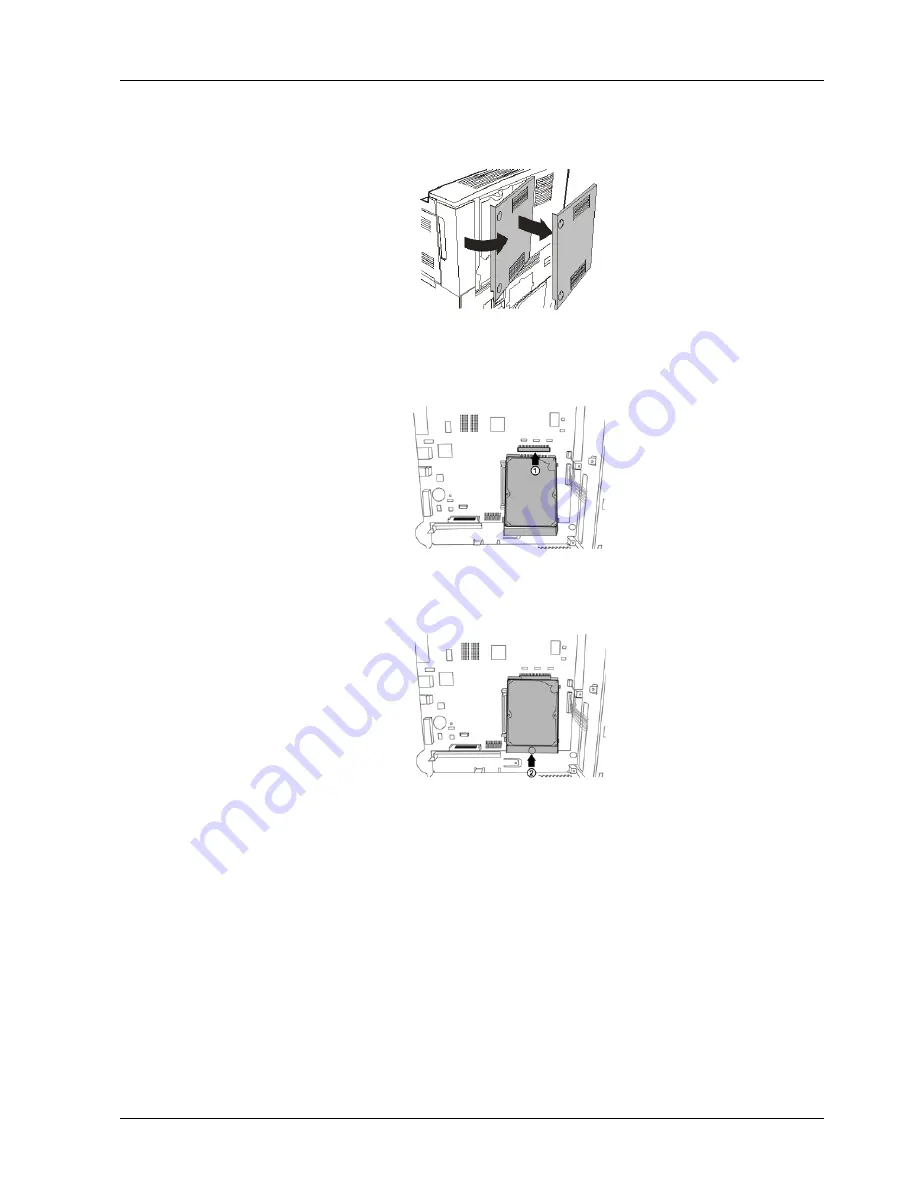
Turn screws on controller assembly counterclockwise until loose and gently pull cover
towards you to remove from printer.
6.
Carefully insert the Hard Drive into the socket, being careful not to damage the fragile
pins.
7.
Seat the Hard Drive over the locating pins and push firmly to seat the unit.
8.
Reinstall the side covers in reverse order.
9.
Connect the power cord to the wall outlet.Turn the printer power switch to the ON [I]
position.
Summary of Contents for 9050N -
Page 1: ...9050N Laser Printer User Manual...
Page 8: ...TOC 6 User Manual...
Page 48: ...3 22 User Manual Cancelling Checking Printing Basic Printing Tasks...
Page 58: ...4 10 User Manual Sending Files Advanced Printing Tasks...
Page 80: ...5 22 User Manual PRECAUTIONS AND LIMITATIONS Networking...
Page 116: ...8 22 User Manual Error and Warning Messages Troubleshooting...
Page 134: ...9 18 User Manual Paper Jam in Tray 6 Clearing Paper Jams 7 Close Door A...
Page 158: ...10 24 User Manual Memory Option and Compact Flash Installing Accessories...
Page 170: ...I 4 User Manual...
Page 171: ......


