59
SV106A User Manual
7.1 Saving files in the external memory
There are two options for storing
measurement results. One option is to
press the
<Save>
push-button right after
the measurement performance. Another
option is to create
<New File>
in the
File Manager
window.
After pressing
<Save>
the
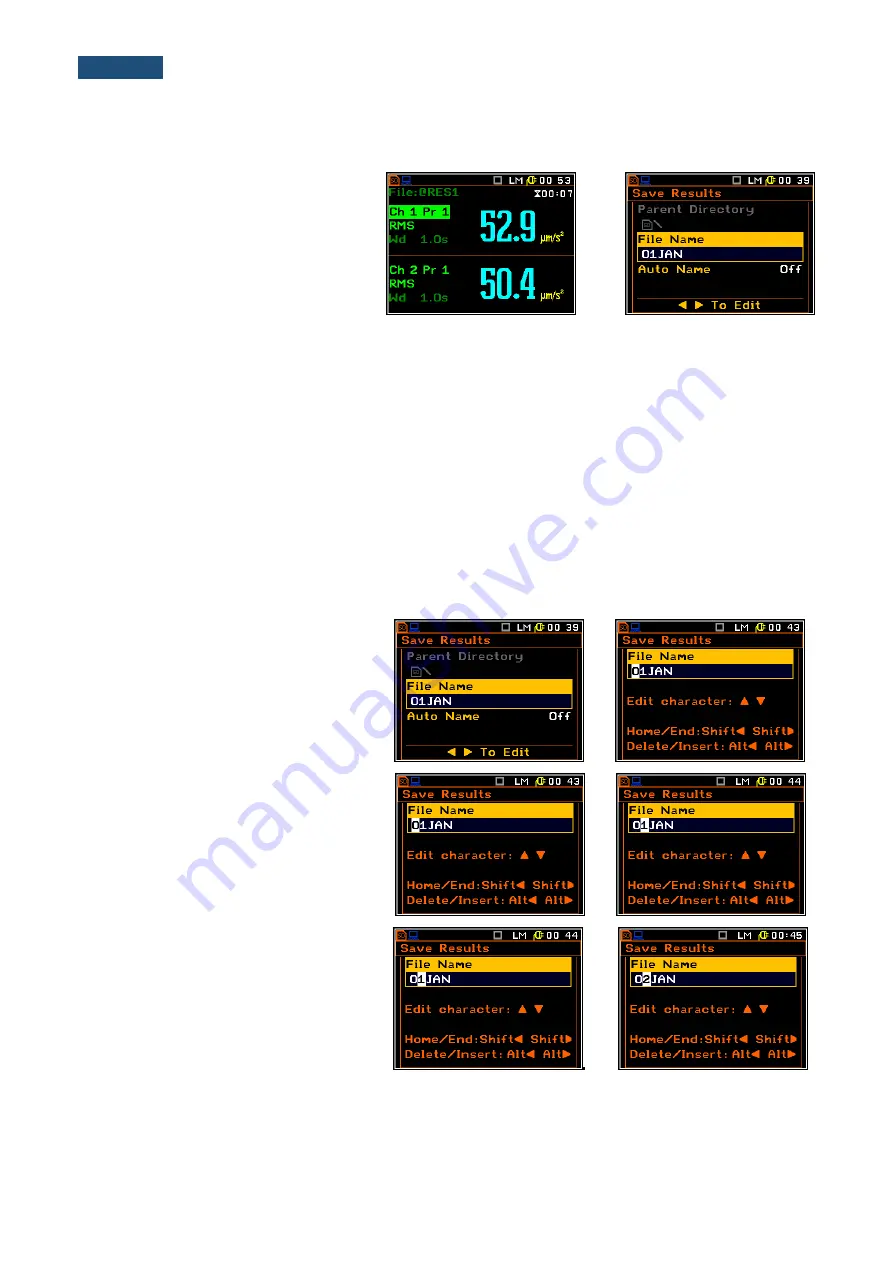
Save Results
window appears.
<Save>
There are two available options for saving files: to edit name, or automatically change name’s number –
increase it by one. These options can be selected in the position
Auto Name
. If
Auto Nam
e is switched off
(
Off
) the name of the saved file is as selected in the position
File Name
. This file name can be edited in the
special window, which is opened by the
<
>
push-button. When the
Auto Name
function is set on
Number
,
then a file is saved with the name as displayed above, but after the last non-numeric letter of text there will be
added digit 0. If there already exists any chain of digits on the end of the file text the number that these digits
create will be increased by one.
The number can be changed from 0 to N. The only limitation of the N value is the length of the file name, which
cannot be longer than eight characters. When such limitation is reached and the instrument cannot
automatically change the file’s name the only possibility is to use a new file name.
The default name for a file is displayed when first entering to this position (after power on). The default name
consists of the day and the month’s abbreviation and cannot exceed 8 characters.
The user c
an skip editing the file’s name and start saving the file by pressing the
<ENTER>
push-button or
return to the
File
list or measurement display by pressing
<ESC>
.
To start file editing the user has to select
the
File Name
position and to press
<
>
or
<
>
push-button. Then the special
window with editing function opens. The
editing process is presented below.
<
>
Selection of the character’s position to
be edited
Select the position of the character in the
edited text using the
<
>
,
<
>
push-
buttons. For the current position the
character can be changed, position can
be deleted or inserted.
<
>
Changing the edited character
The available ASCII characters can be
changed using the
<
>
(or
<
>
) push-
button. The subsequent digits, letters and
other characters appear on the display in
the inversely displayed position after each
press of the above-mentioned push-
buttons.
<
>


