background image

41 


Membrane Cleaning  

For normal cleaning, the SC-3 Acid Cleaning Compound is used first, then the SC-2 Alkaline 
Cleaning Compound. If known bio-fouling is present, the SC-2 may be used first. Using hot wa-
ter if possible, up to 120° (45C) is  recommended as it greatly enhances the ability of the cleaners 
to do their jobs. 
 
If the history of the system is unknown or has been left “unpickled” for an extended length of 
time and biological growth is present, it is recommended that the system is cleaned with SC-2, 
using an alternate source of unchlorinated fresh water before the system is run under pressure. A 
simple test can be performed  to see if biological growth has occurred. Before running the sys-
tem, remove the prefilters and examine their condition If the housings are full of smelly discol-
ored water, the system was not properly stored. Install clean prefilters if they were bad. Next 
check the membrane. Detach the brine discharge hose and lead to a bucket. Open the pressure 
relief valve one turn, and manually run the system for 30 seconds. Examine the brine water: if 
it’s discolored and smells bad, perform an SC-2 cleaning with an alternate source of unchlori-
nated water before running the system pressurized. If the brine is fairly clean, the system can be 
purged, run normally, and checked for performance. Clean the membranes only if performance is 
reduced. 
 
Heating the water is preferable. One way to do this is to find a camp stove and use a large 
stainless steel pot to heat the solution in. The cleaning solution throughout the system will heat as 
it circulates in and out of the pot. An alternative is to heat the one or two gallons of initial water 
to 120° on the main stove before mixing in the cleaner and circulating it into the system. Periodi-
cally stop and reheat the solution. 
 

Perform the cleaning procedures while the ship is in acceptable sea water for purging and testing


There are two types of cleaners: acid and alkaline. The acid cleaner (SC-3) will remove min-
eral scaling. The alkaline cleaner (SC-2) is used to remove biological by-products, oil, and 
dirt particles that get past the prefilters. If membrane performance is reduced and they have 
not been pickled recently, cleaning with both chemicals is recommended. The acid cleaner 
should be used first. If the membrane fails to respond to both cleanings, this is an indication 
of another problem with the system, or that it is time to replace the membrane. Contact 
Spectra Watermakers before removing a membrane. 


The membranes need to be cleaned only when they have lost up to 15%  of their capacity 
due to fouling or the product quality degrades. The leading cause of fouling is from biologi-
cal growth that occurs when the system is left unused without flushing or pickling. Fouling 
from mineral scaling can happen during operation under certain sea water conditions, and 
from rust. Monitor the product salinity and feed pressure bar graphs for higher than normal 
readings for the conditions. Other conditions can cause high pressure such as cold feed wa-
ter or clogged filters. Low product flow is usually due to low voltage, damaged feed pump 
or Clark pump. Look for all other causes before cleaning the membrane. Membrane life can 
be shortened by excessive cleaning. 


The Membranes 

Summary of Contents for Newport 1000

Page 1: ...1 Spectra Watermakers Inc 20 Mariposa Road San Rafael CA 94901 Phone 415 526 2780 Fax 415 526 2787 E mail spectra spectrawatermakers com www spectrawatermakers com O9 22 05 Rotoflow...

Page 2: ...2...

Page 3: ...lete system before assuming the system is opera tional If the boat is in fresh or dirty water see Dry testing the system Spectra dealers are responsible for educating the vessel owners on the operatio...

Page 4: ...4...

Page 5: ...location 47 Z Brane Installation 59 Page Number New Systems Start Up and Testing 28 Dry Testing 31 Normal Start Up Using the Auto Run 33 Automatic Fresh Water Flush Cycle 34 Manual Operation 35 Mainte...

Page 6: ...6...

Page 7: ...will assist you in understanding the function of each component Layout the system Before starting the installation identify the location where each module and component will be placed Insure that the...

Page 8: ...8...

Page 9: ...ine as possible to avoid contamination and air induction The brine discharge through hull should be mounted above the waterline in or just above the boot stripe to minimize water lift Double clamp all...

Page 10: ...tains a 50 Micron prefilter charcoal filter for the flush water flush solenoid and three way intake service valve Optional Z Brane The optional Z Brane Water treatment system is permanently in stalled...

Page 11: ...4 1 2M from the pump module A long screwdriver will be required to access the fasteners The MPC Control Box Filters may be relocated for bet ter access or to prevent splashing water on sensitive equip...

Page 12: ...5M reach of the wires from main feed pump module This unit may be placed as high in the boat as you desire Make sure that the area around and under the pump does not have any water sensitive equipmen...

Page 13: ...wide by 2 7 8 68mm high opening for the panel Locate it in an area that is easily visible and easy to manipulate the buttons Use only Spectra approved remote cable Do not connect power to the alarm bu...

Page 14: ...the overboard thru hull use the supplied 5 8 15 9mm clear braided vinyl hose 700 1000 System Tubing Schematic Note 700 1000 systems use Spectra high pres sure tubing with stainless fittings See Spect...

Page 15: ...nlet thru hull to the flush module and from flush module to the pump module inlet use the supplied clear 3 4 19mm spiral suction rated hose The outlet of the filter assembly on the main module to the...

Page 16: ...els See the Parker tube fitting assembly diagram next page Product water is pre plumbed from the membrane into the electric diversion valve The diversion valve will reject product water into the overb...

Page 17: ...r 1 4 3 8 tube 1 2 tube should not bottom out in the fitting to allow full compression of the O ring Hand tighten the nut DO NOT OVER TIGHTEN DO NOT USE A WRENCH The tube should not come out if pulled...

Page 18: ...ight while moving the tube around to prevent binding One thread should be showing under the nut Secure the tube so it won t back out when tightening Refer to figure 3 Use 13 16 wrench to hold a straig...

Page 19: ...ation motor speed control and the MPC 3000 control board On the motor speed control are two potentiometers used to set the run flush and service speeds The speed control has over temperature shutdown...

Page 20: ...n with al most any AC frequency Regardless of the input conditions the drive will hold a constant motor speed The motor controller output is three phase AC to the motor The control will soft starts th...

Page 21: ...t splices These are heat shrink connectors so you can seal them after splicing Route the single two conductor cable to the fresh water flush module and splice the wires to the solenoid wires Heat the...

Page 22: ...Wire length for a pair of wires is measured from source circuit breaker or fuse to control terminal block Wire Run Length Wire Run meters AWG wire size Sq mm wire size Less than 15 Less than 5 10 6 20...

Page 23: ...0 awg 5 sq mm 50 feet to 75 feet 15M to 23M 8 awg 8 sq mm Wire length for a pair of wires is measured from source circuit breaker to control box Wire Length AWG wire size Square MM wire size To 25 fee...

Page 24: ...erts in the event of a fault or at the end of certain timed cycles Use only the buzzer units supplied by Spectra Watermakers as current on the LCD buzzer terminal is limited to 20 mA any excessive loa...

Page 25: ...seal the splice in waterproof heat shrink tubing Diversion Valve Salinity Probe Rotoflow Assembly This assembly is located at the Clark pump Membrane module on Newport models The sa linity probe shou...

Page 26: ...at the bottom outlet at the top The ballast wires plug into the end of the bulb in the lamp module The ballast RED wire connects to STER terminal on the MPC board and the bal last BLACK wire connects...

Page 27: ...rt up within five days it will automatically do a fresh water flush AutoFill mode can be ended by pushing the stop button or the Autoflush button If the watermaker is in Autorun mode it can be put int...

Page 28: ...mbrane If the location or weather prevents proper testing refer to the section Dry Testing 1 First Check That Thru hull valve is open Power is on If you have an AC system both the AC power and the DC...

Page 29: ...start 5 After the purge sequence The control will alarm with the message Close pressure relief valve C C C Cl l l lo o o os s s se e e e t t t th h h he e e e v v v va a a al l l lv v v ve e e e and...

Page 30: ...lower with warm water or low salinity Filter Condition Service Prefilter alarm warns that filters are getting dirty Clean filters as soon as convenient A second Service Prefilters alarm means the filt...

Page 31: ...ation Cycle the auto store system 5 more times to purge all of the storage chemicals out of the system 5 Hook up your service hoses per the service diagram and photos Route them into a 5 gallon 20 Lit...

Page 32: ...e drawn in to make up the dif ference At initial startup the fresh water flush system should be tested by taking a sample of the brine discharge water just as the flush cycle is ending This water shou...

Page 33: ...ncy Auto Run the system as long as possible each time The more product water you make each time the lower the proportion of product consumed by the flush cycle Never let the system sit with salt water...

Page 34: ...closed if the system was just used to make water The auto flush may not operate if the valve is open The power for the system must remain on during the auto flush mode Turning off the power will disa...

Page 35: ...water manifold outlet Bypass the diversion valve as follows Disconnect the 3 8 inch tube A that runs from the product manifold to the salin ity probe at the product manifold Product water will run out...

Page 36: ...ystem is to be left unused for more than 2 weeks perform the following storage pro cedure The procedure introduces a chemical compound into the system that prevents bio logical growth This procedure r...

Page 37: ...ule Lead the hose into the bucket Turn the service valve on the fresh water flush module 180 so the intake is now coming from the bucket Step 5 Mix the storage chemical compound into the water in the...

Page 38: ...38 Push the Auto Flush button press Stop press Auto Flush again...

Page 39: ...f the fresh water flush module Lead the hose into the bucket Turn the service valve on the fresh water flush module 180 so the intake is now coming from the bucket Step 5 Pump as much as possible of t...

Page 40: ...ppears on the filter condition bar graph on the LCD display To service the filters shut off the thru hull open the housings discard the old filters Clean out the housing bowls reassemble the housings...

Page 41: ...roughout the system will heat as it circulates in and out of the pot An alternative is to heat the one or two gallons of initial water to 120 on the main stove before mixing in the cleaner and circula...

Page 42: ...Open unpressurized Step 7 Set the switches on the pump module to Service System and Flush Auto to turn on the feed pump Circulate the chemical in the system for approxi mately 25 minutes Allow to soak...

Page 43: ...n the calibrate position where it can then be seen on the LCD display rather than a bar graph After adding the jumper it may be necessary to cycle through the different LCD displays until the display...

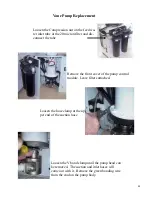
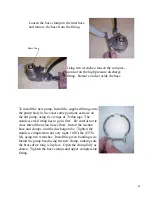
Page 44: ...lamp until the pump head can be removed The suction and inlet hoses will come out with it Remove the green bonding wire from the stud on the pump body Loosen the hose clamp at the up per end of the su...

Page 45: ...on the old pump using five wraps of Teflon tape The stainless steel fitting has to go in first Be careful not to cross thread the nylon hose elbow Install the suction hose and clamps and the discharg...

Page 46: ...replacement strainer screen O ring for strainer screen O rings for filter housing Spectra Watermakers parts list SC 2 ORGANIC CONTAMINATION CLEANER FT CHE SC2 SC 3 MINERAL SCALE CLEANER FT CHE SC3 BAS...

Page 47: ...ubes to one of the components secure the tube runs and then trim and connect to the other component A 90 degree bend in a tube is better than a 90 degree fitting A tube when mounted should have at lea...

Page 48: ...tivates but pump will not run loose or broken pump wire connection bad pump relay tanks are full Check wiring at terminal block inside MPC Test power relay replace Replace fuse mini automo tive type A...

Page 49: ...battery voltage too high or low loose wires or poor connec tions Charge batteries Check charging voltage Check power connections Re starting no signal from stroke sensor at startup System Air locked...

Page 50: ...heduled fresh water flushes or by pickling Keeping the prefilters clean is also important in preventing bio fouling If your prefilters are allowed to become a breeding ground for bacteria get smelly t...

Page 51: ...per minute Fill a bucket with fresh water and mix in a couple squirts of the detergent Run the system depressurized with the watermaker drawing water from the bucket and discharging over board When ab...

Page 52: ...ne glycol based automotive antifreeze which is toxic Propylene glycol can be used instead of Spectra SC 1 storage chemical for storage in any climate up to one year following this procedure 1 Replace...

Page 53: ...r only an hour or so a day will probably need to have the filters changed due to odor before they are dirty enough to restrict water flow Prefilters can be cleaned We recommend that you have three set...

Page 54: ...n other models to avoid exceeding this flow rate If the ship s water system is unable to provide flush water at the required flow rate sea water will be drawn in to make up the difference This will ca...

Page 55: ...f so equipped Plugged filters can be cleaned several times by soaking in a bucket towing behind the boat at moderate speeds or hosing them off When operated only an hour or two a day in inland or near...

Page 56: ...g The membrane can only handle small amounts of chlorine for short periods without damage The chlorine will damage the bonding agent in the membrane in a very short time So if you skimp on the char co...

Page 57: ...change a speed setting run the watermaker in the mode in which you want to change the speed For example If you want to change the speed the pump runs at while making water have the unit actually makin...

Page 58: ...ble SETTING FLUSH SPEED Flush speed should be set to run the pump slowly enough that the vessels fresh water system can supply sufficient flow of water through the charcoal filter so that no sea water...

Page 59: ...59 Z BRANE OPERATION MANUAL...

Page 60: ...continuous 12Vor 24V DC power to be operative The installation of the Z Brane only consists of wiring the power supply to a continuous source The Z brane power supply can tolerate voltages between 10V...

Page 61: ...e not only to protect the membrane but to prevent corrosion in the feed water system To achieve full effectiveness thoroughly fresh water flush the watermaker several times before leaving the vessel T...

Page 62: ...P DT FM NPC FC FRONT COVER N P CHASSIS FM NPC ACB NEWPORT AC BOX FM NPC ACC NEWPORT AC BOX COVER For more information on the AC Tech drives please go to the technical section of our web site and downl...

Page 63: ...VANE PUMP 240 250 AUST PL MTE 1 2X1 2S 1 2 X 1 2 TUBE FITT ELL SS PL PMP VBC V BAND CLAMP FOR ROTARY VANE PUMP PL PMP PCA MOTOR COUPLING AND ADAPTOR EL MTR 3 4AC220 3 4 HP 240 VAC 3 PHASE 56C MOTOR E...

Page 64: ...ND CAP A FT PV ER MEMBRANE RING FM PVB PBE PLATE BRACKET END FM PVB PBI PLATE BRACKET INTERMEDIATE FM PVB PB PLATE BRACKET FT PV ER MEMBRANE RING PL NLT 1 2HP 1 2 HIGH PRESSURE TUBE DAYCO FT PV UTC U...

Page 65: ...ERSION VALVE 12V W O VB PL SLN 1 4D24VB 1 4 DIVERSION VALVE 24V W O VB SUB NP DVM DIVERSION VALVE MANI FOLD EL SSR IFM INLINE ROTO FLOW METER PL MTS 1 4X1 4P 1 4 NPTX1 4 TUBE FITT ST PL MTE 3 8X3 8P 3...

Page 66: ...4 50 MICRON FILTER ELEMENT FT FTC 50 3 4 MPT X 3 4 HOSE BARB ELBOW PL HBE 3 4X3 4 3 4 MPT X 3 8 TUBE FITT ELL PL MTE 3 4X3 8P 3 8 LOW PRESS TUBE PL NLT 3 8LP 1 4 MPT X 3 8 TUBE FITTING ELBOW PL MTE 1...

Page 67: ...cylinder and base End block A End cap Cylinder ring Stainless steel tube End block B Valve block Alternate brine out Reset button Not on all units Test port Center block High pressure out Back View Hi...

Page 68: ...acer ring Valve spool Spool piston End block A Piston O ring Valve bore O ring Spacer ring Valve block Brine port O ring Pilot port O rings Valve bore O ring 5 16 2 3 4 SS A H bolts Spool piston End b...

Page 69: ...rings Pilot spool O rings 4 Mount inside block Pilot valve pin Pilot spool Pin seal O rings Center block Check valve retainer Check valve poppet Feed in Check valve washer Check valve spring Check val...

Page 70: ...sembly End cap O ring Cylinder end cap Cylinder Ring S S compression fittings 1 2 SS tube Piston with seal Composite cylinder and base PL MTS 3 8X1 2S HP CYL SST HP CYL CCA SO HPP ECCB HP CYL EC HP CY...

Reviews: