


58
Copying of recorded data starts.
To cancel copying, select [Abort] and press the
ENTER button.
7
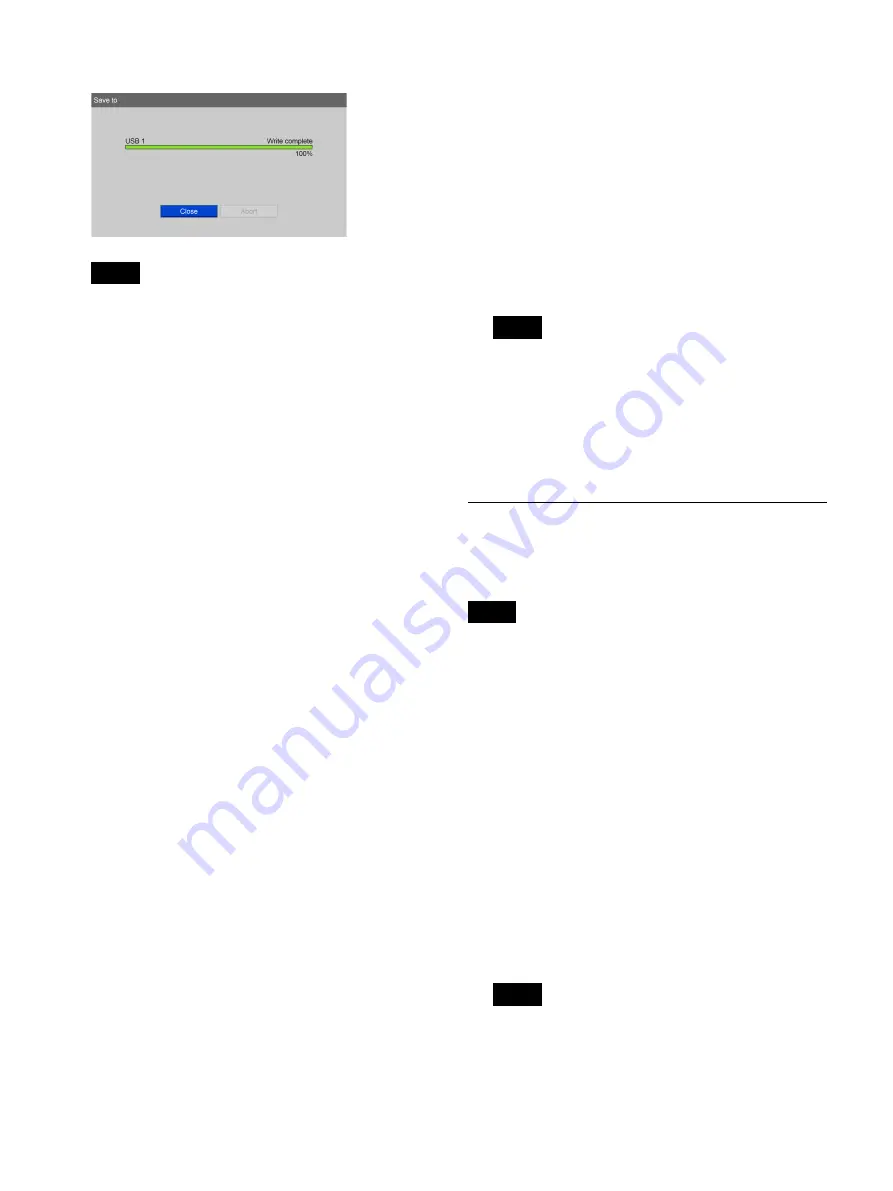
When copying is complete, press the ENTER button
while [Close] is selected.
The [Recording List] screen appears again.
To select data for copying from the
[Image List] (thumbnail display) screen
This section describes how to select thumbnail images of
recorded data in the [Image List] screen for copying onto
external media. The copying procedure is identical for
both videos and still images.
1
If you are copying to a BD/DVD disc or USB
memory device, insert the media into the unit.
2
Select [Image List] for the operation box in the
[Recording List] screen.
For details on displaying the [Recording List] screen,
see “Image Search” (page 54).
3
Select the recorded data in the [Recording List]
screen, and press the ENTER button.
The [Image List] screen appears.
4
Switch to the thumbnail display for videos when you
want to copy video data, and switch to the thumbnail
display for still images when you want to copy still
image data.
For details on switching the display, see “Viewing
Thumbnails of Recorded Data” (page 54).
5
Select the check boxes for the recorded data you want
to copy.
6
Select the operation box, and press the ENTER
button.
The [Operation] screen appears.
7
Select [Save to], and press the ENTER button.
The [Image List] screen appears again.
8
Select [Execute], and press the ENTER button.
The [Save to] screen appears.
9
Configure save settings for the recorded data, select
[Execute], and press the ENTER button.
For details on each setting, see step
6
of “To select
data for copying from the [Recording List] screen”
(page 57).
To cancel copying, select [Abort] and press the
ENTER button.
10
When copying is complete, press the ENTER button
while [Close] is selected.
The [Image List] screen appears again.
Editing Patient Information
You can edit the ID, name, and other patient information
that is attached to recorded data and not yet configured.
• When [Change Patient Info.] is set [Not Used] in the
[System Admin Settings] screen – [Function Settings]
screen – [Patient Info.] tab, you can only edit patient
information that has not yet been entered. Patient
information entered by a user cannot be edited.
• Patient information obtained from MWL cannot be
edited.
1
Display the [Recording List] screen, select the
operation box, and press the ENTER button.
The [Operation] screen appears.
2
Select [Change], and press the ENTER button.
The [Recording List] screen appears again.
3
Select the check box of the recorded data for which
you want to edit patient information.
You can only edit patient information for one
recorded data entry at a time. If multiple recorded
data entries are selected, patient information editing
will be disabled.
Tip
Tip
Notes
Tip
Summary of Contents for HVO-4000MT
Page 117: ......


