4100U-S1 Programming Guide
Document: LT0400
Building and Downloading the Configuration
Page 11-4
15 December 2010
Issue 1.4
11.4 Direct Connection to the Panel
Follow these steps to connect the 733-794 serial cable between the PC and the panel.
1. Locate the PC within 6 feet of the panel and
connect a 733-794 serial cable to the configured
serial port (typically COM1) on the PC.
2. Connect the other end of the cable to the service
port on the front panel of the 4100U, to the left of
the operator interface. For 2 X 40 displays, make
sure the red stripe is aligned to the left as you
connect the cable. For InfoAlarm displays, make
sure the red stripe is aligned to the bottom as you
connect the cable.
3. Run the
File Transfer
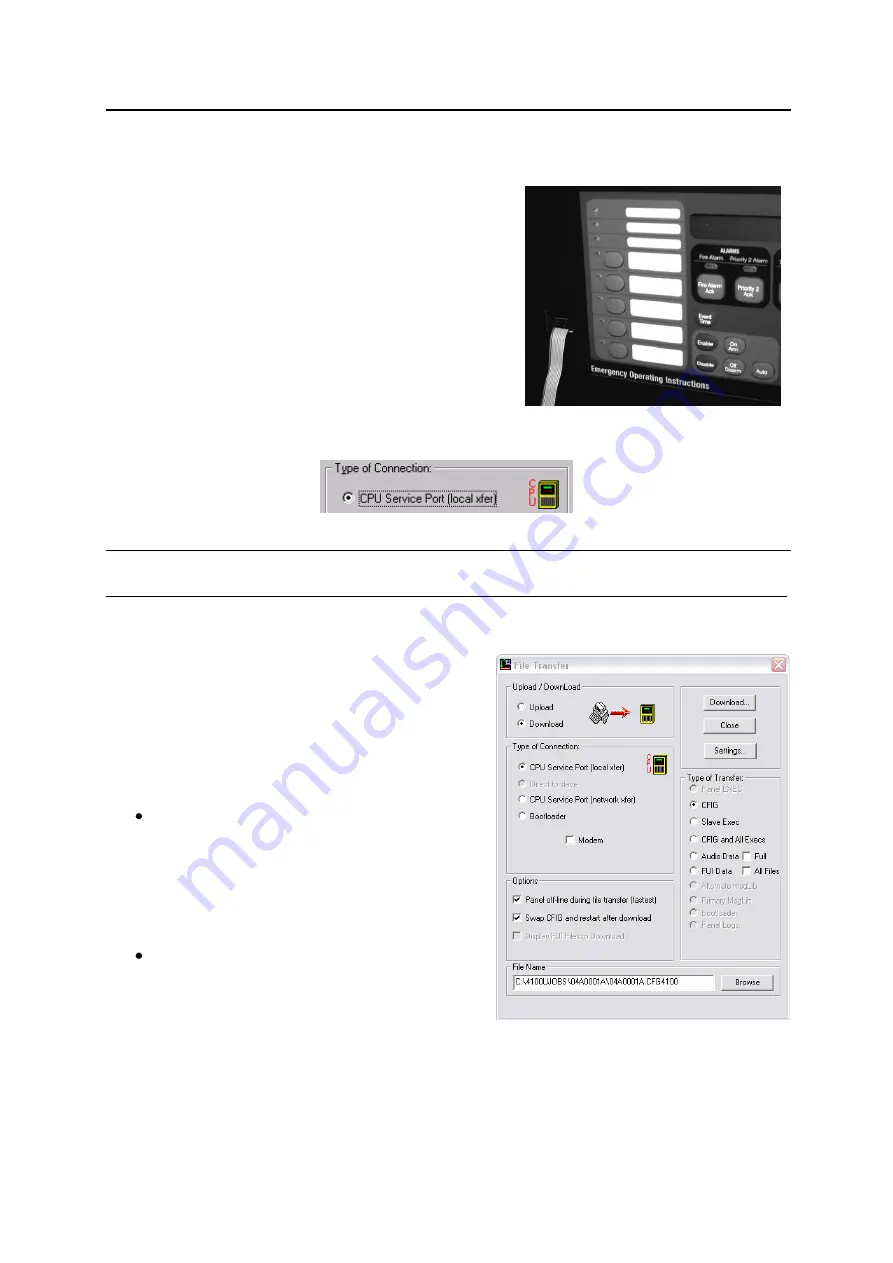
utility and select the
CPU Service Port (local xfer)
radio button.
11.5 Downloading the CFIG File
1.
Set the
Download
radio button.
2.
Set the
Type of Connection
to CPU
Service (local xfer) and connect the PC‟s
serial port to the panel‟s service port.
3.
Click on the CFIG radio button in the
Type
of Transfer
area.
4.
Set the
Options
to use during the
download.
Panel Off-Line During File Transfer
(Fastest)
- Select this option when
downloading a large job (thousands of
points, complicated custom control
equations). Note that the panel is non-
functional for the duration of the download
when this option is selected.
Swap CFIG and restart after download
-
In most cases, this option should be
selected. When selected, the existing CFIG
is automatically replaced with the CFIG
being downloaded and the panel is
automatically restarted following download.
5.
Click the
Browse
button and use the standard Windows dialog to open the folder
containing the built job file (.CFG4100U). When the folder containing the CFIG is
open, click on the filename and click Open to select the file and close the dialog box.
Red
Stripe


