4
6
7
9
11
MENU 1
DATE/T ME
l
SUMR TIME
SETT I NG
OFF
ME
OFF
1.1994
12:00 AM
AM
2.
12:00 A'M'
2.
6.1995
1 0
2.
6.1995
10:
30 AM
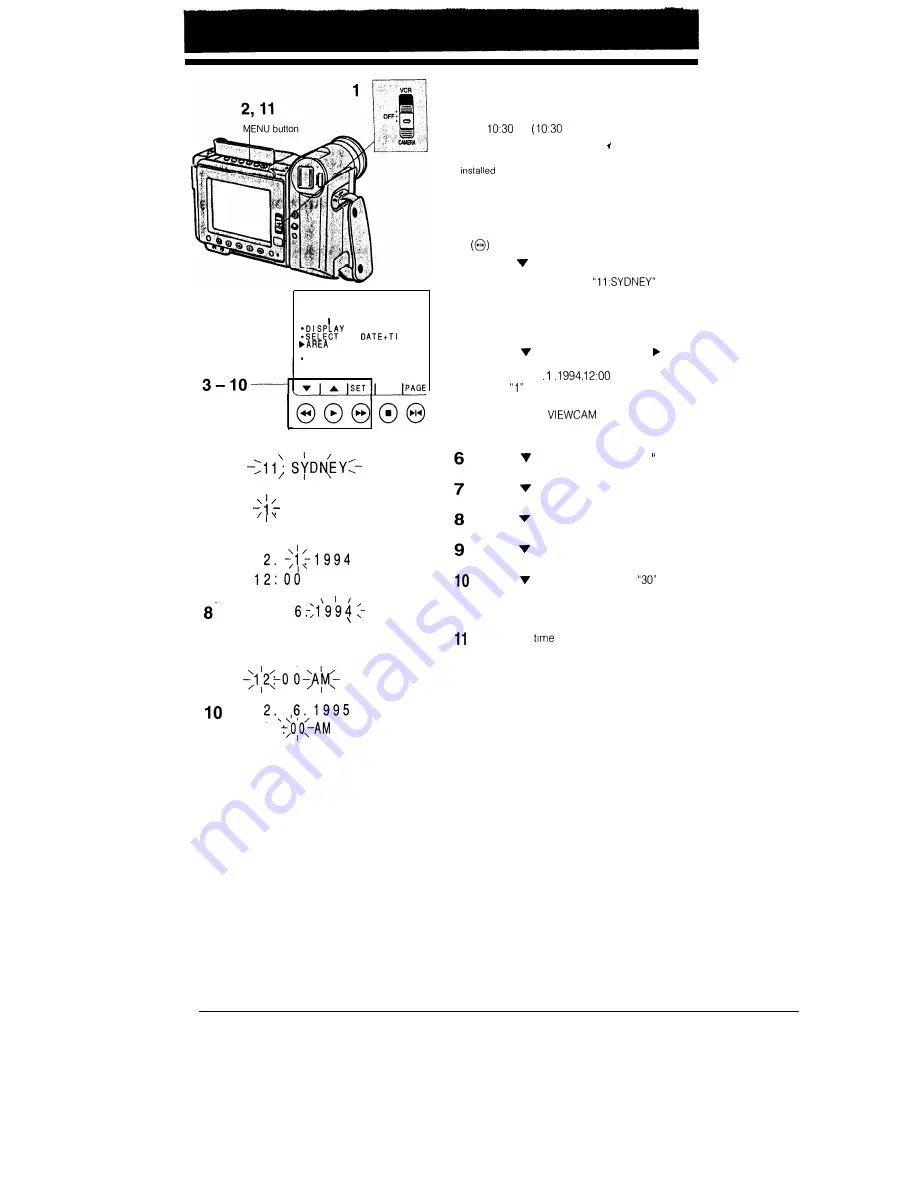
SETTING THE DATE AND TIME
Example:
Setting the date to 2 June 1995 (2. 6. 1995) and the
time to
am
AM) in Sydney.
Notes:
l
Check that the memory backup lithium battery has been
before setting the date and time.
l
The date and time, once set, are stored in memory.
1
2
3
4
5
Set the Operate switch to CAMERA.
Press the MENU button to display MENU 1.
If MENU 2 is displayed, press the PAGE button
to get
MENU 1 on the monitor.
Press the
or A button
to select AREA.
Press the SET button until
appears.
l
See the Time Zone Chart on page 19 for time
zone numbers and representative city for each
zone.
Press the or A button to move the pointer
to “SETTING”, and then press the SET button.
(At this time, “1
AM” is displayed
with the
flashing.)
l
When the memory backup is not operating,
e.g. when the
is first received from
the factory, the pointer automatically points at
this item.
Press the
or A button to select “2. (day),
and press the SET button.
Press the or A button to select “6.” (month),
and press the SET button.
Press the or
A
button to select “1995”
(year), and press the SET button.
Press the or
A
button to select “10 AM”
(hour), and press the SET button.
Press the or
A
button to select
(minutes), and press the SET button.
l
The internal clock starts operating when the
SET button is pressed.
The date and
settings are now complete
Press the MENU button, and the menu will
disappear from the monitor.
Note:
The menu display is automatically cancelled if no settings
are made
within 5 minutes after the
MENU button is
pressed.
16


