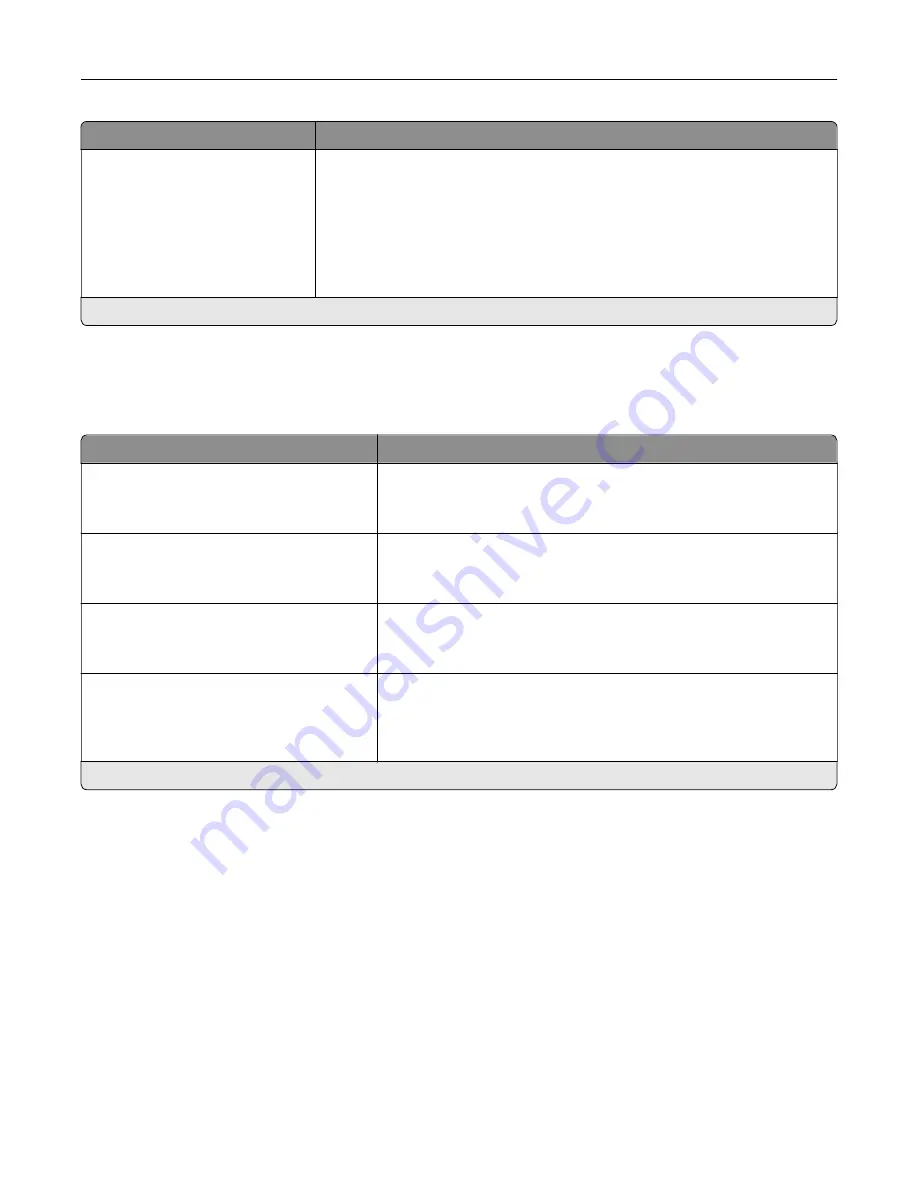
Menu item
Description
Configure MP
Cassette*
Manual
First
Determine the behavior of the multipurpose feeder.
Notes:
•
Cassette configures the multipurpose feeder as the automatic paper
source.
•
Manual sets the multipurpose feeder only for manual-feed print jobs.
•
First configures the multipurpose feeder as the primary paper source.
Note:
An asterisk (*) next to a value indicates the factory default setting.
Media Configuration
Universal Setup
Menu item
Description
Units of Measure
Inches
Millimeters
Specify the unit of measurement for the universal paper.
Note:
Inches is the U.S. factory default setting. Millimeters is the
international factory default setting.
Portrait Width
3–52 inches (8.5*)
76–1321 mm (216*)
Set the portrait width of the universal paper.
Portrait Height
3–52 inches (14*)
76.2–1321 mm (356*)
Set the portrait height of the universal paper.
Feed Direction
Short Edge*
Long Edge
Set the printer to pick paper from the short edge or long edge
direction.
Note:
Long Edge appears only when the longest edge is shorter
than the maximum width supported.
Note:
An asterisk (*) next to a value indicates the factory default setting.
Understanding the printer menus
53
Summary of Contents for MX-C607P
Page 1: ...DIGITAL FULL COLOR PRINTER MX C607P User s Guide October 2021 Machine type 5063 Model 53H ...
Page 86: ...2 Remove the waste toner bottle Maintaining the printer 86 ...
Page 91: ...Replacing a photoconductor unit 1 Open door A Maintaining the printer 91 ...
Page 92: ...2 Remove the waste toner bottle Maintaining the printer 92 ...
Page 95: ...Replacing an imaging unit 1 Open door A Maintaining the printer 95 ...
Page 96: ...2 Remove the waste toner bottle Maintaining the printer 96 ...
Page 101: ...4 Insert the new waste toner bottle 5 Close door A Maintaining the printer 101 ...
Page 102: ...Replacing the transfer belt 1 Turn off the printer 2 Open door A Maintaining the printer 102 ...
Page 103: ...3 Remove the waste toner bottle 4 Open door A1 Maintaining the printer 103 ...
Page 129: ...Staple jam in door G 1 Open door G 2 Pull out the staple cartridge holder Clearing jams 129 ...
Page 131: ...5 Insert the staple cartridge holder 6 Close door G Clearing jams 131 ...


