


8
PART NAMES AND FUNCTIONS
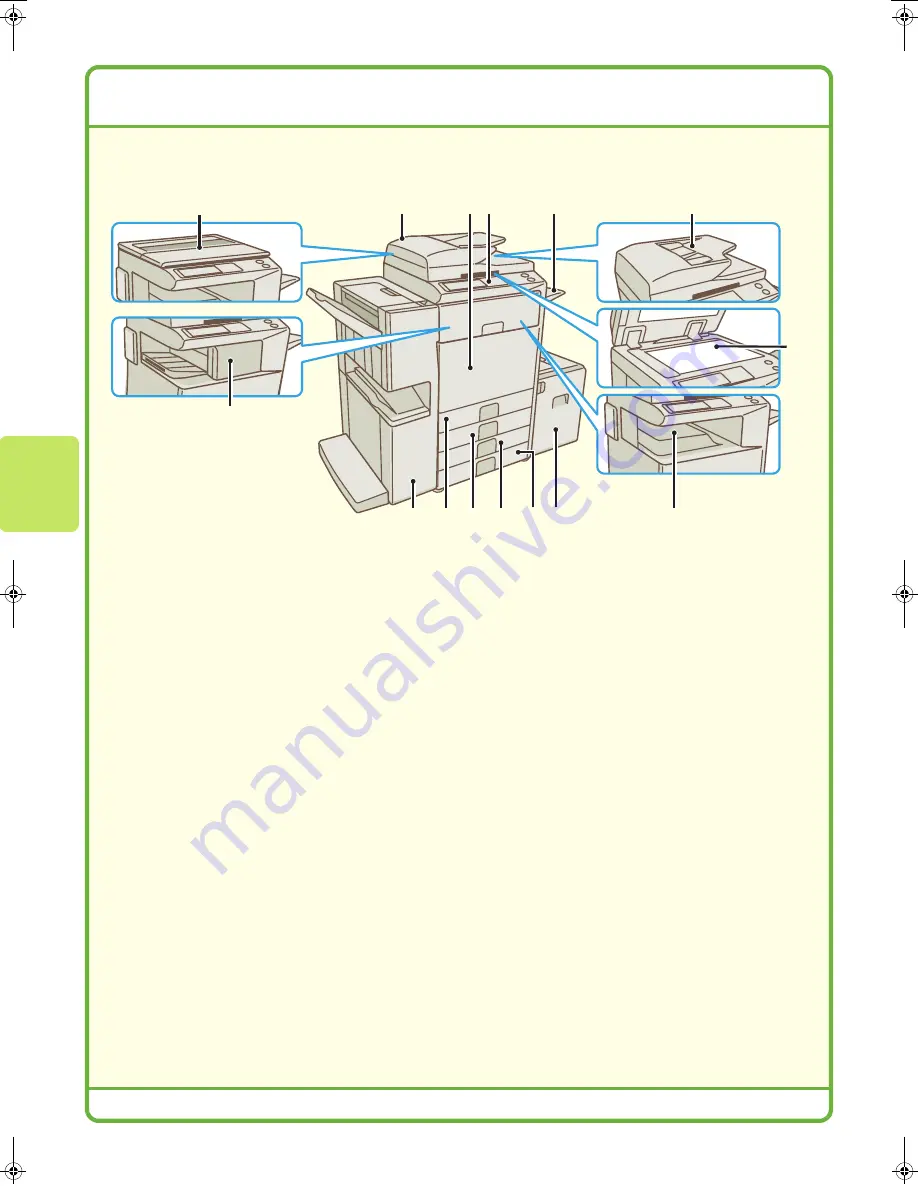
Exterior
(1) Document cover
This holds the original down.
(2) Automatic document feeder
This automatically feeds and scans multiple originals.
Both sides of 2-sided originals can be scanned at
once.
(3) Document feeder tray
Place the originals in this tray when using the
automatic document feeder.
(4) Document glass
This is used to scan books and other originals that
cannot be scanned using the automatic document
feeder.
(5) Front cover
Open to replace a toner cartridge.
(6) Operation panel
(7) Exit tray unit (right tray)
When installed, output can be delivered to this tray.
(8) Output tray (centre tray)
Copy jobs and print jobs are delivered to this tray.
(9) Saddle Stitch Finisher
This can be used to staple output. The saddle stitch
finisher can automatically staple output at the centre
line and fold the pages to create a pamphlet. A punch
module can be installed to punch holes in output.
(10) Tray 1
This holds paper. Up to 500 sheets of paper can be
loaded.
(11) Tray 2
This holds paper. Up to 500 sheets of paper can be
loaded.
(12) Tray 3 (when a stand/1 x 500 sheet paper drawer
or stand/2 x 500 sheet paper drawer is installed)
This holds paper. Up to 500 sheets of paper can be
loaded.
(13) Tray 4 (when a stand/2 x 500 sheet paper drawer
is installed)
This holds paper. Up to 500 sheets of paper can be
loaded.
(14) Tray 5 (when a large capacity tray is installed)
This holds paper. Up to 3500 sheets of paper can be
loaded. When a stand/1 x 500 sheet paper drawer is
installed, this is tray 4.
(15) Finisher
This can be used to staple output. A punch module
can be installed to punch holes in output.
(2)
(1)
(3)
(4)
(6)
(7)
(5)
(9)
(11)
(10)
(14)
(8)
(12) (13)
(15)
mx2700̲ex̲qck.book 8 ページ 2005年9月20日 火曜日 午前9時46分
Summary of Contents for MX-2300G
Page 8: ......
Page 44: ......
Page 56: ......
Page 60: ...58 4 Press the COLOUR START key or the BLACK WHITE START key or Cancel scanning ...
Page 85: ......
Page 86: ......
Page 88: ...PRINTED IN FRANCE TINSE3125GHZZ Quick Start Guide MX 2300G MX 2700G MX 2300N MX 2700N MODEL ...