


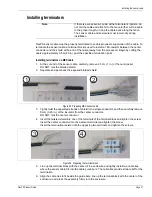


Installing the sensor cable
FlexPS Product Guide
Page 35
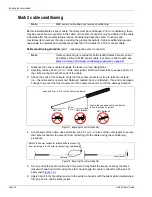
7.
Snap the enclosure shut ensuring that both tabs are securely locked in the slots.
8.
Attach the enclosure to the fence.
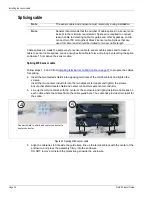
Splicing Mark 2 sensor cable
Follow steps 1, 2, 3 and 4 from
Installing terminators on Mark 2 cable on page 32
to prepare the
cables for splicing.
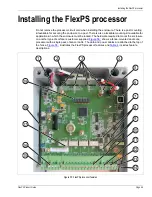
5.
Insert the two twisted shields into opposing terminals of the terminal block and tighten the
screws.
Insert the two center conductors into the two adjacent terminals and tighten the screws.
Ensure that shield meets shield and center conductor meets center conductor.
6.
Line up the terminal block with the center of the enclosure and line up the sensor cable with
the cable guide bars in the enclosure. Press the assembly firmly into the enclosure.
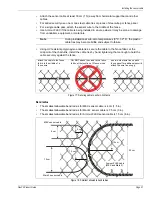
DO NOT remove or disturb the protective gel inside the enclosure (see
).
7.
Snap the enclosure shut ensuring that both tabs are securely locked in the slots.
8.
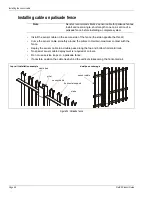
Attach the enclosure to the fence (see
).
Figure 33: Preparing the splice enclosure
Note
Form drip loops and install the enclosure horizontally to protect
the cable entry points from rain and run off.
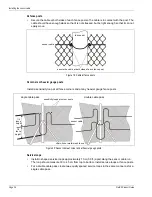
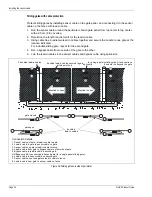
Figure 34: Mounting the splice enclosure
Note
Form drip loops and install the enclosure horizontally to protect
the cable entry points from rain and run off.
7
6
8
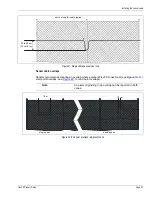
15 cm (6 in.)