33
■
Horizontal “POSITION” Knob
1. Adjust the horizontal position of all channels and math waveforms (the position of the trigger
relative to the center of the screen). The resolution of this control varies with the time base setting.
2. When you press the horizontal “POSITION” Knob, you can set the horizontal position to zero.
■
“S/div” Knob
1. Using to change the horizontal time scale to magnify or compress the waveform. If waveform
acquisition is stopped (using the RUN/STOP or SINGLE button), turn the S/div knob to expand or
compress the waveform.
2. Select the horizontal time/div (scale factor) for the main or the window time base. When Window
Zone is enabled, it changes the width of the window zone by changing the window time base.
■
Display Scan Mode
When the SEC/DIV control is set to100 ms/div or slower and the trigger mode is set to Auto, the oscilloscope
enters the scan acquisition mode. In this mode, the waveform display updates from left to right. There is no
trigger or horizontal position control of waveforms during scan mode.
b) Window Zone
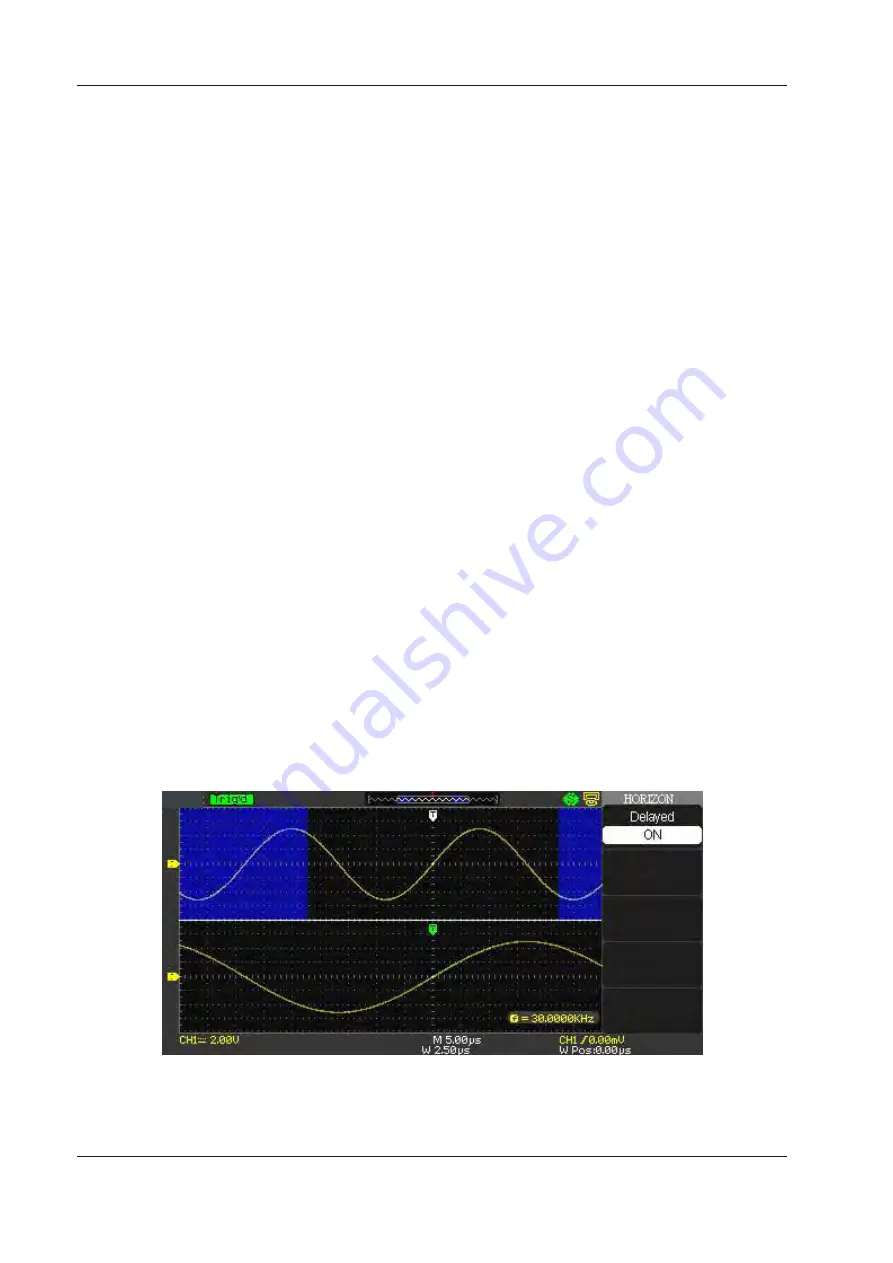
Use the Delayed option to define a segment of a waveform to see more detail. The Window time base setting
cannot be set slower than the Main time base setting. You can turn the Horizontal Position and SEC/DIV
controls to enlarge or minish waveforms in the Window Zone.
“ M” Mean main time base, “ W” mean window time base.. It is also a arrow on the scale top to show the
vertical position.
If you want to see a section of the waveform in detail, follow these steps:
1) Press the “HORI MENU” button to enter the “Horizontal menu”.
2) Turn the “S/div” knob to change the main timebase scale.
3) Press the “Delayed” option button to select “On”.
4) Turn the “Horizontal Position” knob (adjust window’s position) to select the window that your need
and expanded window waveform display on the below half screen at the same time.
Fig. 23 Delayed Timebase
User Manual SMO702, SMO1002
Summary of Contents for SMO1002
Page 1: ...Digital Oscilloscopes SMO702 SMO1002 User Manual ...
Page 59: ...59 Fig 45 B Cursor Measurement Auto Mode User Manual SMO702 SMO1002 ...
Page 62: ...62 Table 40 All Measurement function menu User Manual SMO702 SMO1002 ...
Page 63: ...63 Table 41 Introduction of the Measure Type User Manual SMO702 SMO1002 ...
Page 91: ...91 User Manual SMO702 SMO1002 ...
Page 92: ...92 User Manual SMO702 SMO1002 ...
Page 93: ...93 User Manual SMO702 SMO1002 ...
Page 98: ...98 Default Setting User Manual SMO702 SMO1002 ...
Page 99: ...99 User Manual SMO702 SMO1002 ...


