


Wireless network setup
154
2. Using a Network-Connected Machine
6
When the network connection window appears, disconnect the network
cable. Then, click
Next
. The network cable connection can interfere with
searching for wireless devices.
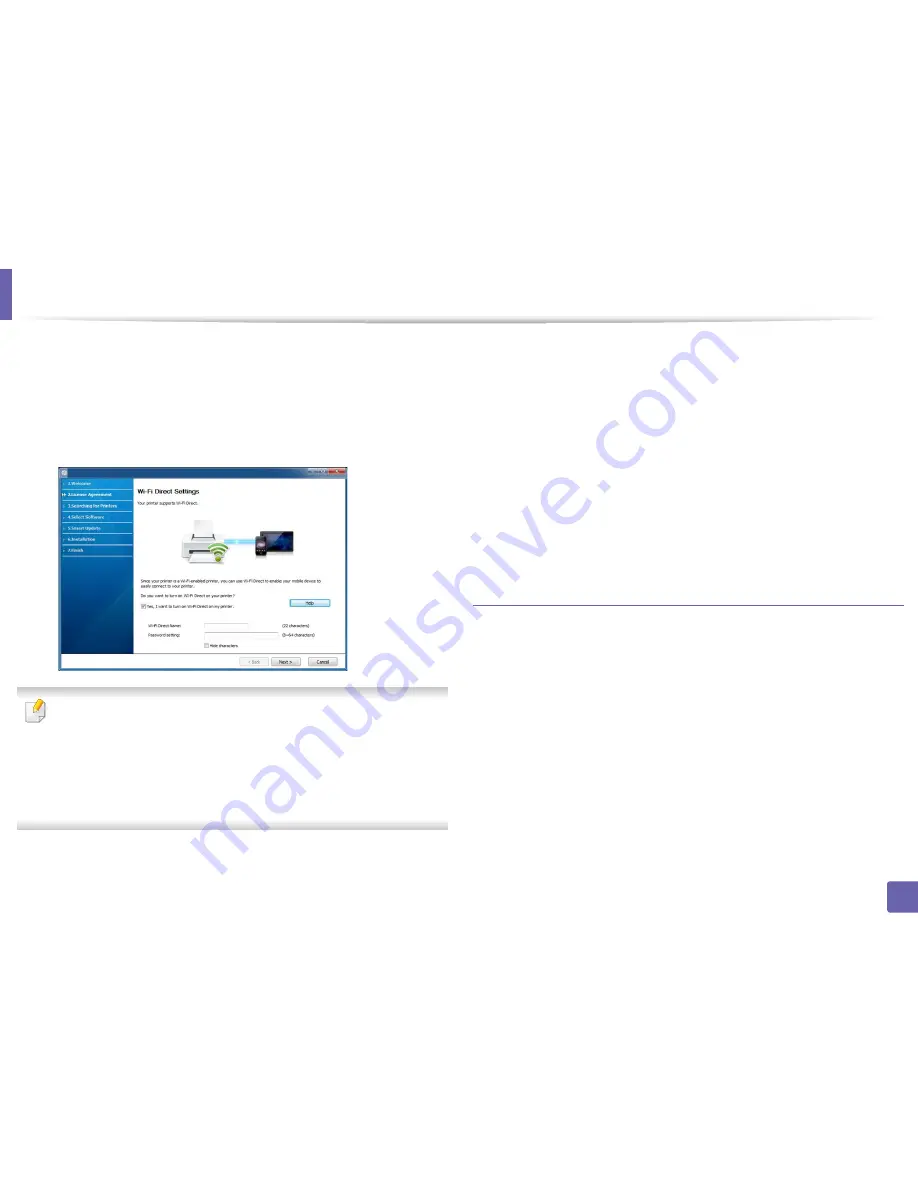
7
If your printer supports Wi-Fi Direct, the following screen screen appears.
Click
Next
.
•
Can start to build Wi-Fi Direct by using
Samsung Easy Printer Manager
(see
"Setting up Wi-Fi Direct" on page 164).
•
Wi-Fi Direct Name
: The default Wi-Fi Direct Name is the model name
and the maximum length is 22 characters.
•
Password setting
is the numeric string, and the size is 8 ~ 64 characters.
8
When the wireless network set up is completed, disconnect the USB
cable between the computer and machine. Click
Next
.
9
Select the components to be installed.
10
After selecting the components, you can also change the machine name,
set the machine to be shared on the network, set the machine as the
default machine, and change the port name of each machine. Click
Next
.
11
If you want to register your machine with the Samusng web site and
receive useful information, click
On-line Registration
. If not, click
Finish
.
Ad hoc via USB cable
If you do not have an access point (AP), you may still connect the machine
wirelessly to your computer by setting up an ad-hoc wireless network by
following the simple steps below.
Items to prepare
•
Network-connected computer
•
Software CD that was provided with your machine
•
A machine installed with a wireless network interface
•
USB cable
Summary of Contents for SL-M3820DW/XAA
Page 3: ...3 BASIC 5 Appendix Specifications 101 Regulatory information 109 Copyright 119...
Page 63: ...Replacing the toner cartridge 63 3 Maintenance M3320 M3820 M4020 series 2 1...
Page 64: ...Replacing the toner cartridge 64 3 Maintenance M3325 M3825 M4025 series 1 2...
Page 66: ...Replacing the imaging unit 66 3 Maintenance 7 Imaging unit M3325 M3825 M4025 series 2 1 1 2...
Page 70: ...Installing accessories 70 3 Maintenance 2 1 2 1...
Page 75: ...Cleaning the machine 75 3 Maintenance 2 1 1 2 1 2 1 2...
Page 81: ...Clearing paper jams 81 4 Troubleshooting 2 In optional tray...
Page 84: ...Clearing paper jams 84 4 Troubleshooting M382xND M382xDW M402xND series...
Page 86: ...Clearing paper jams 86 4 Troubleshooting M3320 M3820 M4020 series...
Page 87: ...Clearing paper jams 87 4 Troubleshooting M3325 M3825 M4025 series 1 2 2 1...
Page 90: ...Clearing paper jams 90 4 Troubleshooting 6 In the duplex unit area...
Page 118: ...Regulatory information 118 5 Appendix 22 China only...


