


© Safe Fleet | 2020 | All rights reserved | Part #: 700-1213 R1
DH4C Installation Guide
p. 30
DH4C Basic Configuration
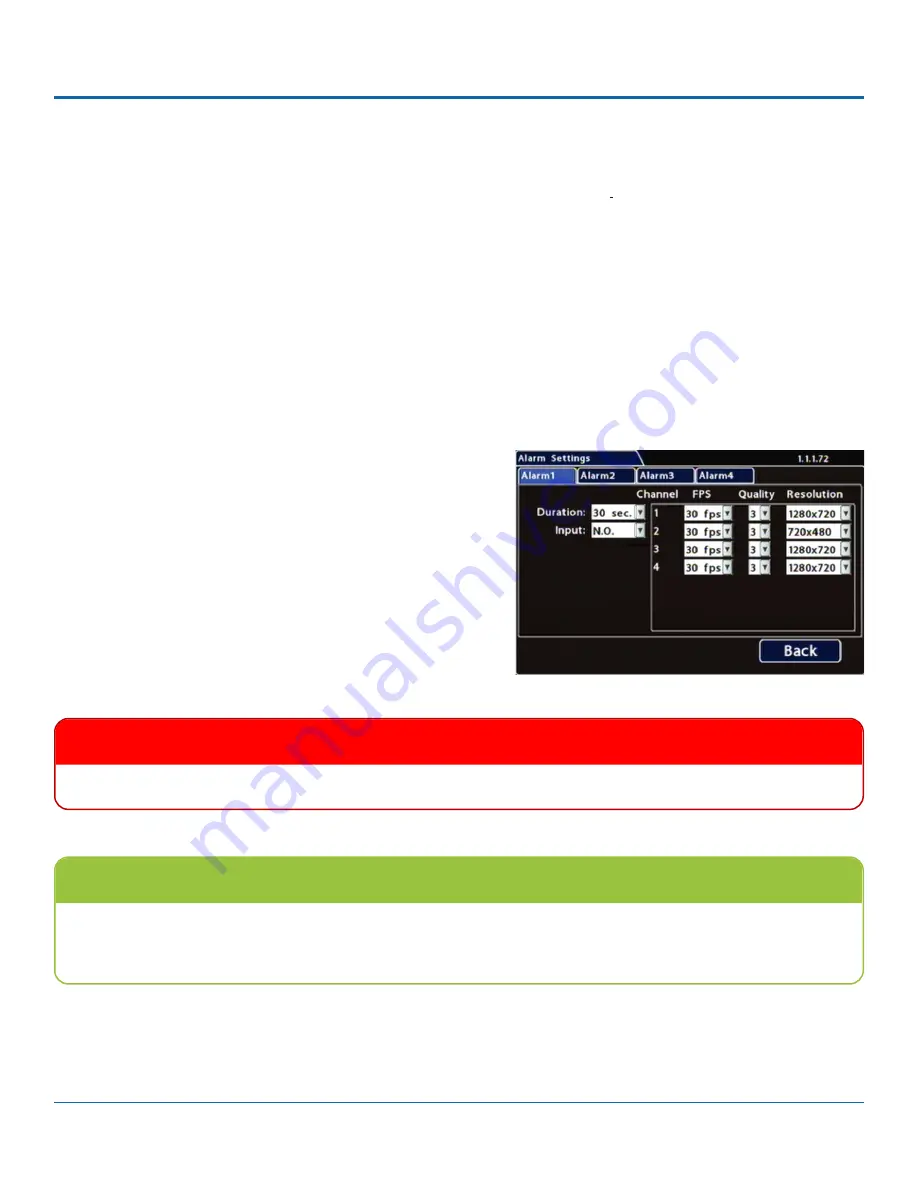
Alarm Settings
Triggered alarms create searchable flags in recorded video, making it easy to locate alarm events and associated metadata
later (for details, find the
Evidence Manager User Guide
on the Safe Fleet Community).
You can also tell the system to switch to higher recording quality settings when an alarm is triggered - for example, to help
identify people or license plates when reviewing video of the event.
If the system is wirelessly enabled with our video management software, flagged video can be automatically downloaded
to your network (for more information, see the
Commander User Guide
or the
Depot Manager User Guide
on the Safe Fleet
Community).
The DVR supports 4 independent Alarms. By default, Alarm 1 is connected to the optional RGY button installed in the vehicle,
for use by the operator (for more information, see
Flagging Video for Review
). Alarms 2-4 can be triggered automatically by
vehicle speed, a G-sensor threshold, GPS fencing, or when a Signal is activated.
To Configure Alarms:
1. Select
Alarm/Signal
Alarms
to open the tab.
2.
Configure Alarm settings as required. For details, see
Menu
Options
, below.
3. Click
Back
to save settings, then click
Back
again to return to
the Configuration menu.
IMPORTANT
Set FPS (Frames per Second) OFF for unused channels to avoid DVR video loss events.
Higher recording quality settings for Alarm events
Select higher speed (FPS), Quality, and Resolution in Alarm Settings to increase video quality for a short duration to record
an alarm event. Higher quality video involves greater storage requirements, which reduces the amount of video you can
store before it is overwritten. Therefore, a DVR usually records in a mode that conserves storage space.


