55
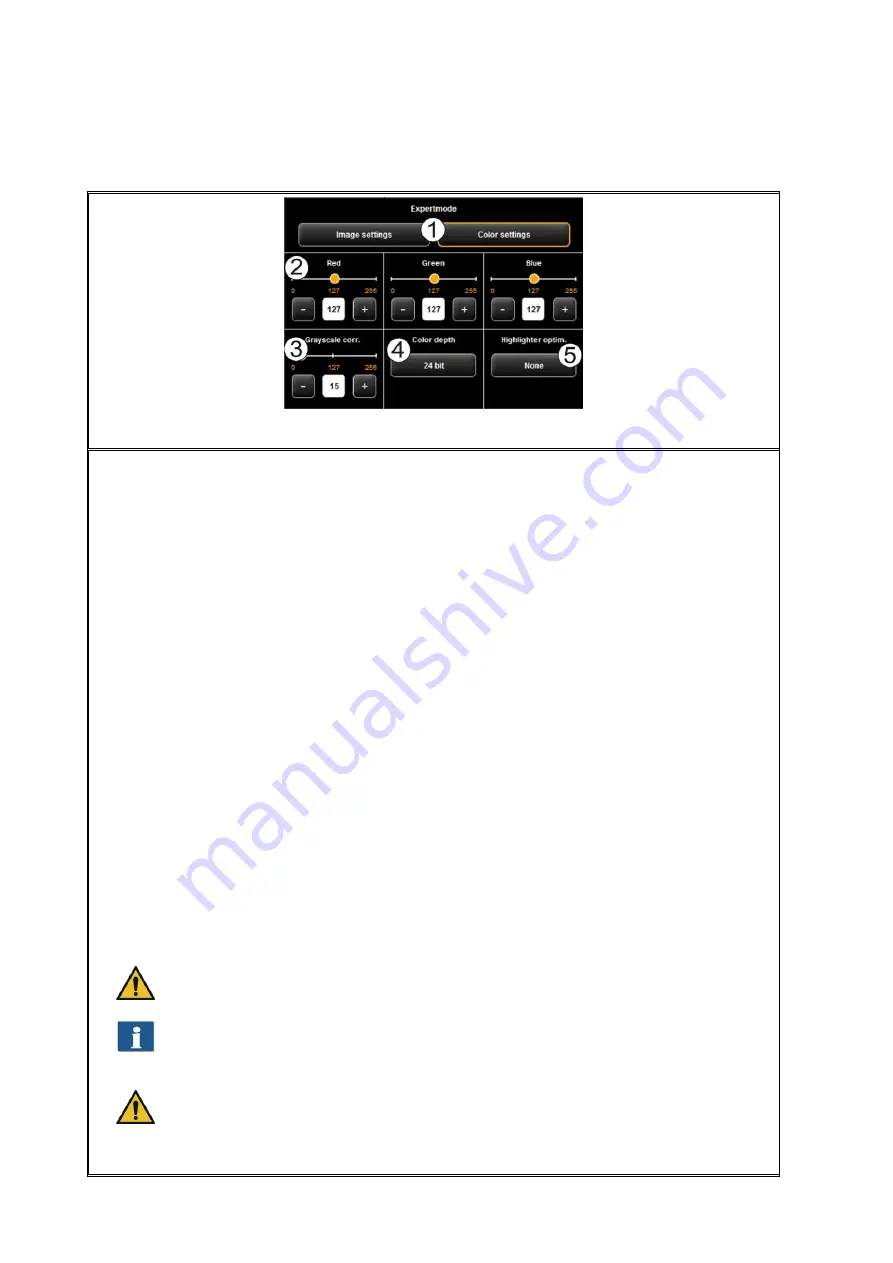
Figure 5.28: Expert mode - Color settings
1.
Image settings / Color settings
: If you switch to "Image setting", you see the
submenu depicted in Figure 5.27.
2.
Red / Green / Blue
: By means of these three slide controls, you can shift the
weighting of the three color channels red, green, and blue (R, G, B). E.g., if you
want to reduce the red share in the image, reduce the setting of control slide
"
Red
" (setting range 0...255, 127: neutral).
3.
Gray scale correction
: If there are any gray scales in an image which cannot be
presented in a color neutral way (e.g. greenish cast), you can compensate this
deviation by means of this slide control. When setting a higher value, colors
which are almost gray are switched to the next shade of gray. If the value is very
high, also those colors are shifted to gray which are quite far away from a gray
scale. (setting range 0...255, 0: neutral).
4.
Color depth
: In color mode (RGB), the color information is usually coded with 8
bits per color channel (R, G, and B), i.e. 24 bits per pixel. This may result in
relatively large files. In particular for originals with only a few colors (e.g. CAD
drawings), it may be reasonable to reduce the color depth. This can be achieved
by selecting the option
Indexed Color
. The color depth is then reduced from 24 to
8 bits per pixel so that 256 colors can be displayed.
5.
Highlighter optimization
: When scanning originals which are marked with
permanent markers, it may occur that these marks are not shown properly. In
order to enhance the presentation, special optimizations can be enabled. Three
degrees of intensity can be selected (
none
,
medium,
normal
and
high
). In most
cases, the reproduction of markings with permanent markers should be ok
without any optimization.
When optimizing markings with permanent marker heavily, other colors of the
image may change, too. You can check the result in the Viewer at any time.
This problem is due to the fact that the effect of permanent markers is
achieved by special fluorescent dyes the effect of which is obtained by lighting
with light sources with a high UV content, only.
Should some permanent markers not be visible at all (white), reduce the value
for background compensation if applicable. Usually, the brightness of
permanent markers cannot be distinguished from the actual background
(white of paper).
Summary of Contents for Scan 600-20
Page 1: ...R O T H WE B E R G m b H ROWE Scan 600 Series O P E RA T I N G M A N UA L RE V I SI O N 1 4...
Page 55: ...56...
Page 70: ...71 5 14 4 Job Settings Figure 5 50 PrintMaster PRO Job settings...
Page 94: ...95...
Page 109: ...110 Figure 7 25 Cost Control Settings...
Page 128: ...129...
Page 133: ...134 Figure 9 1 WEEE symbol...
Page 135: ...136 D About this System Copyright 2003 2012 ROTH WEBER GmbH All rights reserved...
Page 140: ...141...


