119
SETTING DATE AND HOUR
7
8
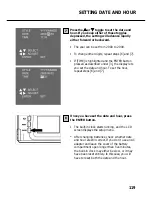
Press the or toggle to set the date and
hour. If you keep either of these toggles
depressed, the setting will advance rapidly
either forward or backward.
• The year can be set from 2000 to 2099.
• To change other digits, repeat steps [6] and [7].
• If [TIME] is highlighted and the ENTER button
pressed as described under [3], the display lets
you set the date and hour. To set the hour,
repeat steps [6] and [7].
Once you have set the date and hour, press
the ENTER button.
• The built-in clock starts running, and the LCD
screen displays the setup menu.
* After changing batteries, check whether date
and hour are still correct. If you don’t use an AC
adapter and leave the cover of the battery
compartment open longer than five minutes,
the built-in clock may either be slow, or it may
have been reset entirely. In this case, you will
have to reset both the date and the hour.
Summary of Contents for d23 com
Page 1: ...1 Rollei d23 com Instructions for use ...
Page 2: ...2 ...
Page 21: ...21 ...
Page 22: ...22 SETTING UP THE CAMERA ...
Page 31: ...31 TAKING PICTURES ...
Page 44: ...44 ADDITIONAL FEATURES ...
Page 57: ...57 RECORDING OPTIONS ...
Page 67: ...67 WHITE BALANCE SETTINGS Switching the camera off will automatically reset it to AUTO ...
Page 70: ...70 PLAYBACK MODE ...
Page 85: ...85 DELETING IMAGES ...
Page 89: ...89 DELETING AN IMAGE Press the MENU button The LCD screen will revert to playback 10 ...
Page 93: ...93 PLAYBACK SETTINGS ...
Page 107: ...107 SETUP ...
Page 128: ...128 CONNECTING YOUR CAMERA TO A COMPUTER ...
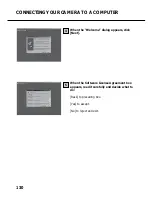
Page 134: ...134 CONNECTING YOUR CAMERA TO A COMPUTER When the Welcome box appears click Continue 3 ...
Page 141: ...141 APPENDIX ...


