186
Step 3. Combine the 3D images
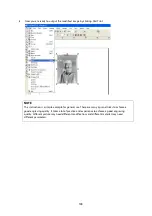
After finishing the production for each of the objects, you may proceed with the combination of the objects. The
combined graphic may be output with the laser engraver.
Output the 3D graphic
After selecting the graphic to be output, set the Mode as 3D Mode in the driver. After setting the engraving
parameters, output the 3D graphic.
Tips for engraving 3D graphics
Application Lab provides a few reminders that may require your attention during the 3D engraving in order to
improve the result of the engraving.
Turn on the Air Assist function
When the engraving is done along with Air Assist, the depth of the engraving would be deeper. Set Air assist inside
the driver by checking the box.
Summary of Contents for LV-290
Page 1: ......
Page 25: ...23 3 Chapter 3 Mechanical Overview Front View Top View Right View Left View Rear View...
Page 34: ...32...
Page 35: ...33...
Page 36: ...34...
Page 41: ...39...
Page 42: ...40...
Page 50: ...48 3 Click Next 4 The installation would be finished in few seconds...
Page 74: ...72 5 1 4 Graphic Control Panel Navigation Chart...
Page 185: ...183...
Page 187: ...185...
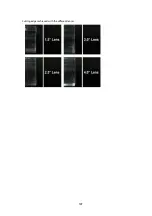
Page 199: ...197 Cutting edges achieved with the different lenses...
Page 211: ...209 9 Chapter 9 Basic Troubleshooting...
Page 213: ...211 10 Chapter 10 Appendix Glossary Specification Sheet...
Page 216: ...FA01785 R1 190805...


