79
Part 7 Troubleshooting
When performing long printing or cutting,
operation stopped before printing or
cutting finished.
Depending on the program you're using, it may be possible to
print or cut only up to the program's maximum output size.
For more information, refer to "4.2 Output from a Compatible
Program" or the Readme file for the driver.
One portion cannot be printed or cut.
- Does the media-size (printing-size) setting for the driver
match the media-size setting for the program?
If the driver's setting and the program's setting for media size
(printing size) are different, the output position is misaligned. Be
sure to make the driver's printing-size setting match the
program's setting for the media size (printing size).
The driver is installed and set up, but
printing isn't possible.
If you cannot perform printing even though the driver is installed
and set up, check the following.
- For a USB Connection
If you're using a USB connection, make sure the printer port is
set to [USB001].
In the [Roland PC-12 Properties] dialog box, go to the [Details]
page and check the [Print to the following port] list. If [USB001
(Virtual printer port for USB)] is not listed, carry out the
following steps.
For Windows 2000, go to the [Ports] page and examine the
[Port] list.
1
In Windows, open [Control Panel], then double-click
[System].
The [System Properties] dialog box appears.
2
Click the [Device Manager] tab to display the [Device
Manager] page.
For Windows 2000, click the [Hardware] tab to display the
[Hardware] page, then click the [Device Manager] button.
3
In the list on the [Device Manager] page, select [Other
devices], then click [Remove].
4
Make sure the computer and the machine are connected by a
USB cable and that the machine is turned on, then go to the
[Device Manager] page and click [Refresh].
5
When the [Add New Hardware Wizard] appears, reinstall the
USB driver.
- When the following phenomena occur during printing
- The message "Could not start print job." appears.
- The Status Monitor appears at the lower right of the screen
and printing does not start.
- Text is printed, but image data is not printed.
If problems like these occur, carry out the following steps.
- For Windows 95/98/Me
1
Go to "7.2 Tips and Special Techniques," find "To Perform
High-speed Printing (When Using a Parallel Connection),"
and follow steps 1 through 4 there to display the [Details]
page.
2
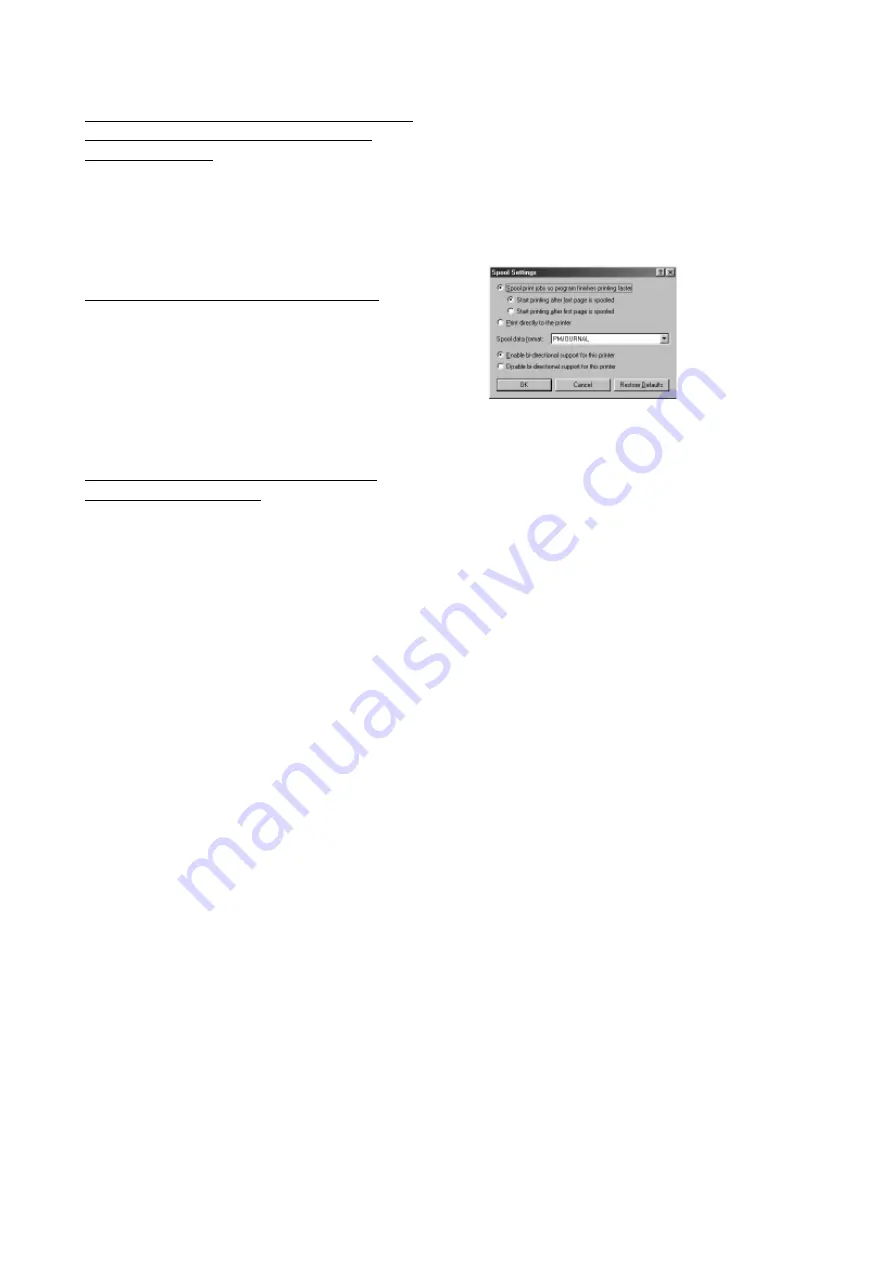
Click the [Spool Settings] button.
The [Spool Settings] dialog box appears.
3
Set [Spool data format] to [PMJOURNAL].
If you cannot set [Spool data format] to [PMJOURNAL], then
delete the driver and install and set up the printer driver again.
See -> "2.1 Installation"
- For Windows NT 4.0
1
Go to "7.2 Tips and Special Techniques," find "To Perform
High-speed Printing (When Using a Parallel Connection),"
and follow steps 1 through 3 there to display the [Roland PC-
12 Properties] dialog box.
2
Click the [General] tab to display the [General] page, then
click the [Print processor] button.
3
Set [Print processor] to [DGDV10S] and set [Default
datatype] to [RAW].
4
Click [OK].
5
When the [Roland PC-12 Properties] dialog box reappears,
click [OK].
If you cannot make this setting, then delete the driver and install
and set up the printer driver again.
- For Windows 2000
1
Go to "7.2 Tips and Special Techniques," find "To Perform
High-speed Printing (When Using a Parallel Connection),"
and follow steps 1 through 3 there to display the [Roland PC-
12 Properties] dialog box.
2
Click the [Advanced] tab to display the [Advanced] page, then
click the [Print processor] button.
3
Set [Print processor] to [DGDV10S] and set [Default
datatype] to [RAW].
4
Click [OK].
5
When the [Roland PC-12 Properties] dialog box reappears,
click [OK].
If you cannot make this setting, then delete the driver and install
and set up the printer driver again.
Summary of Contents for ColorCamm PC-12
Page 96: ...MEMO 94...
Page 97: ...R1 010808...


