


14
Part 1 Getting Started
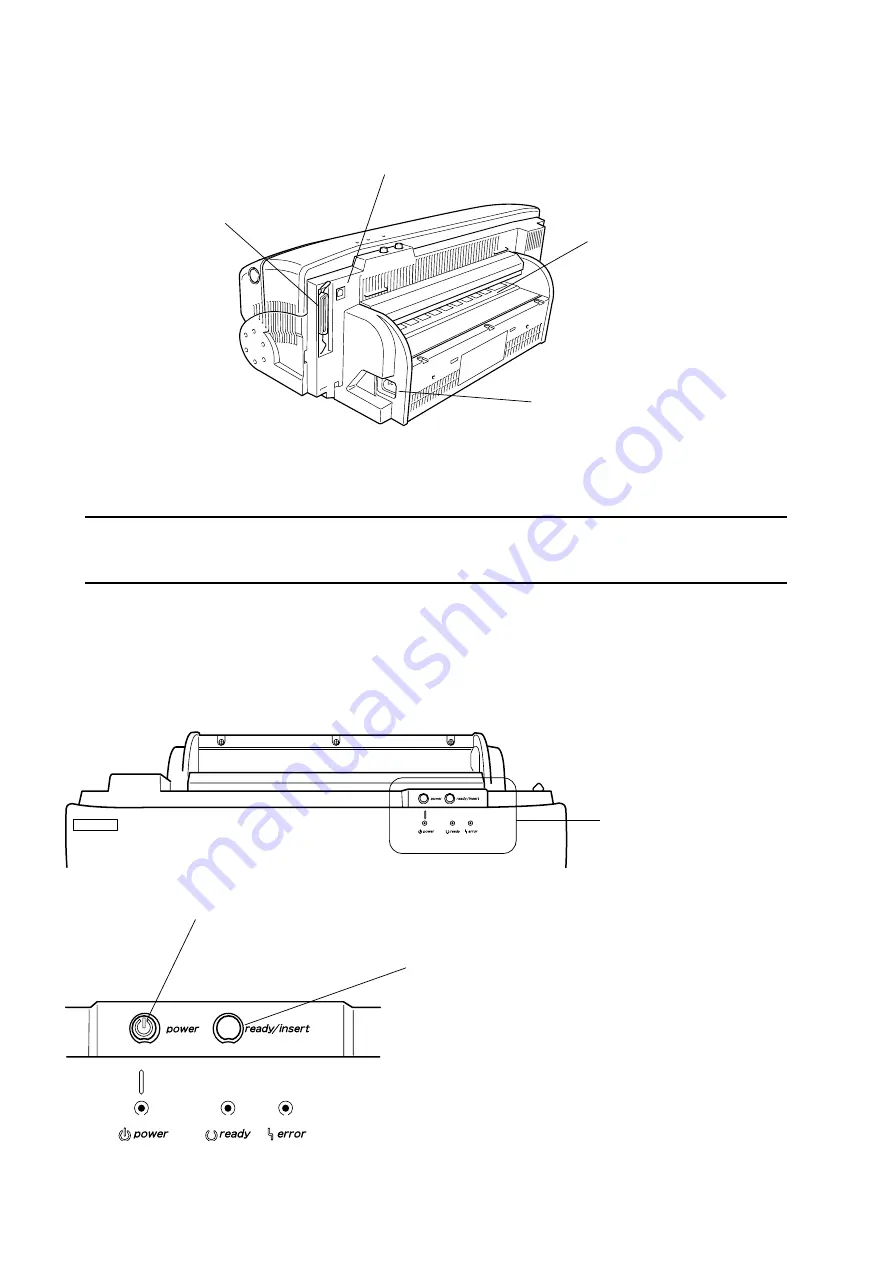
Buttons
Rear View
Operation Panel
Located near the top of the PC-12 are two buttons and three LEDs.
Your control the PC-12 by pressing the buttons to eject media and viewing the lights to check the status. Together, these buttons and lights
make up the operation panel.
In actual use, the media base is installed on the machine. For information on how to install the media base, go to Part
3 and refer to "Installing the Media Base."
NOTICE
The operation panel is located at the
upper-right area of the PC-12.
[power] button
Pressing this button turns the power
on or off.
[ready/insert] button
When no data is being received from the host computer (and the [ready]
light is illuminated), pressing this button supplies or feeds media.
Holding down the button for one second or longer feeds the media
continuously, and feed stops when you release the button.
Also, holding down this button and pressing the [power] button within one
second separates media from the roll of material. Hold down the [ready/
insert] and [power] buttons until media feed occurs.
USB interface connector
This is the connector for connecting a USB cable.
Parallel interface connector
This is the connector for connecting a parallel
cable.
Feed unit
This is where you load media for printing.
Power-cord connector
This is the connector for connecting the power
cord.
Insert the power cord firmly, as far as it will go.
Summary of Contents for ColorCamm PC-12
Page 96: ...MEMO 94...
Page 97: ...R1 010808...


