


45
Documentation, Storage and Recall
If the function T is activated, the soft menu key TIME and
the knob enable you to set the duration of the capture of
the measurement values.
6.3.1 Data Format Example for a Logging File
# Device under test;
# Date: 2013-05-27 ;
# Start Time:, 14:27:07;
# Stop Time:, 14:27:11 ;
# Settings: ;
# ADC Rate : Slow;
# AC Filter : ------;
# Input Imp. : 10M;
;
;
DCV[V],ACV[V],Flag;
15.005159, 0.000186 ;
15.005088, 0.000195 ;
15.004896, 0.000200
;
6.3.2 Example Calculation of the Logging Time
The following calculation refers to the logging of DCV va-
lues with a maximum sampling rate of 200Sa/s.
❙The file header includes 374 byte.
❙One logging line includes 26 byte.
❙An empty 4GB USB stick has a capacity of approx.
3.72GB.
In this case you can log 153858348 measurement values
max. If the time interval is set to 5ms, you will log 769291s
= approx. 8 days, 41 minutes, 31 seconds.
6.4 Power Display (Power)
The soft menu key Power activates the power display. The
function Power is only available if the measurement of DC /
AC current is activated. For instance, if you select the func-
tion DC V as the main measurement value (Main) and DC I
as secondary measurement value (2nd Function) (or vice
versa), the power will be shown in the lower display section
after confirming your selection via soft menu key Power.
If the power display is activated, the soft menu key Power
is marked in yellow. To deactivate the power display, press
the soft menu key Power again.
6.5 Measuring AC+DC (True RMS)
You can show the true RMS value (True RMS) below the
main measurement value (Main) on the display via soft
menu key AC+DC. This function is only available if the
measurement of AC voltage or AC current is activated.
Otherwise, the function is grayed out.
7 Documentation,
Storage and
Recall
The multimeter ¸HMC8012 enables users to store all
screenshots and user settings. Instrument settings may be
saved internally. This data can also be stored on a connec-
ted USB stick. Screenshots may only be stored on a USB
stick. You can access the main menu to store and load
functions by pressing the SAVE/RECALL key.
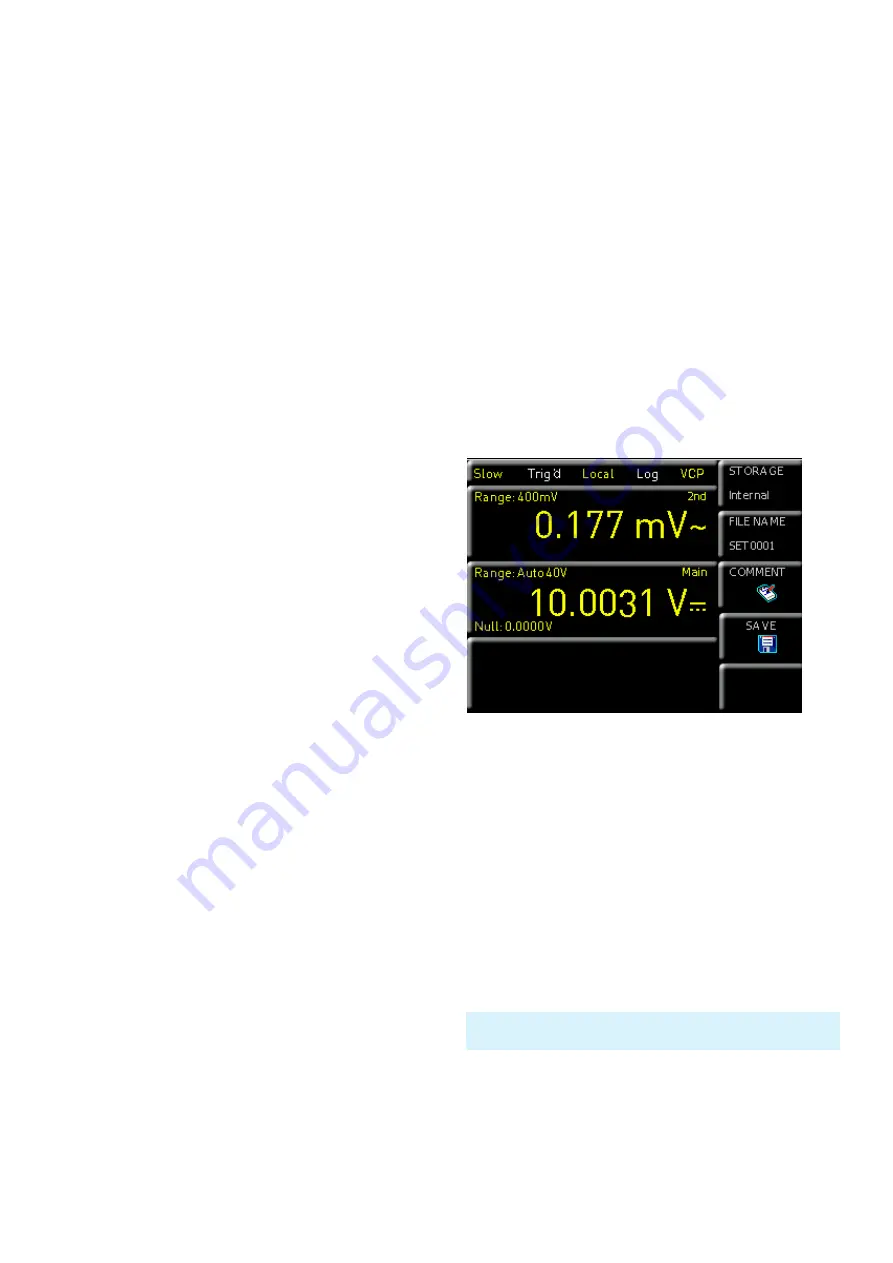
7.1 Instrument Settings
Use the soft menu DEVICE SETTINGS to save current in-
strument settings and to load previously saved settings.
Press the soft menu key SAVE to open the „Save“ menu.
You can use the soft menu key STORAGE to select a pos-
sible location (INTERNAL or FRONT) where you would like
to save the instrument settings. Selecting the respective
storage location and confirming the selection via soft menu
key ACCEPT opens the file system manager. The FILE
NAME can be changed or adjusted to the corresponding
setting (SET is the default label). You can use the soft
menu key COMMENT to enter a comment which will be
displayed in the file manager footer once a file has been
selected. Instrument settings are saved in the HDS format
(binary). The format may not be changed. The option SAVE
allows you to store the settings.
To reload stored preference files, press the respective soft
menu key to open the soft menu LOAD. This open the
file manager where you can use the knob to select the
respective file.
Once the storage location and the respective settings file
has been selected, you can load the file by pressing the
Fig. 7.1: Menu for storing instrument settings
Instrument settings from a previous firmware version cannot be
loaded with a new firmware version.


