5
Getting Started
4.
Transfer pictures from the camcorder to the PC.
1. Place the camcorder’s
POWER
switch in
VCR
and the
DSC/
VIDEO
switch in
DSC.
Make sure a picture stored in
memory appears in the viewfinder
or on the LCD monitor.
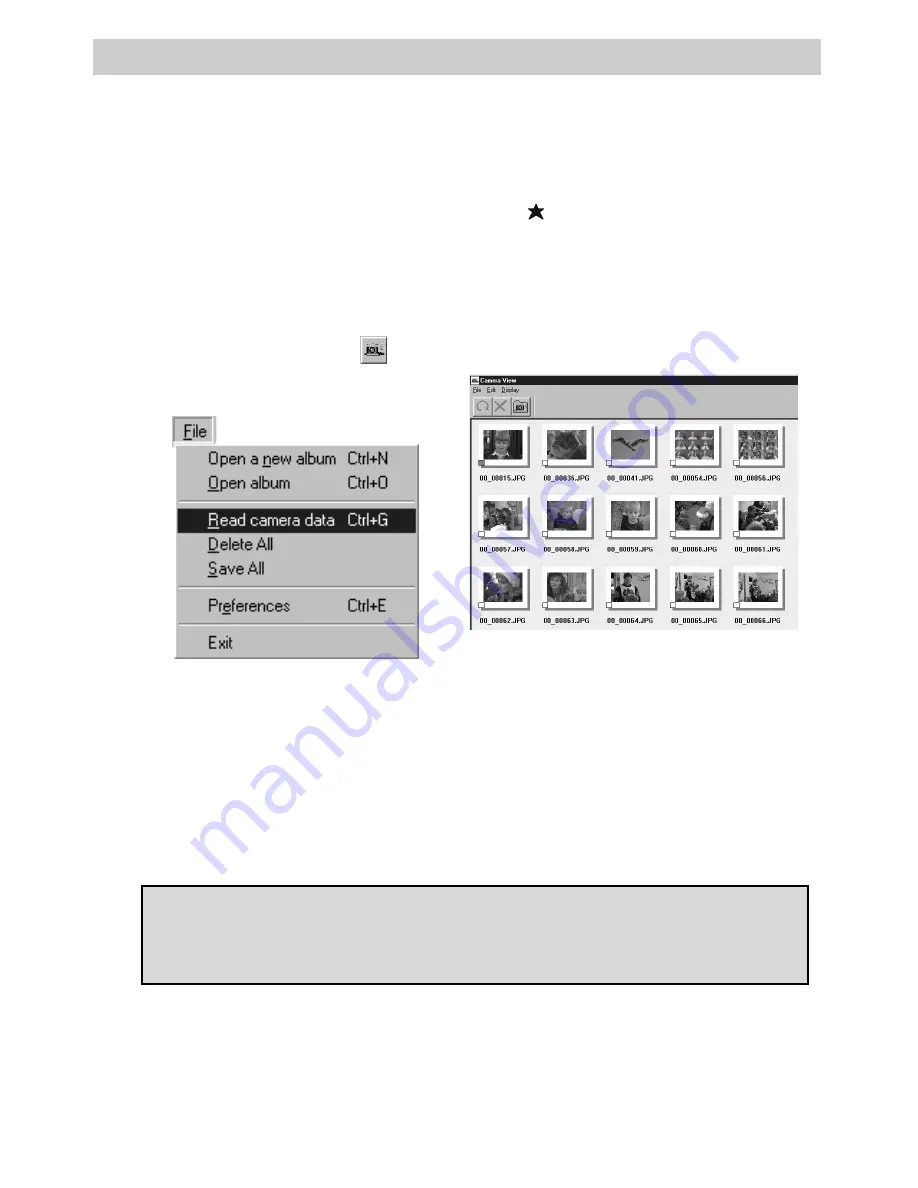
2. Select
File – Read camera data or
click the
camera icon (
) in the
Bookshelf.
Note:
If you get an error message, try
entering a different number for your
COM port in the
Preferences
menu.
If this doesn’t work, consult your
Windows® operating manual.
3. During transfer of pictures from
the camcorder to the PC,
PC
MODE
is displayed on a blue
screen in the viewfinder or on the
LCD monitor of the camcorder.
4. When transfer is complete,
thumbnail images are displayed in
the
Camera View
window.
(Continued on next page)
CAUTION:
Do not turn off the camcorder or disconnect the power source
while the camcorder is transferring the pictures. It may damage the
camcorder’s built-in memory.
Notes:
These images are not automati-
cally stored on the PC’s hard drive.
Transferring the pictures does not
delete them from the camcorder’s
memory.
Summary of Contents for CC6393
Page 105: ...Connection and Software Guide ...
Page 131: ......


