Start Here
RLX-IH
♦
802.11b
Industrial Hotspot
ProSoft Technology, Inc.
Page 11 of 99
April 10, 2007
The PC or laptop must have a wired or wireless Ethernet connection
configured with a static or dynamic IP address.
2 Plug in the power cable and Ethernet cable
(page 12) to the RLX-IH radio,
wait a moment for the radio to power up, and then examine the radio's LED
display to make sure the radio is working properly.
3 Assign a temporary IP address:
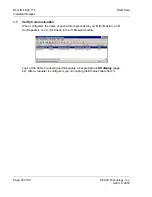
(page 13, page 60) Double-click the radio
listing in the RLX-IH Browser. In the next window, click OK to accept the
temporary IP address, subnet mask, and default gateway.
4
Double-click the radio listing again in the RLX-IH Browser to open the Radio
Configuration / Diagnostic Utility in your web browser. Enter "password"
(lower case, no quotes) in the next window and then click Login.
If necessary, you can enter your own password later. For information, see
Change Password
(page 51).
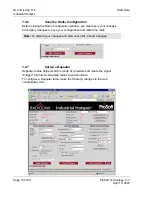
5 Set up the master radio
(page 15) first, using the Radio Settings window in
the Radio Configuration / Diagnostic Utility.
6
Click Apply Changes to save the master radio settings.
To cancel the settings and start over, click the Cancel Changes button before
you click Apply Changes. After they are configured, master radios are
preceded by an "M" in the utility window list.
NOTE:
The text shown in yellow at the bottom of the window indicates the
status of changes you have made to the configuration.
•
If the text shows "Changes not saved", click Apply Changes to save your
settings.
•
If the text shows "Changes not saved; Will disrupt X s", you can click Apply
Changes, however the network will be disrupted temporarily while the
changes are applied. The value of "X" indicates the number of seconds the
network will be offline.
7
Unplug the Ethernet cable from the radio and plug it into the next radio to be
configured.
8 Set Up a Repeater.
(page 18) Return to the RLX-IH Browser. To be sure that
you are seeing the latest status of the radio(s), go to the
toolbar
(page 67)
and click the "Clear" icon (eraser) followed by the "Scan" icon (binoculars).
Double-click the listing of the next radio to be configured, and configure it as a
repeater radio.
9 Save the Radio Configuration.
(page 18) Save the repeater radio settings
by clicking Apply Changes at the bottom of the Radio Settings screen. Repeat
steps 7 through 9 to configure each repeater in the network.
10
After configuring the network and its radios, physically label each radio.
Labeling eliminates confusion about which radios correspond with which radio
configurations in the software. You should identify the radio's name, network
SSID, and IP address, if set.
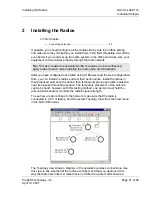
11 Install the radios and antennas
(page 21).
The remainder of the topics in this section describe each of these steps in more
detail.


